PixelGrid Tutorial
PixelGrid Studio is an online pixel editor for creating TC002 graphics on a 52×16-pixel canvas. You can draw in the browser, import an existing image, export a PNG, or publish an artwork to Ulanzi Workshop.
1. Sign in and open the editor
- Open PixelGrid Studio.
- If the sign-in page appears, enter your Ulanzi UGC account credentials and click Log in.
- After signing in, open PixelGrid Studio again to enter the editor.
Sign-in information is used only to access the website. Never enter a password in an artwork name, description, or another public field.
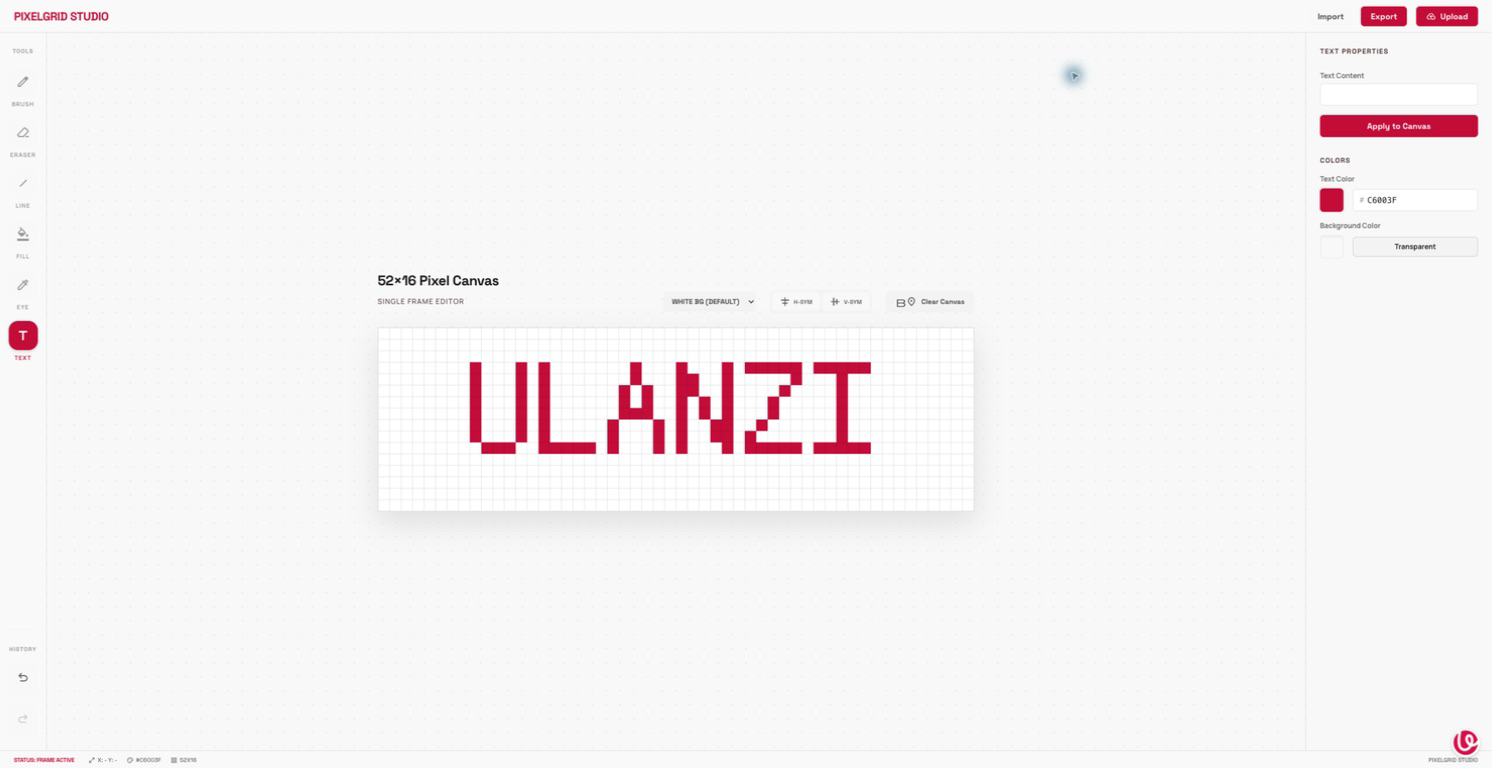
The 52×16-pixel canvas is in the center. Drawing tools are on the left, and settings for the current tool are on the right. Import, Export, and Upload are available in the upper-right corner.
2. Drawing tools
| Tool | UI name | Purpose |
|---|---|---|
| Pencil | Brush | Draw pixels on the canvas and adjust the brush size |
| Eraser | Eraser | Erase pixels from the canvas |
| Straight line | Line | Draw a straight line between two points |
| Paint bucket | Fill | Fill a connected area of the same color with the active color |
| Eyedropper | Eye | Pick an existing color from the canvas |
| Text | Text | Convert text into pixel lettering and place it on the canvas |
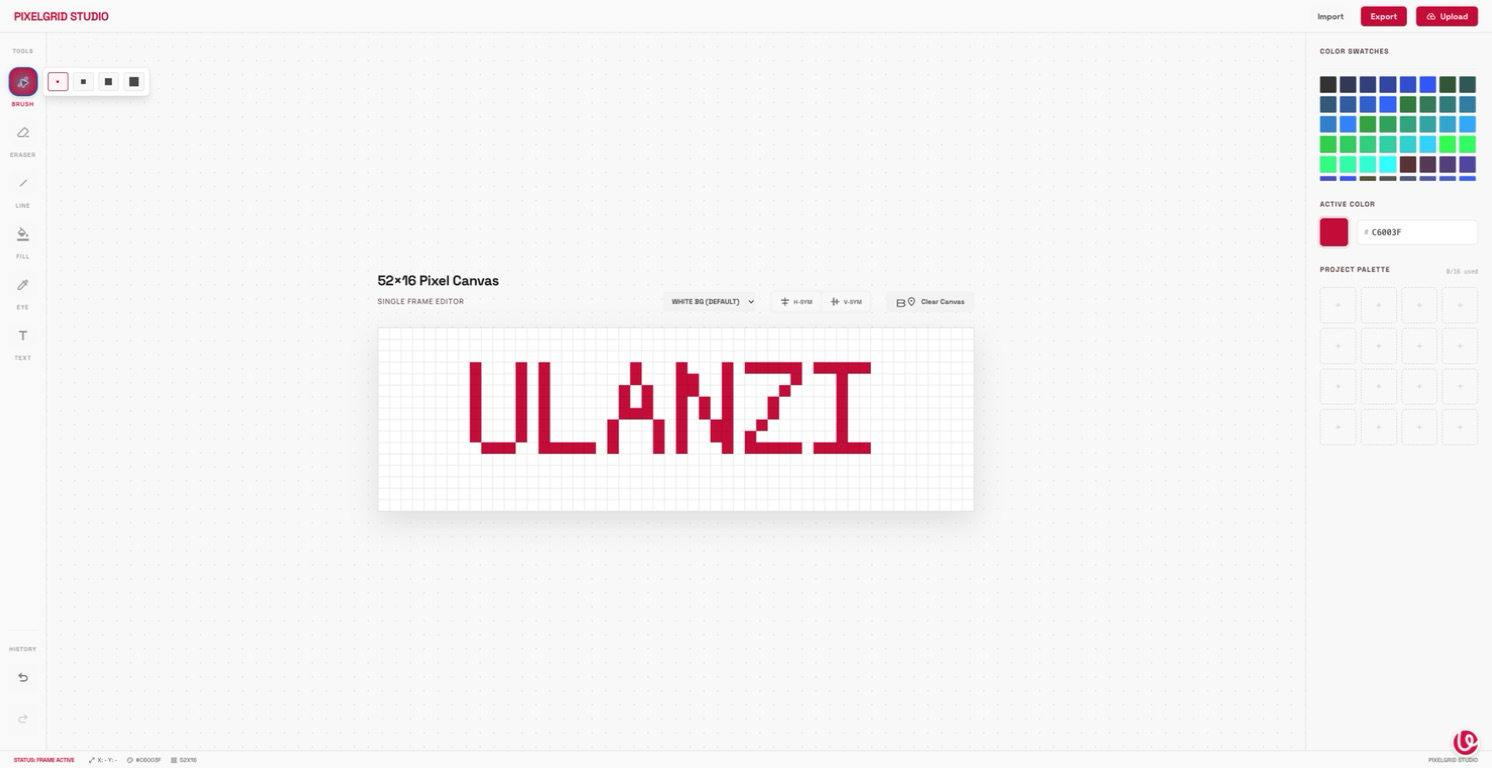
After selecting Brush, Eraser, Line, or Fill, use the controls on the right to set a color:
- Color Swatches selects a preset color.
- Active Color shows the current color. You can also enter a hexadecimal value under HEX Color.
- Project Palette stores up to 16 colors used in the current artwork.
- The small square next to Brush changes the brush size.
3. Canvas controls
The controls above the canvas include:
- White BG (Default) changes the canvas background.
- H-SYM enables horizontal mirror drawing.
- V-SYM enables vertical mirror drawing.
- Clear Canvas clears the current canvas.
- Undo / Redo reverses or restores recent changes.
Choose a background and your common colors before drawing. Mirror drawing can save time when creating symmetrical designs.
4. Add text
- Click Text on the left.
- Enter text under Text Content on the right.
- Set Text Color and Background Color. Select Transparent if the text does not need a background.
- Click Apply to Canvas. The text is converted into pixel lettering and centered on the canvas.
- Switch to Brush or Eraser to adjust individual pixels if necessary.
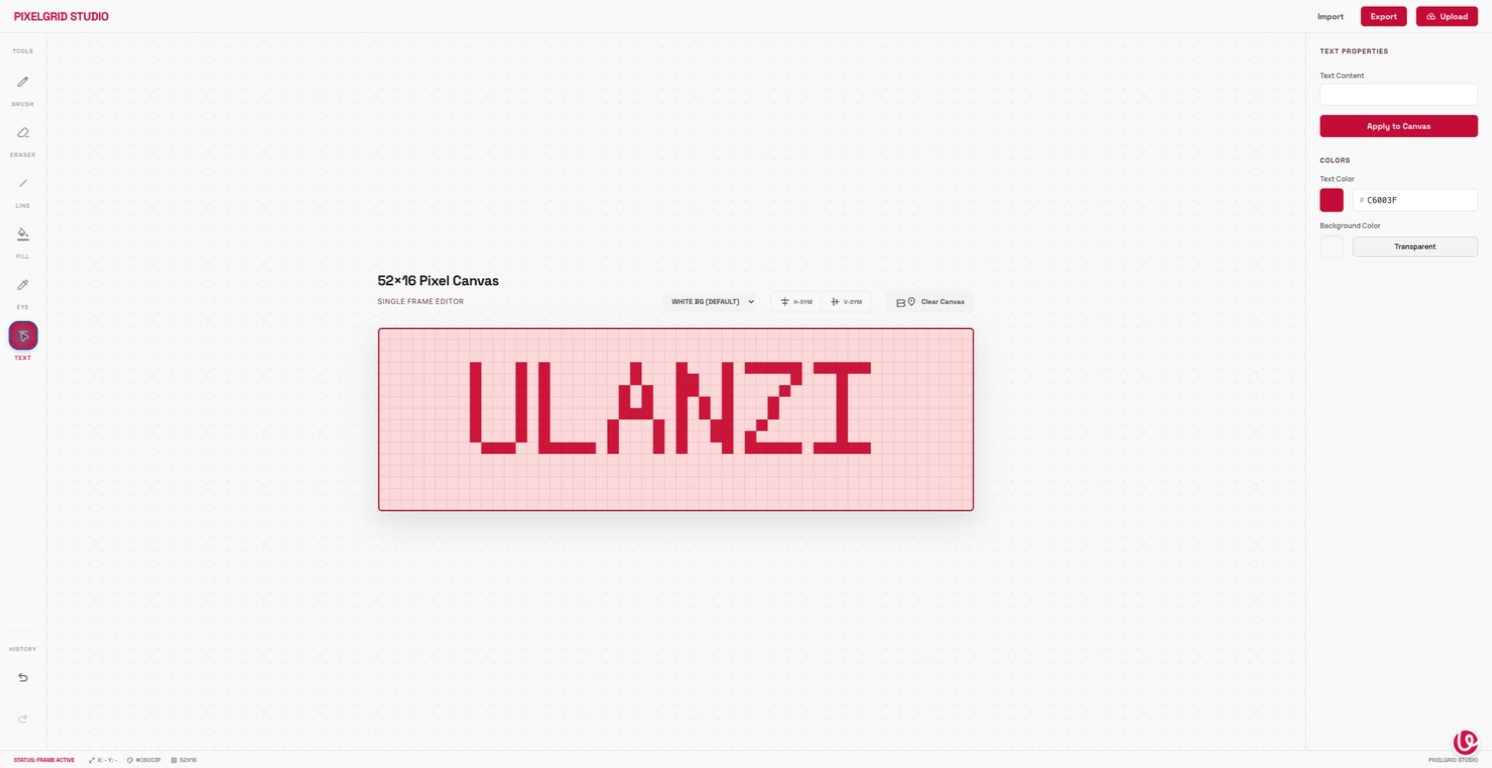
Long text may extend beyond the 52×16 canvas. Shorten the text or adjust the lettering manually with Brush.
5. Import and export
Import an image
Click Import in the upper-right corner and select a local image. The image is placed on the 52×16 canvas, where you can continue editing it.
For a clearer result, use an image close to 52×16 pixels with a distinct silhouette and a limited number of colors.
Export a PNG
Click Export in the upper-right corner to download the canvas as a PNG file.
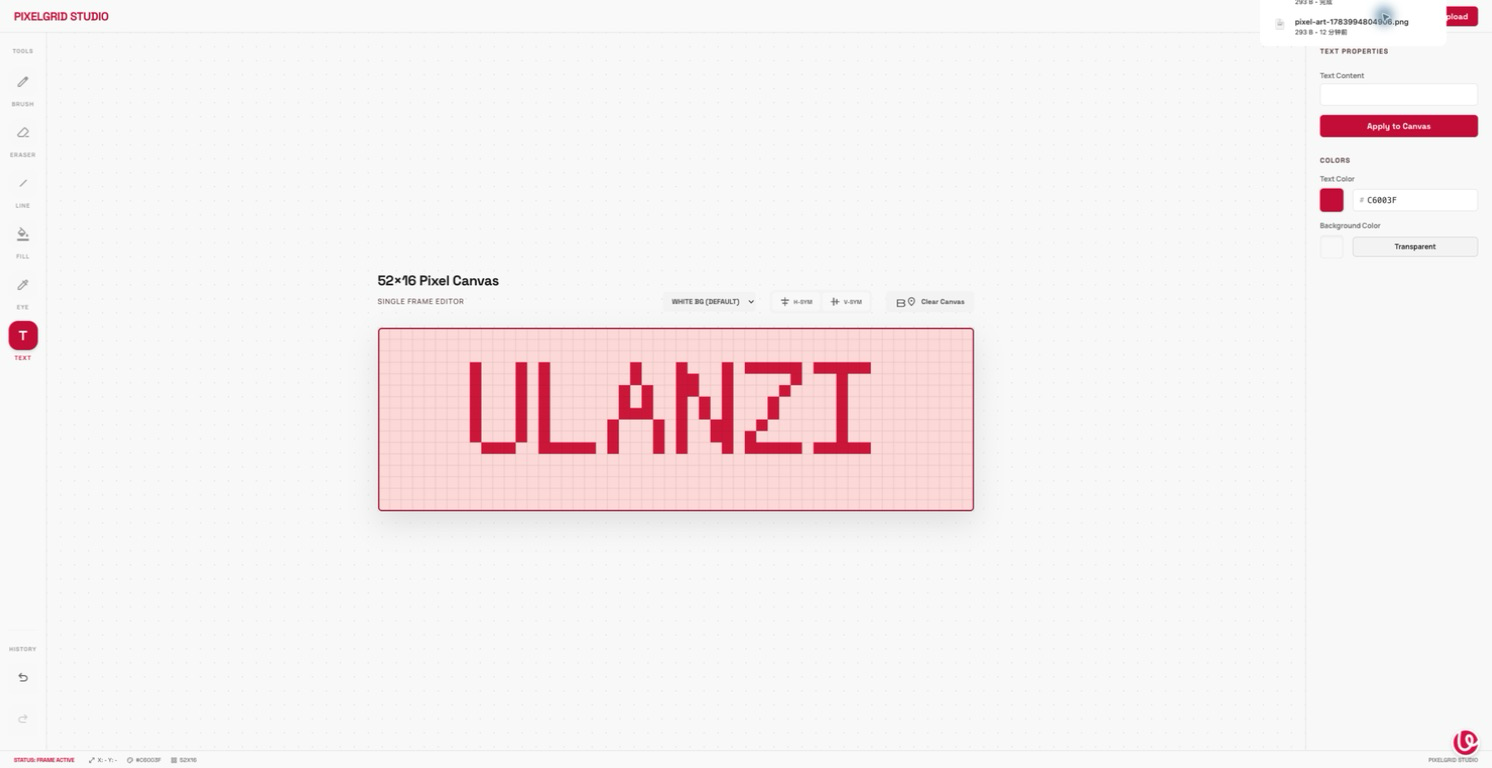
Export a local backup before leaving or refreshing the page. You can import the PNG later to continue editing.
6. Prepare upload assets
When the artwork is complete, click Upload in the upper-right corner. The website prepares temporary publishing assets and opens the Upload works form. The artwork has not been published yet.
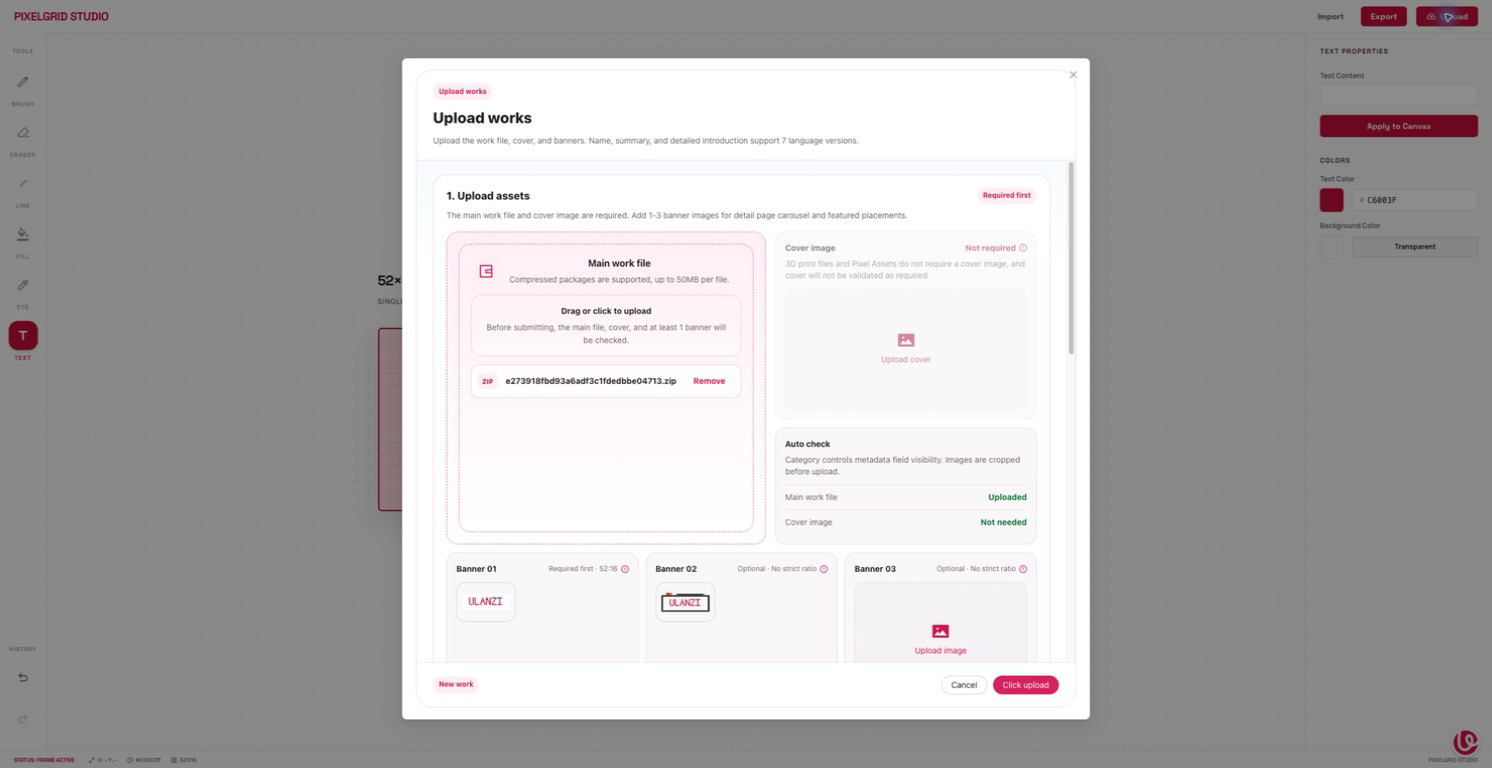
Under 1. Upload assets, check the following:
- Main work file is the archive generated by the website. The maximum file size is 50 MB.
- Cover image is not required for Pixel Assets and displays Not needed.
- Banner 01 is required and uses a 52:16 ratio. It is generated automatically from the canvas.
- Banner 02 / Banner 03 are optional and can appear in the details carousel and recommended placements.
Auto check reports whether the main file, cover, and banners meet the requirements for the selected category. Resolve missing-asset warnings before entering the artwork details.
7. Enter multilingual artwork information
The publishing form supports seven languages: Chinese, English, German, Japanese, Korean, Portuguese, and Spanish. Select a language tab to edit that version.
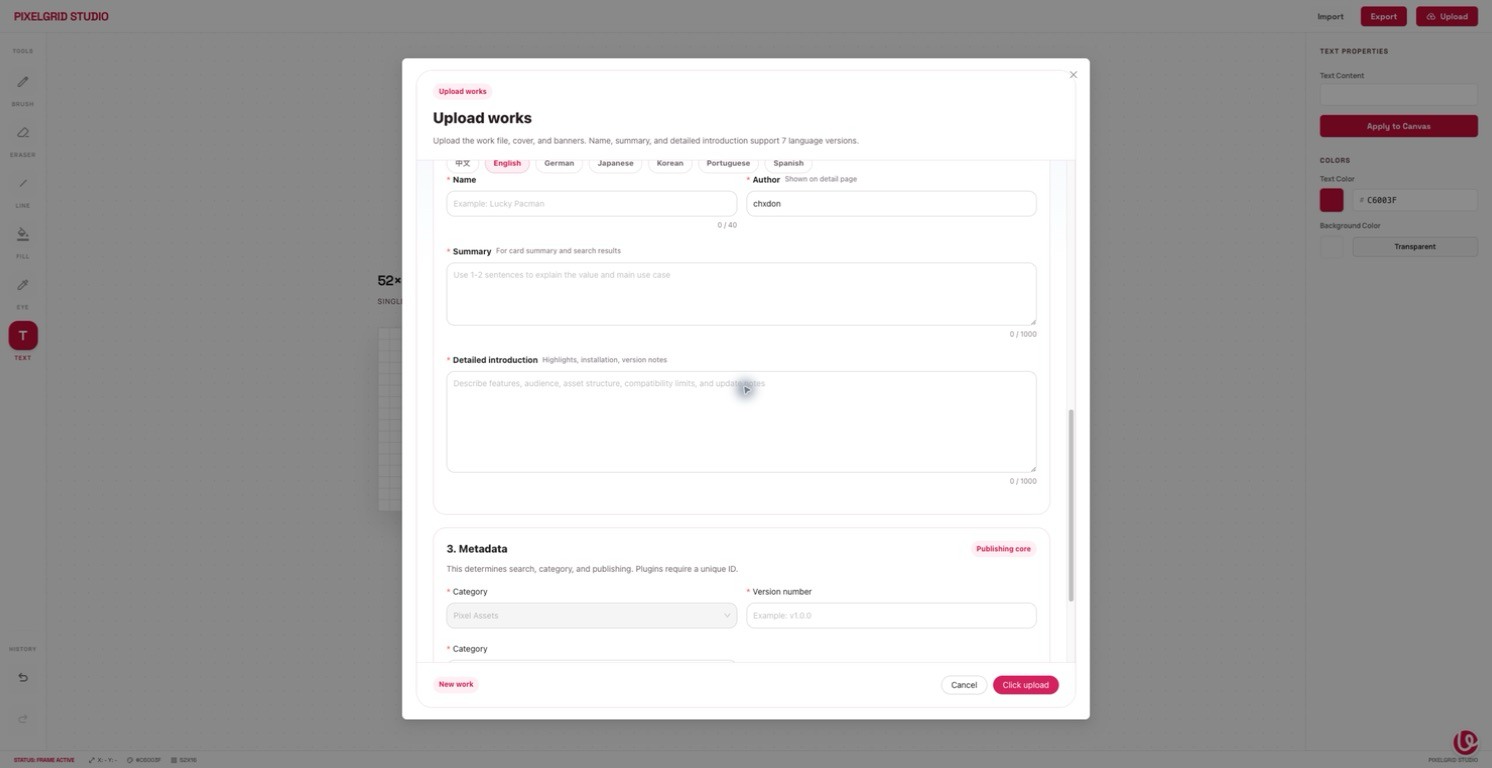
Each language version contains:
| Field | Content |
|---|---|
| Name | Artwork name, up to 40 characters |
| Author | Author or team name shown on the details page |
| Summary | One or two sentences describing the artwork and its key features |
| Detailed introduction | Detailed content, use cases, compatibility limits, and update notes |
You can complete English first, switch to another language, and use Copy English to current. Review and edit the copied text before publishing.
8. Enter metadata
Complete the publishing information under 3. Metadata.
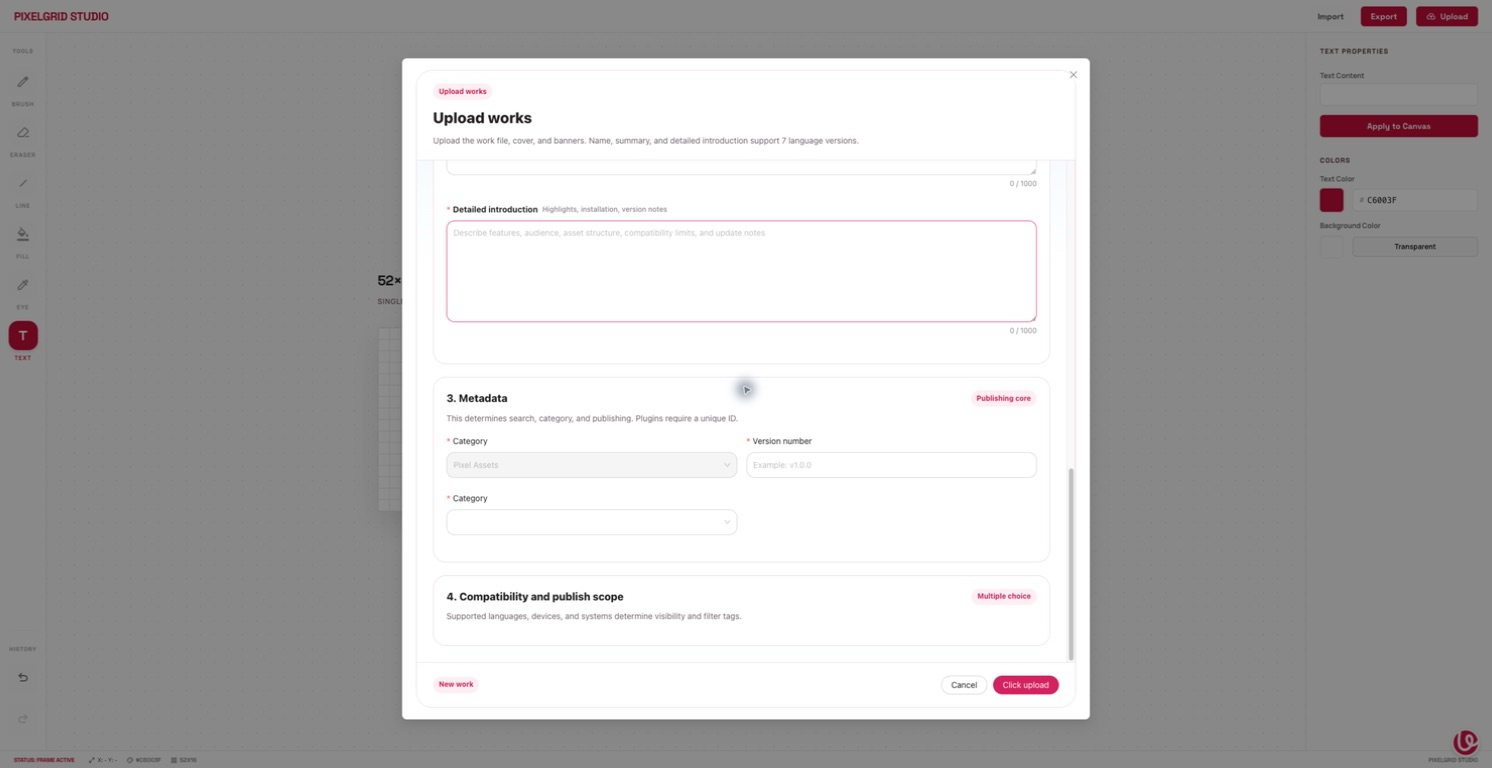
- The first Category is fixed to Pixel Assets.
- Enter a version under Version number, such as
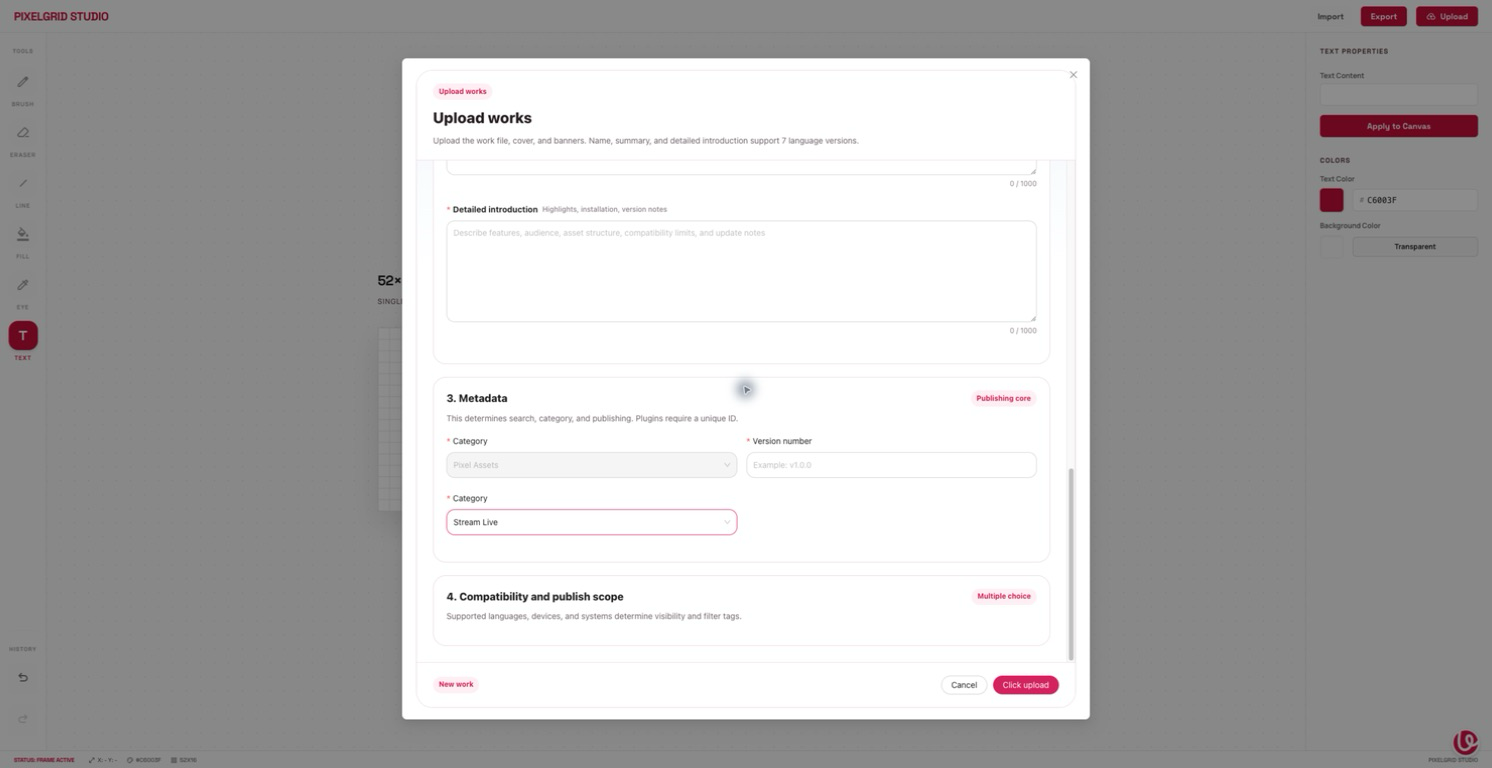
v1.0.0. - For the second Category, choose a theme such as Creative, Lighting, Office, Tools, Text, Landscape, AIGC, Emoji, or Animal.
The category affects search, filtering, and some asset checks. Select the category that best matches the artwork.
9. Compatibility and publishing
Under 4. Compatibility and publish scope, select the languages, devices, and systems supported by the artwork. These settings determine who can find the artwork and are used as filter tags. Select only combinations you have verified.
Before submitting, confirm that:
- The main file and required banner pass validation.
- The artwork name, author, summary, and detailed introduction are complete.
- No language version contains credentials or internal notes.
- The version, theme category, and compatibility scope are correct.
- A PNG backup has been saved locally.
When everything is ready, click Click upload in the lower-right corner. This submits the artwork for review or publication, after which it may become visible to other users.
If you are only testing the editor, click Cancel or close the window. Do not click Click upload.