Beginner's Guide to Calendar on TC002
The Calendar feature in Ulanzi Studio syncs today's schedule to TC002, turning the device into a desktop reminder and information display.
This guide explains how to connect TC002, enable Calendar, configure a supported service, display events, and troubleshoot errors.
Supported services: Feishu, DingTalk, WeCom, Google Calendar, iCloud Calendar, and Outlook.
Before you begin
- Install and open Ulanzi Studio.
- Connect TC002 in Ulanzi Studio.
- Check that the network is working.
- Make sure you can sign in to the calendar service.
Basic setup
- Complete the TC002 Wi-Fi setup in Ulanzi Studio.
- Open the TC002 app settings page.
- Find Calendar and select a service.
- Follow the guide to authorize the account or add a calendar subscription.
- Save the settings. TC002 downloads and displays today's events.
Open Calendar
Find Calendar in the list on the right and click it.
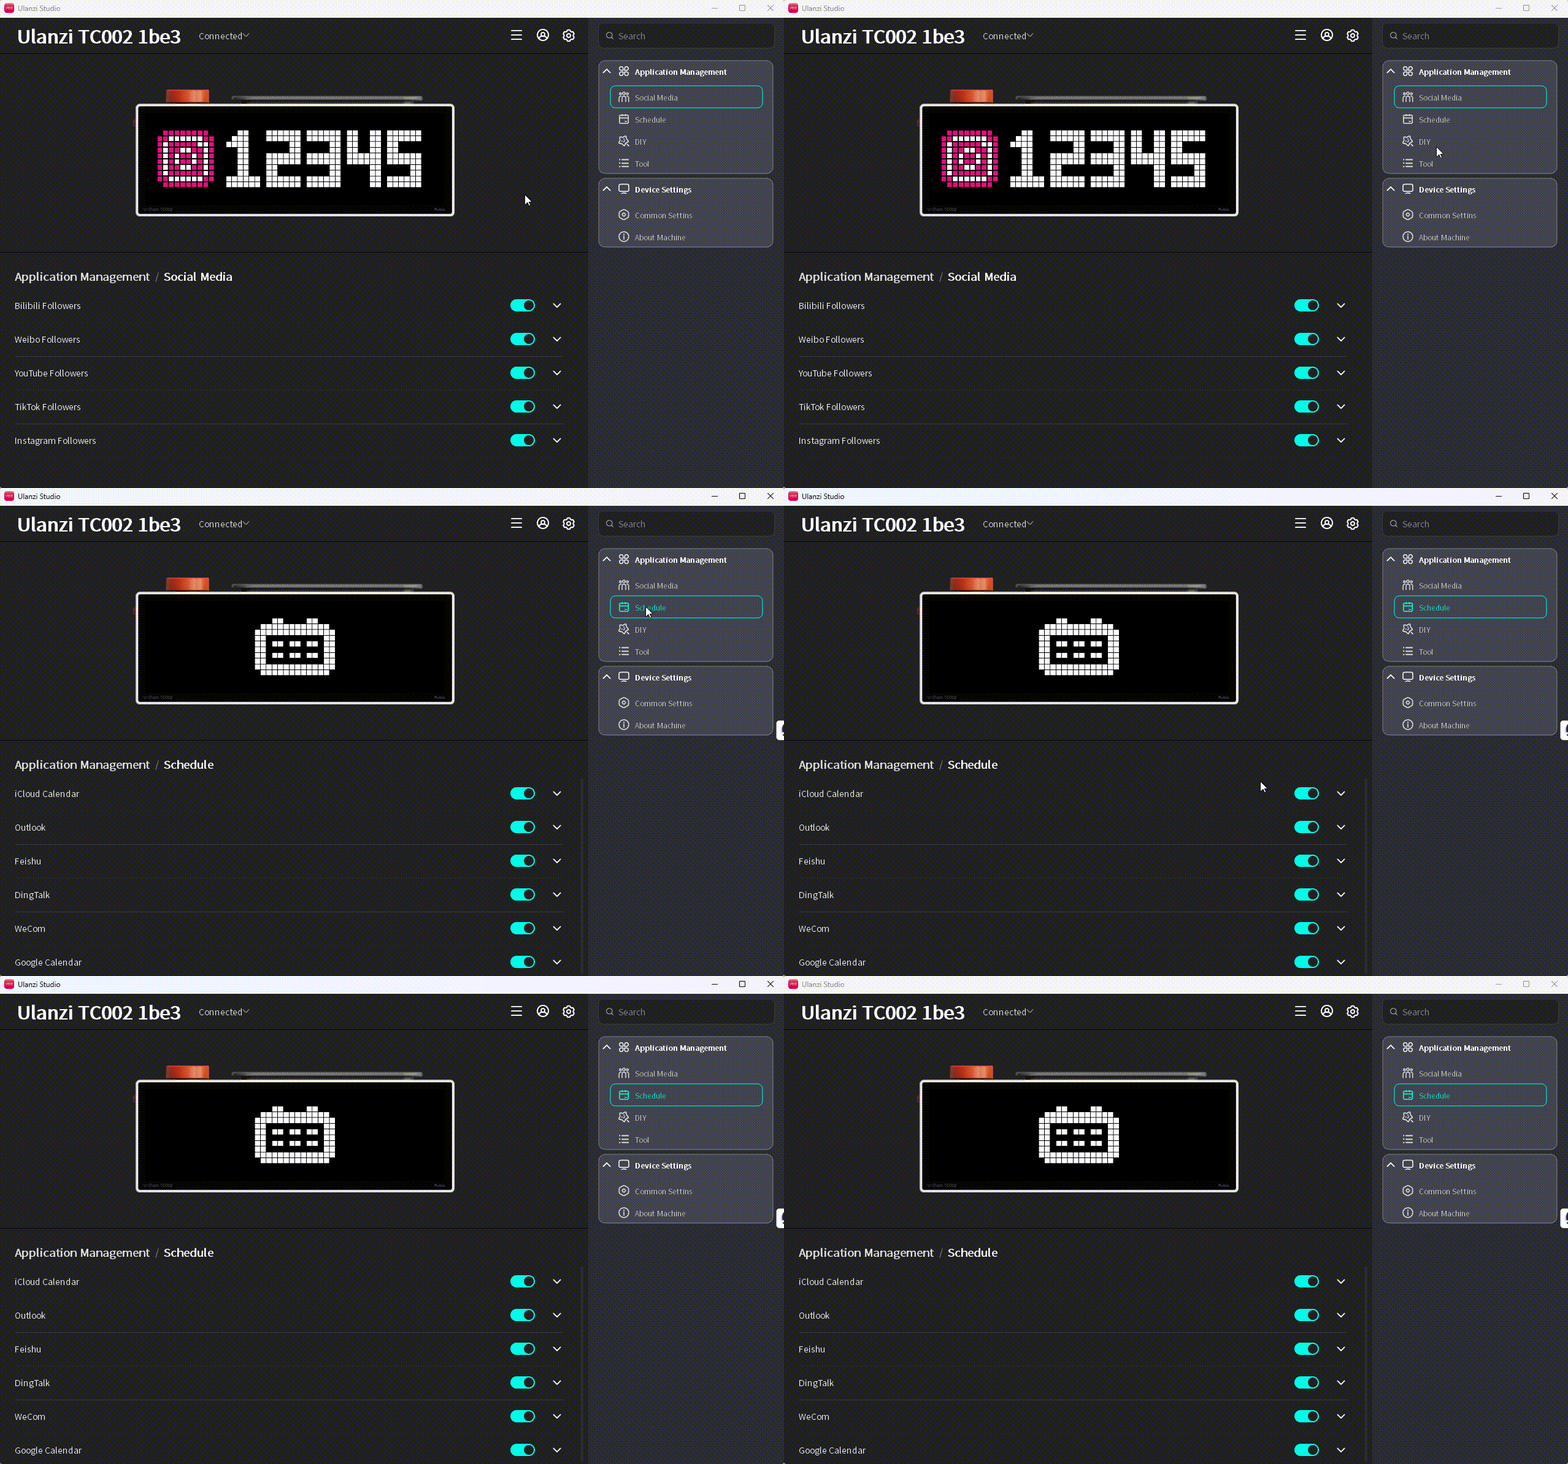
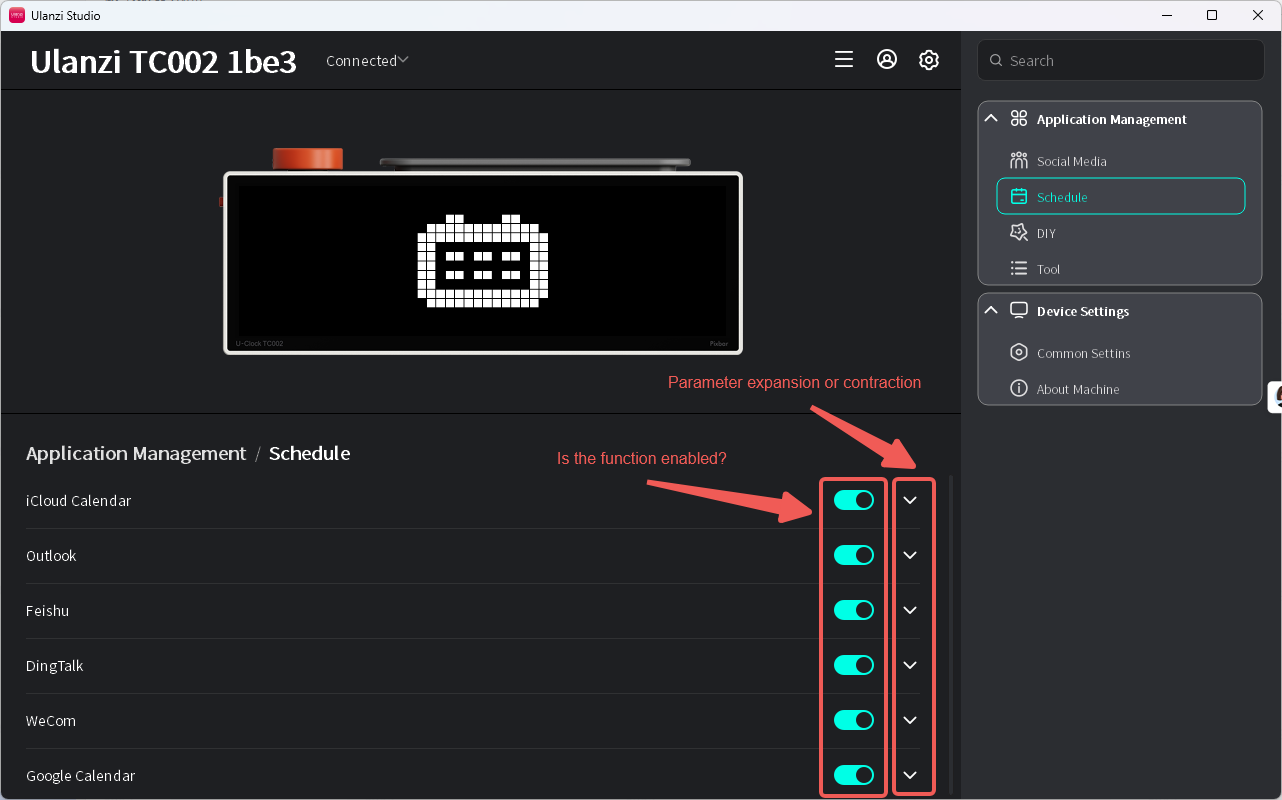
- The enable switch is on by default. When enabled, TC002 displays events or an error for the selected calendar. When disabled, TC002 skips the app during app switching.
- The parameter control is collapsed by default and is hidden when an app has no additional settings.
Feishu
Required fields:
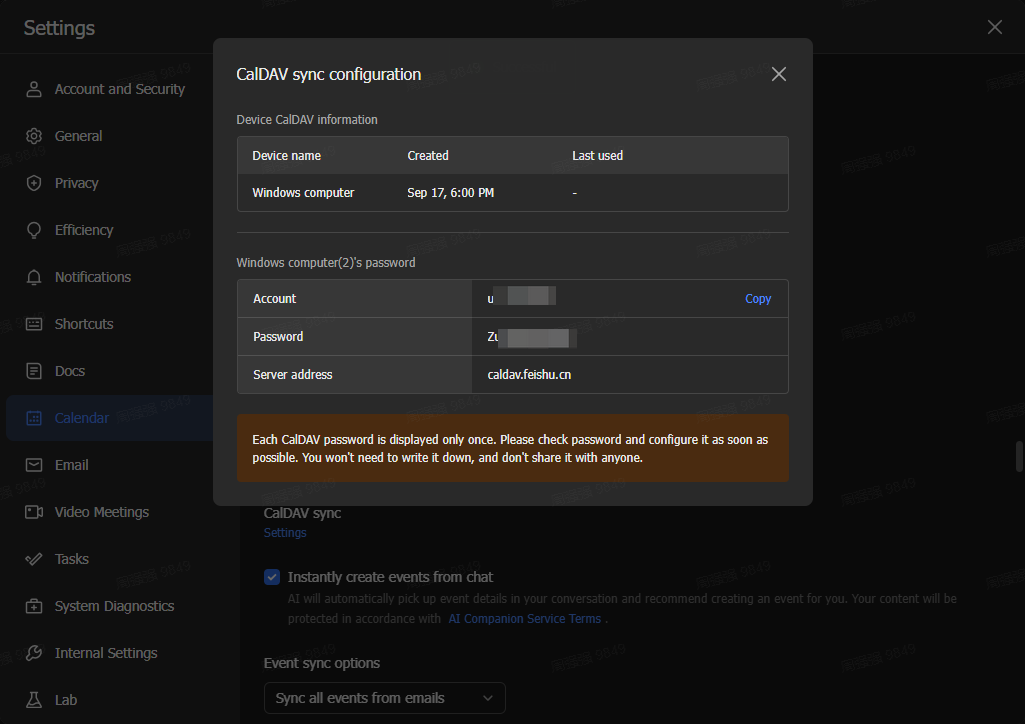
- Username: the CalDAV username generated by Feishu.
- Password: the CalDAV password generated by Feishu.
- Server: the CalDAV server generated by Feishu.
- How to Get Account Information: opens the CalDAV setup guide.
- Expand the settings.
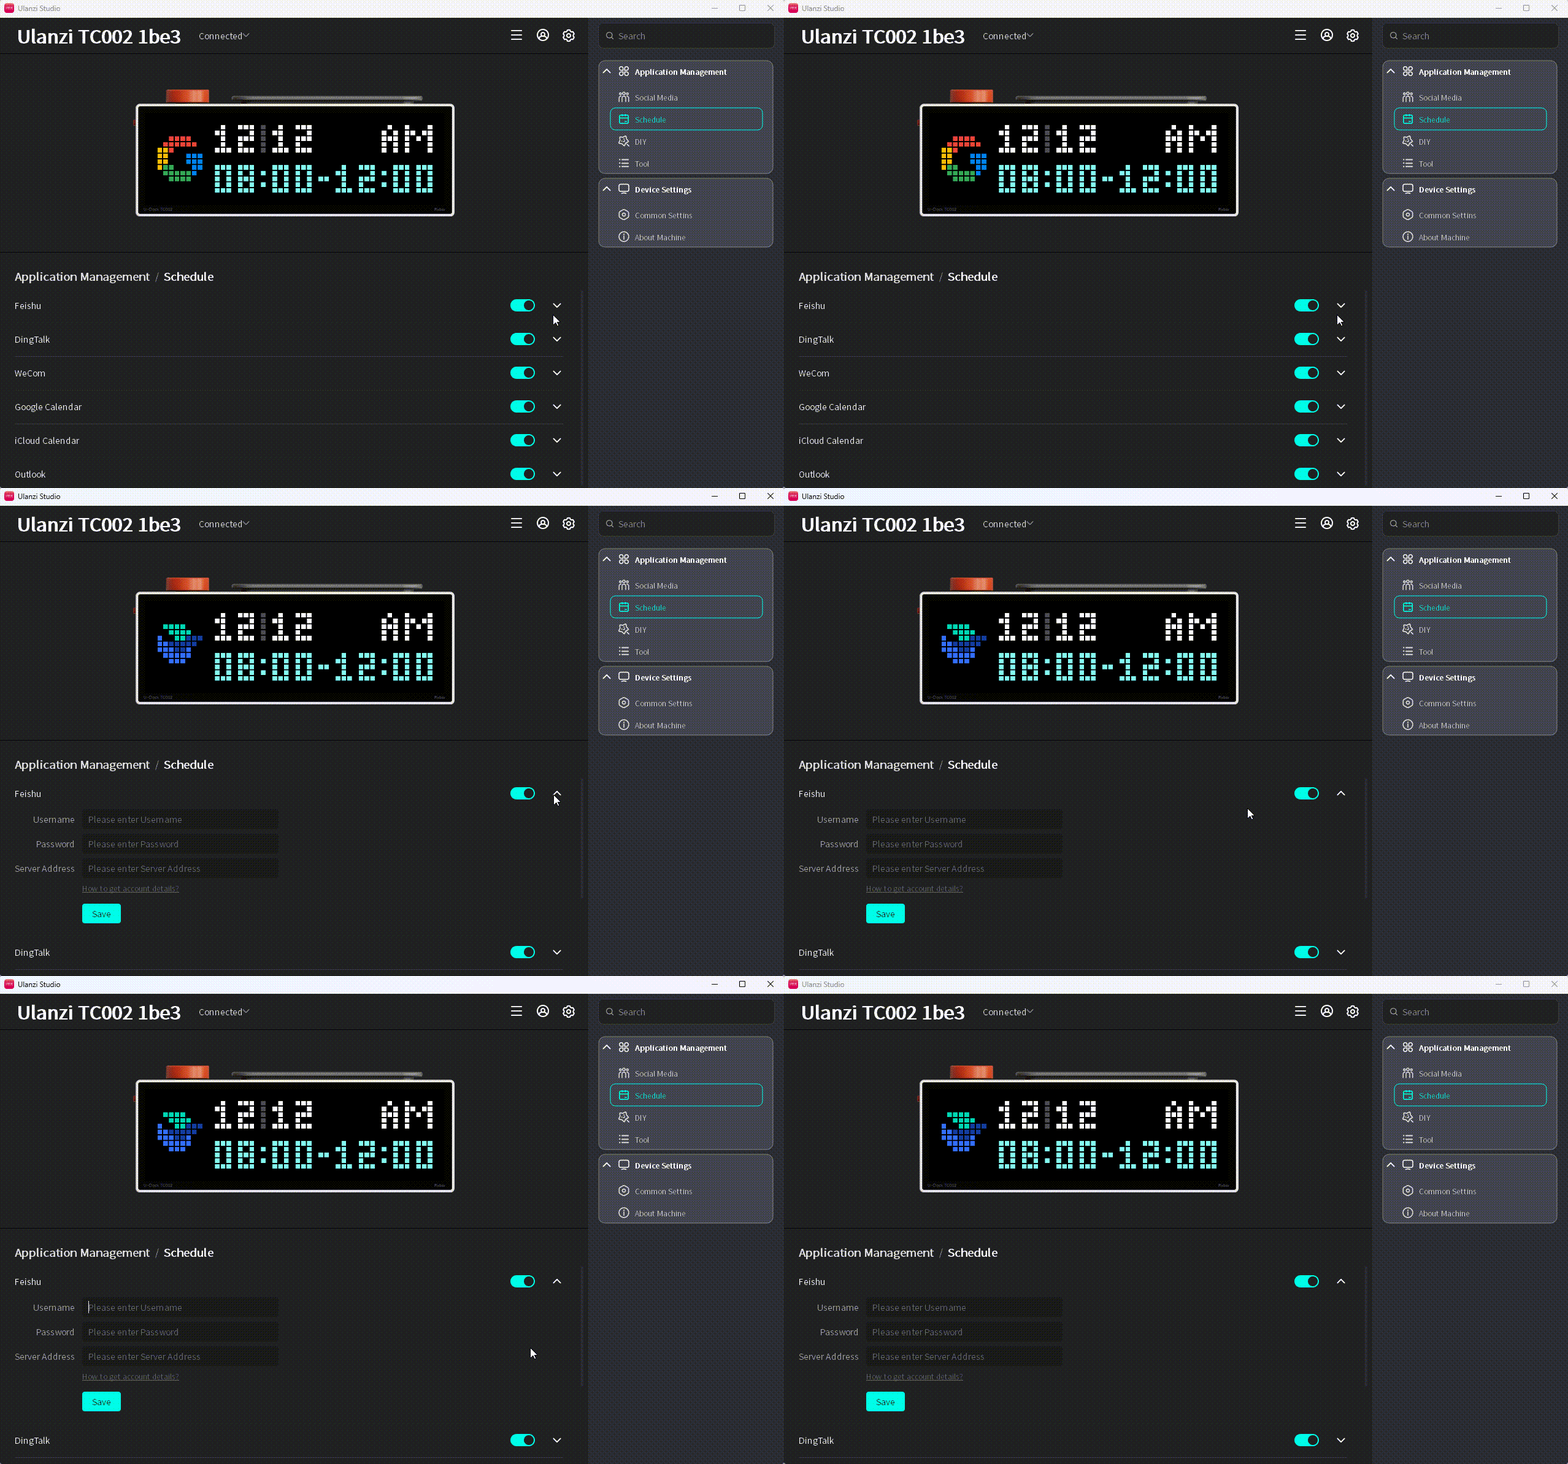
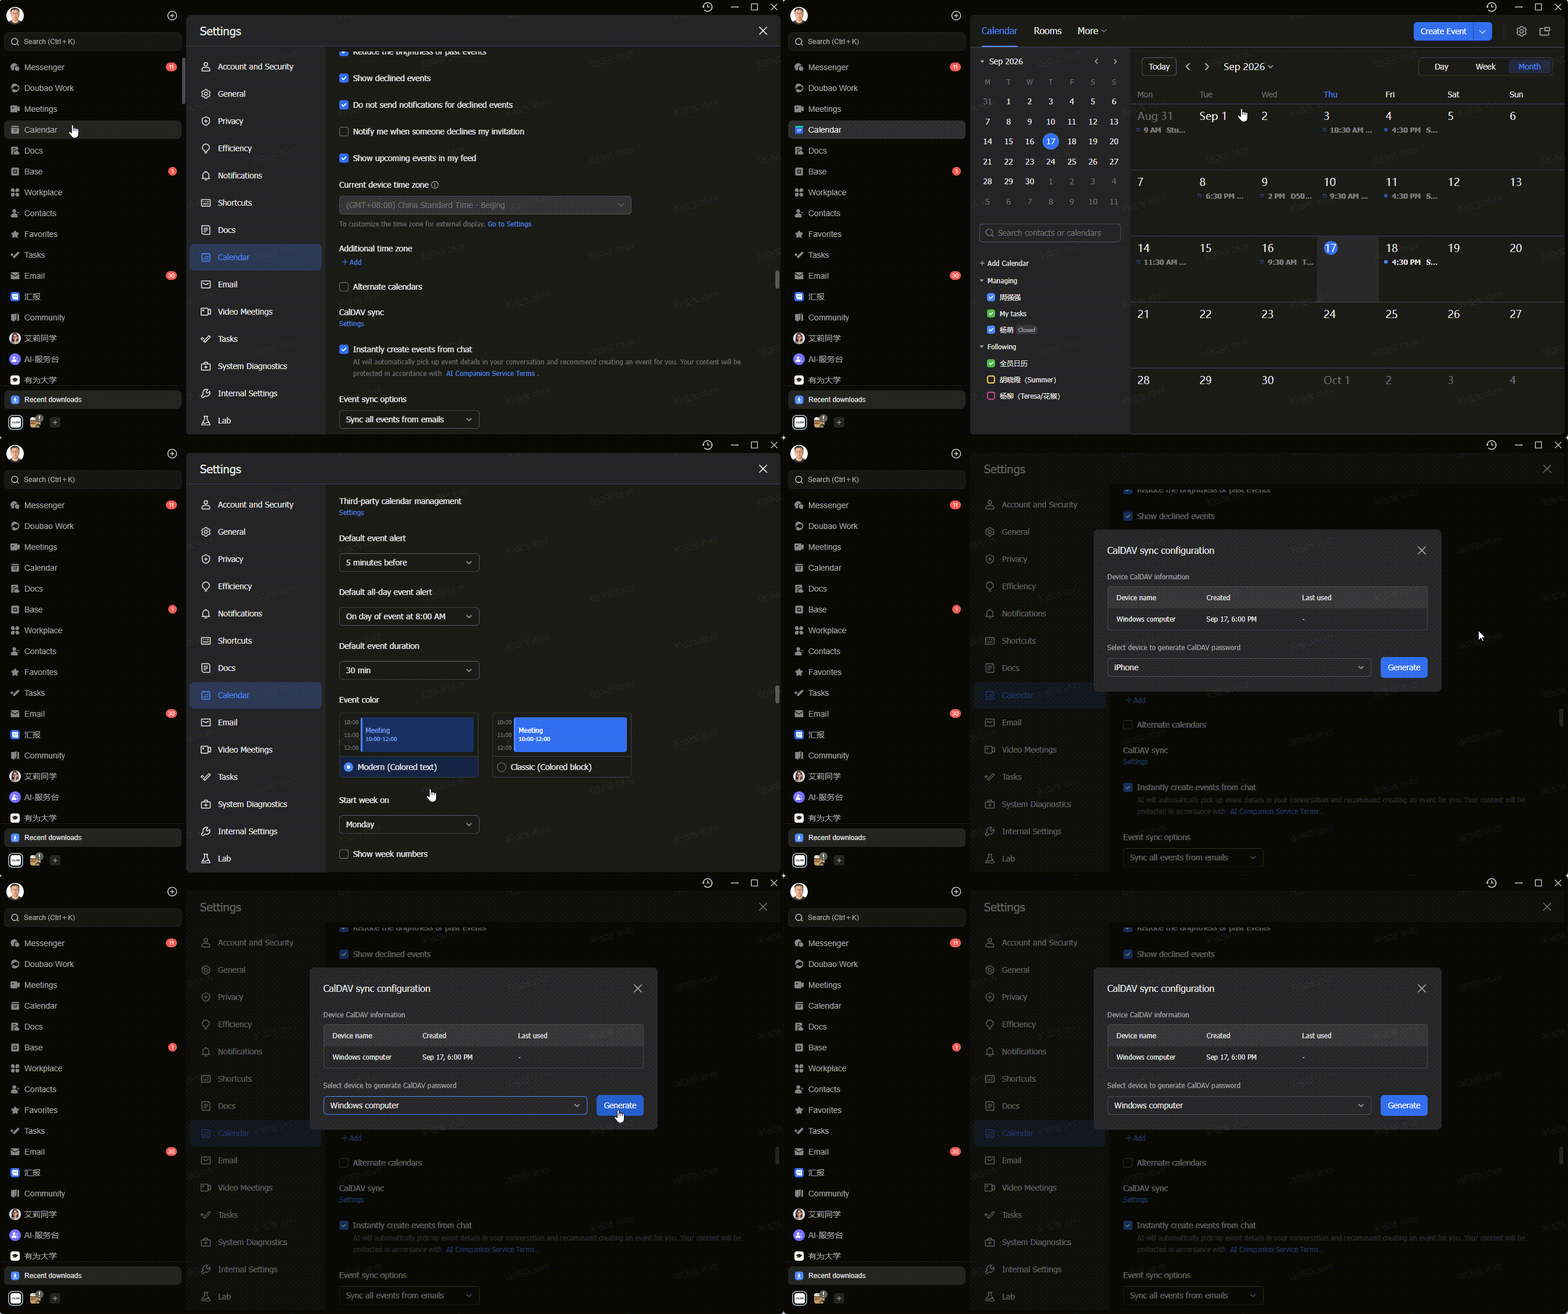
- Click How to Get Account Information? and select the Feishu CalDAV guide.
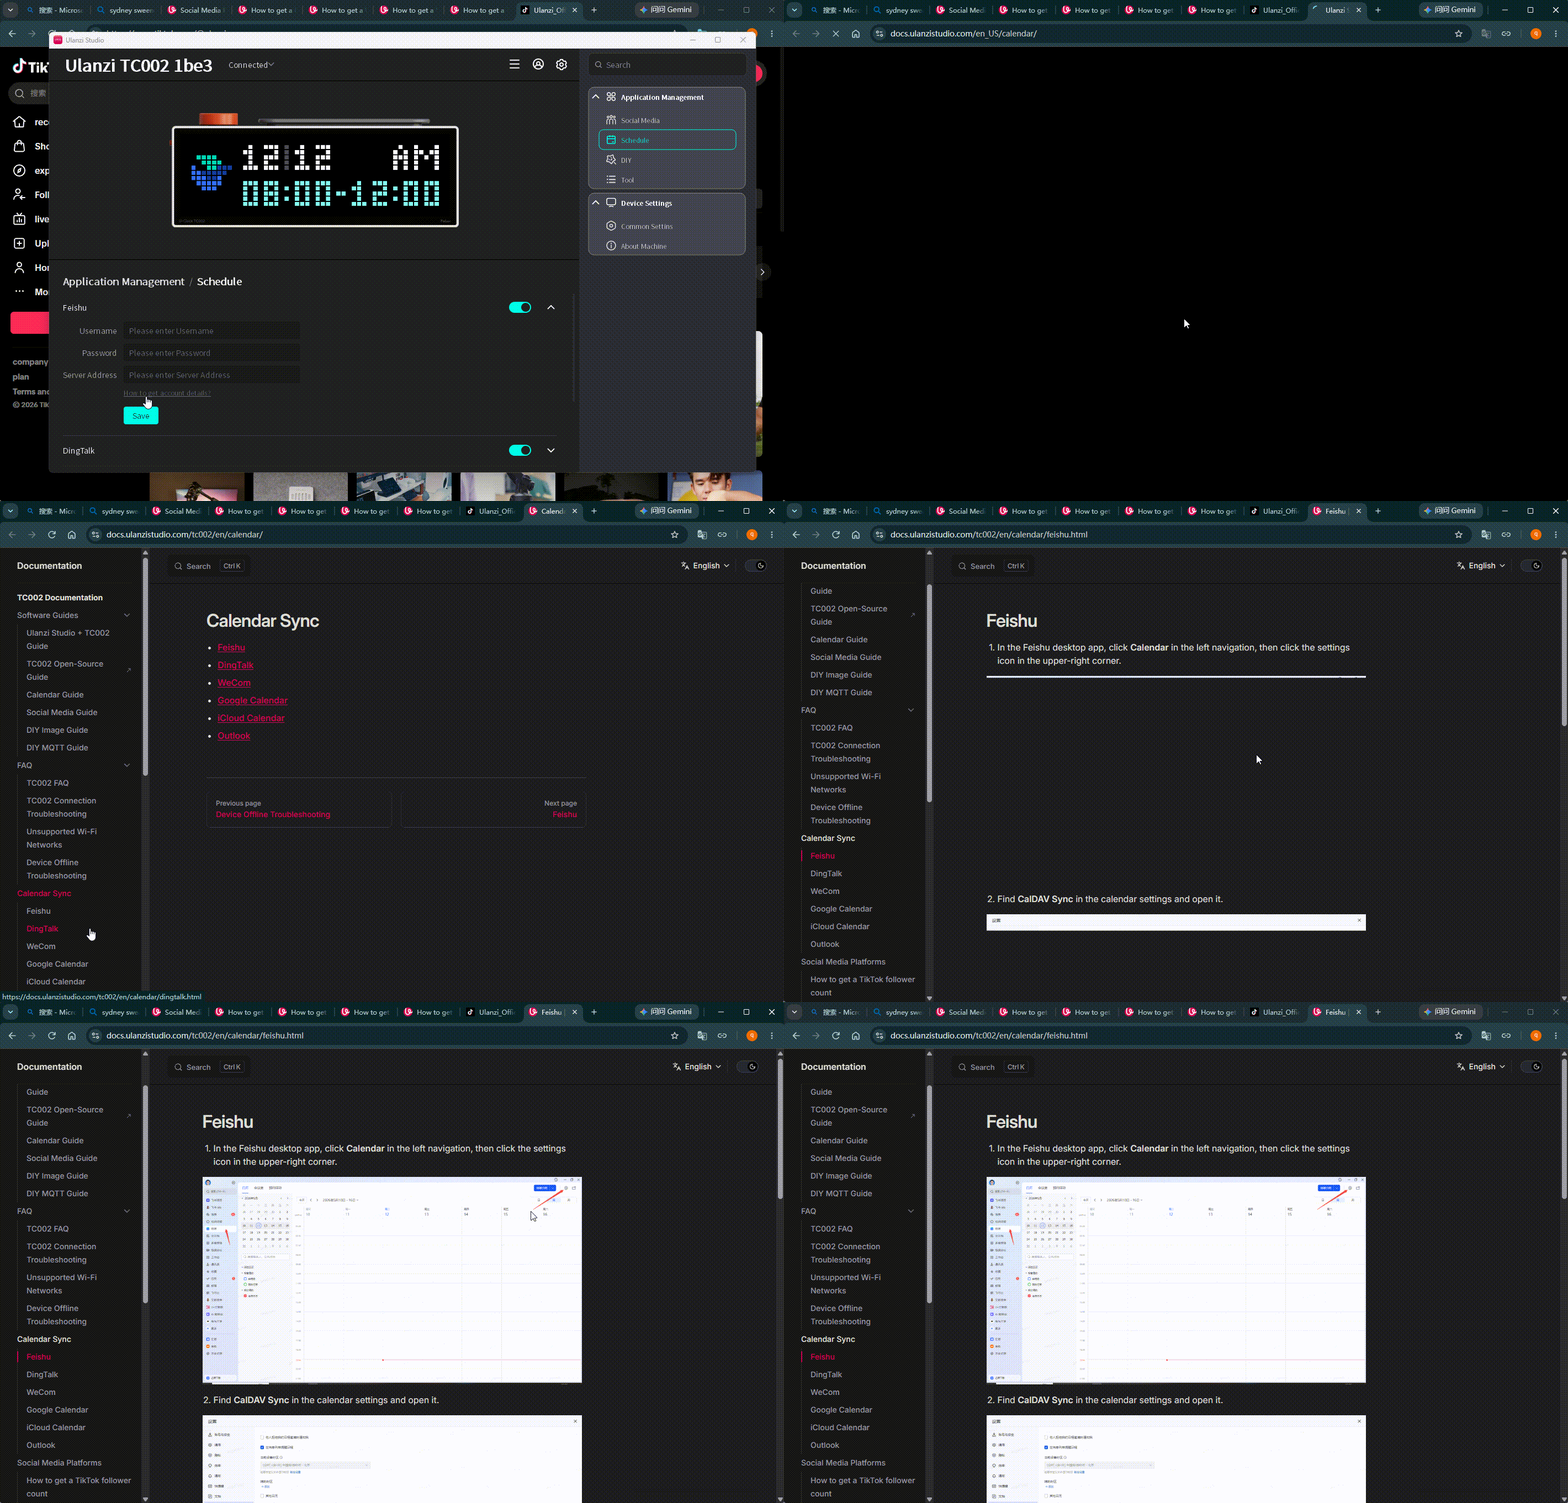
- Get the credentials by following the guide and enter them in the fields.
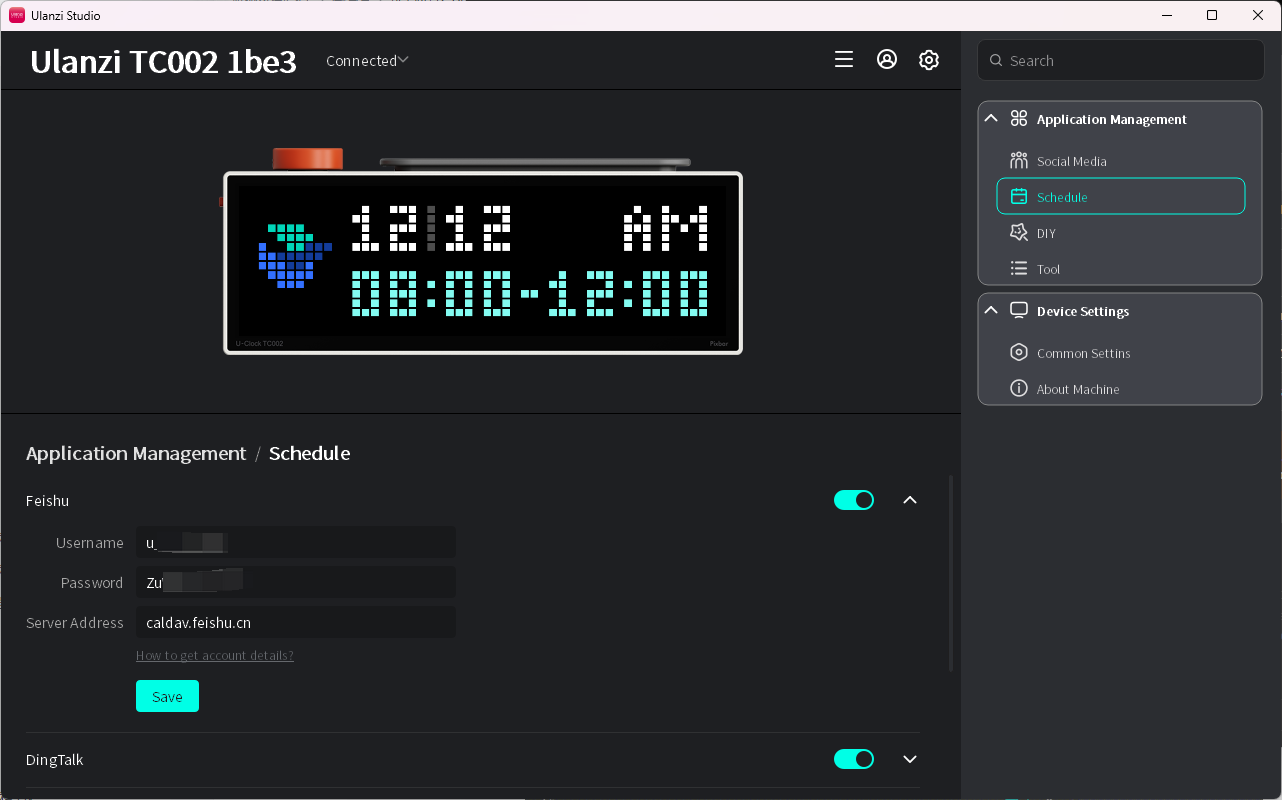
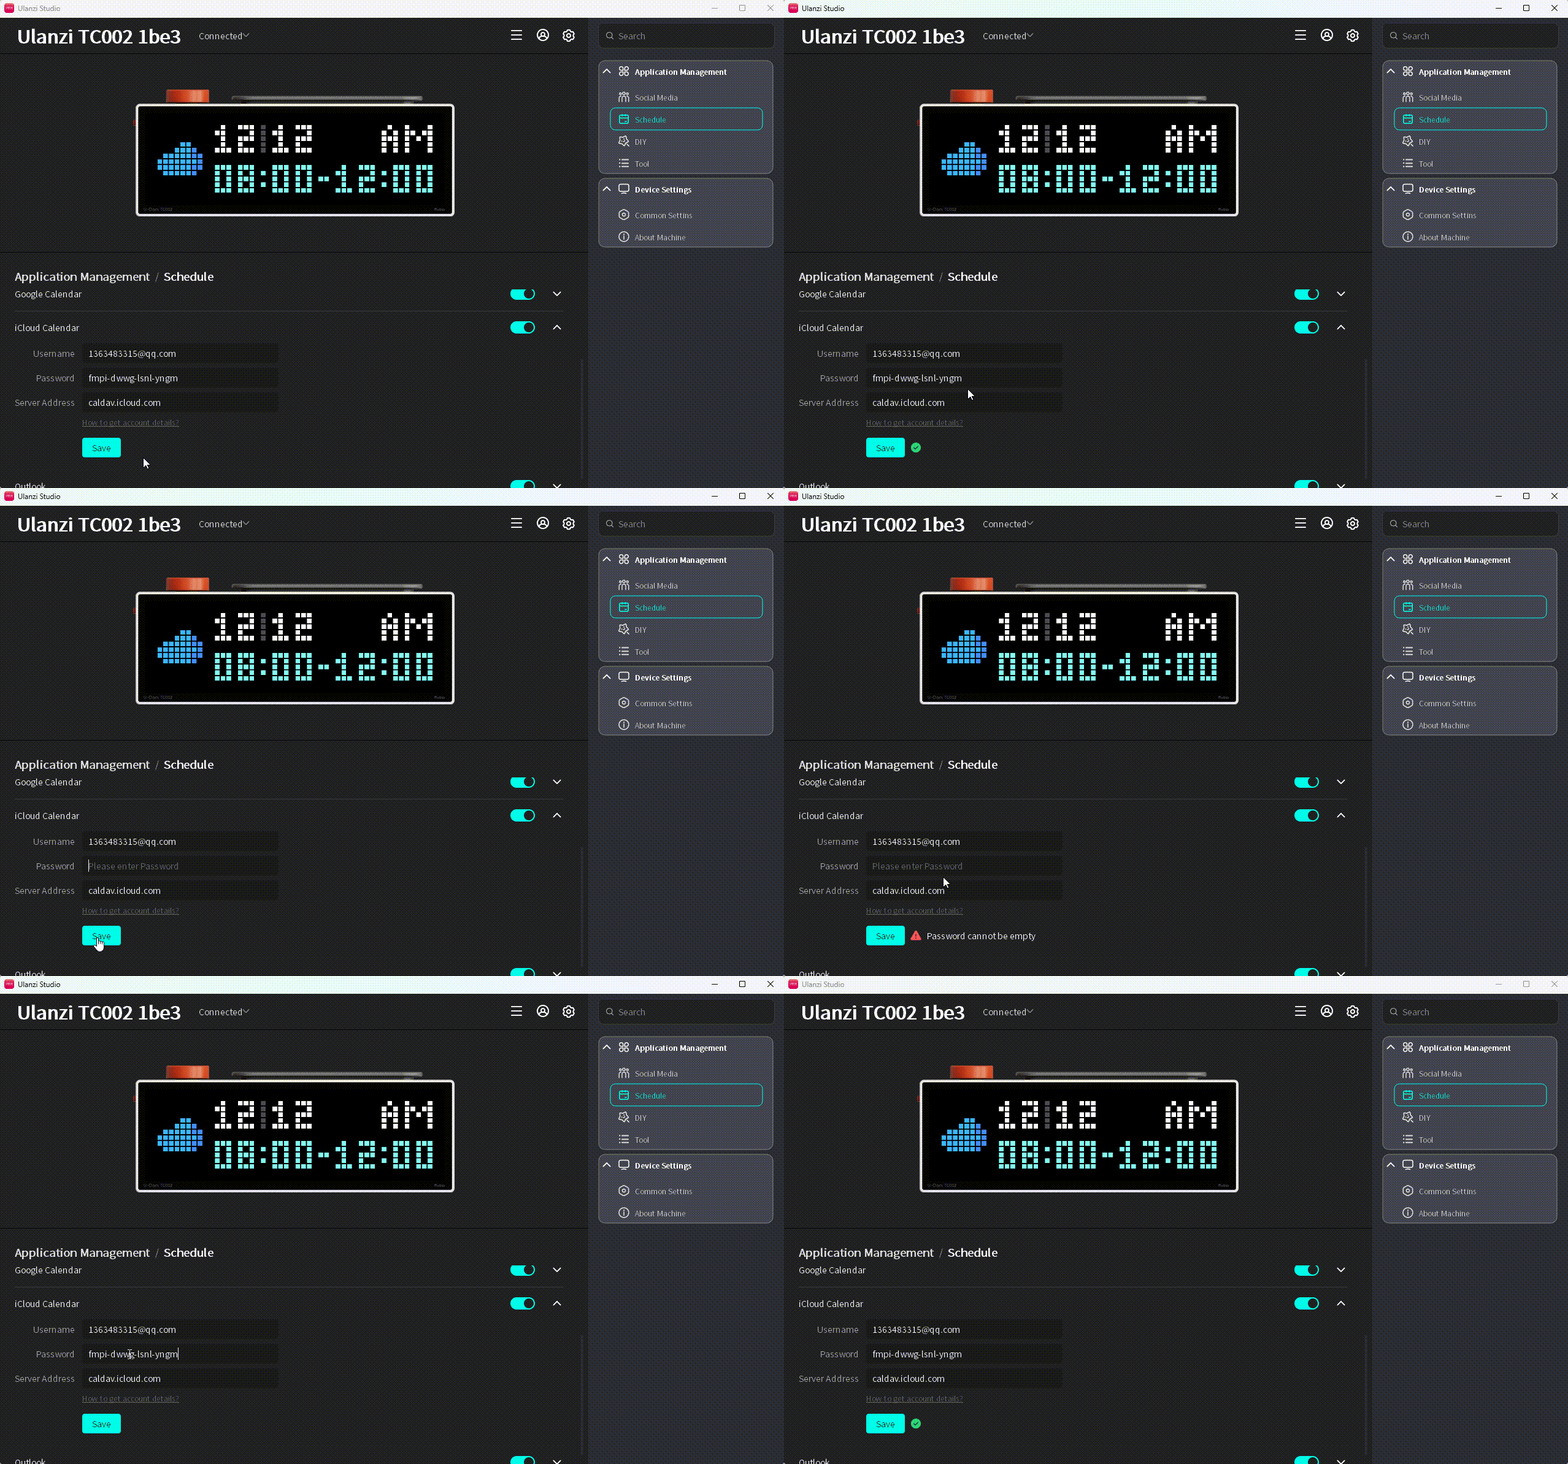
- Click Save. A check mark indicates success; an exclamation mark and message describe an error.
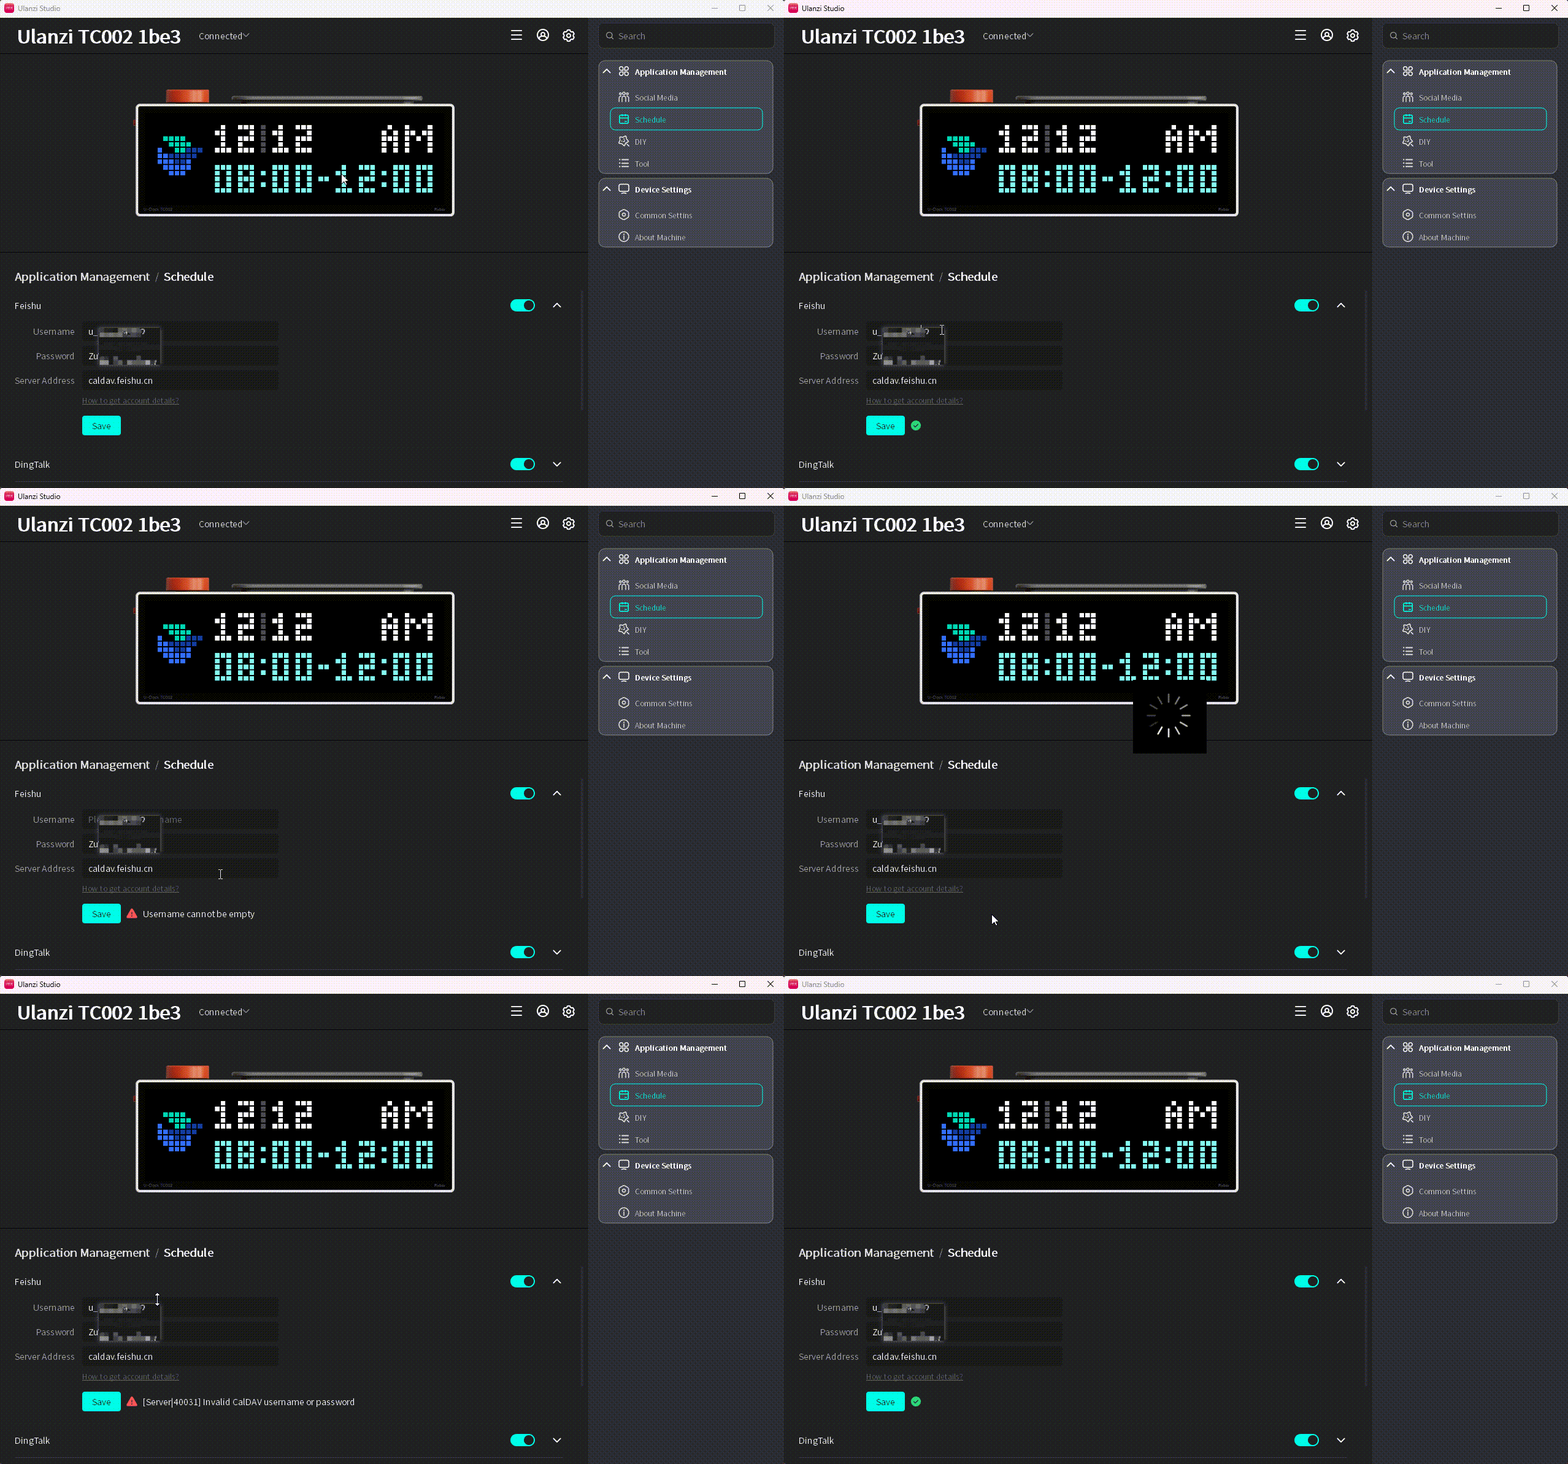
- Switch TC002 to Calendar > Feishu to view today's events.

DingTalk
The required username, password, and server are CalDAV credentials generated by DingTalk.
- Expand the settings.
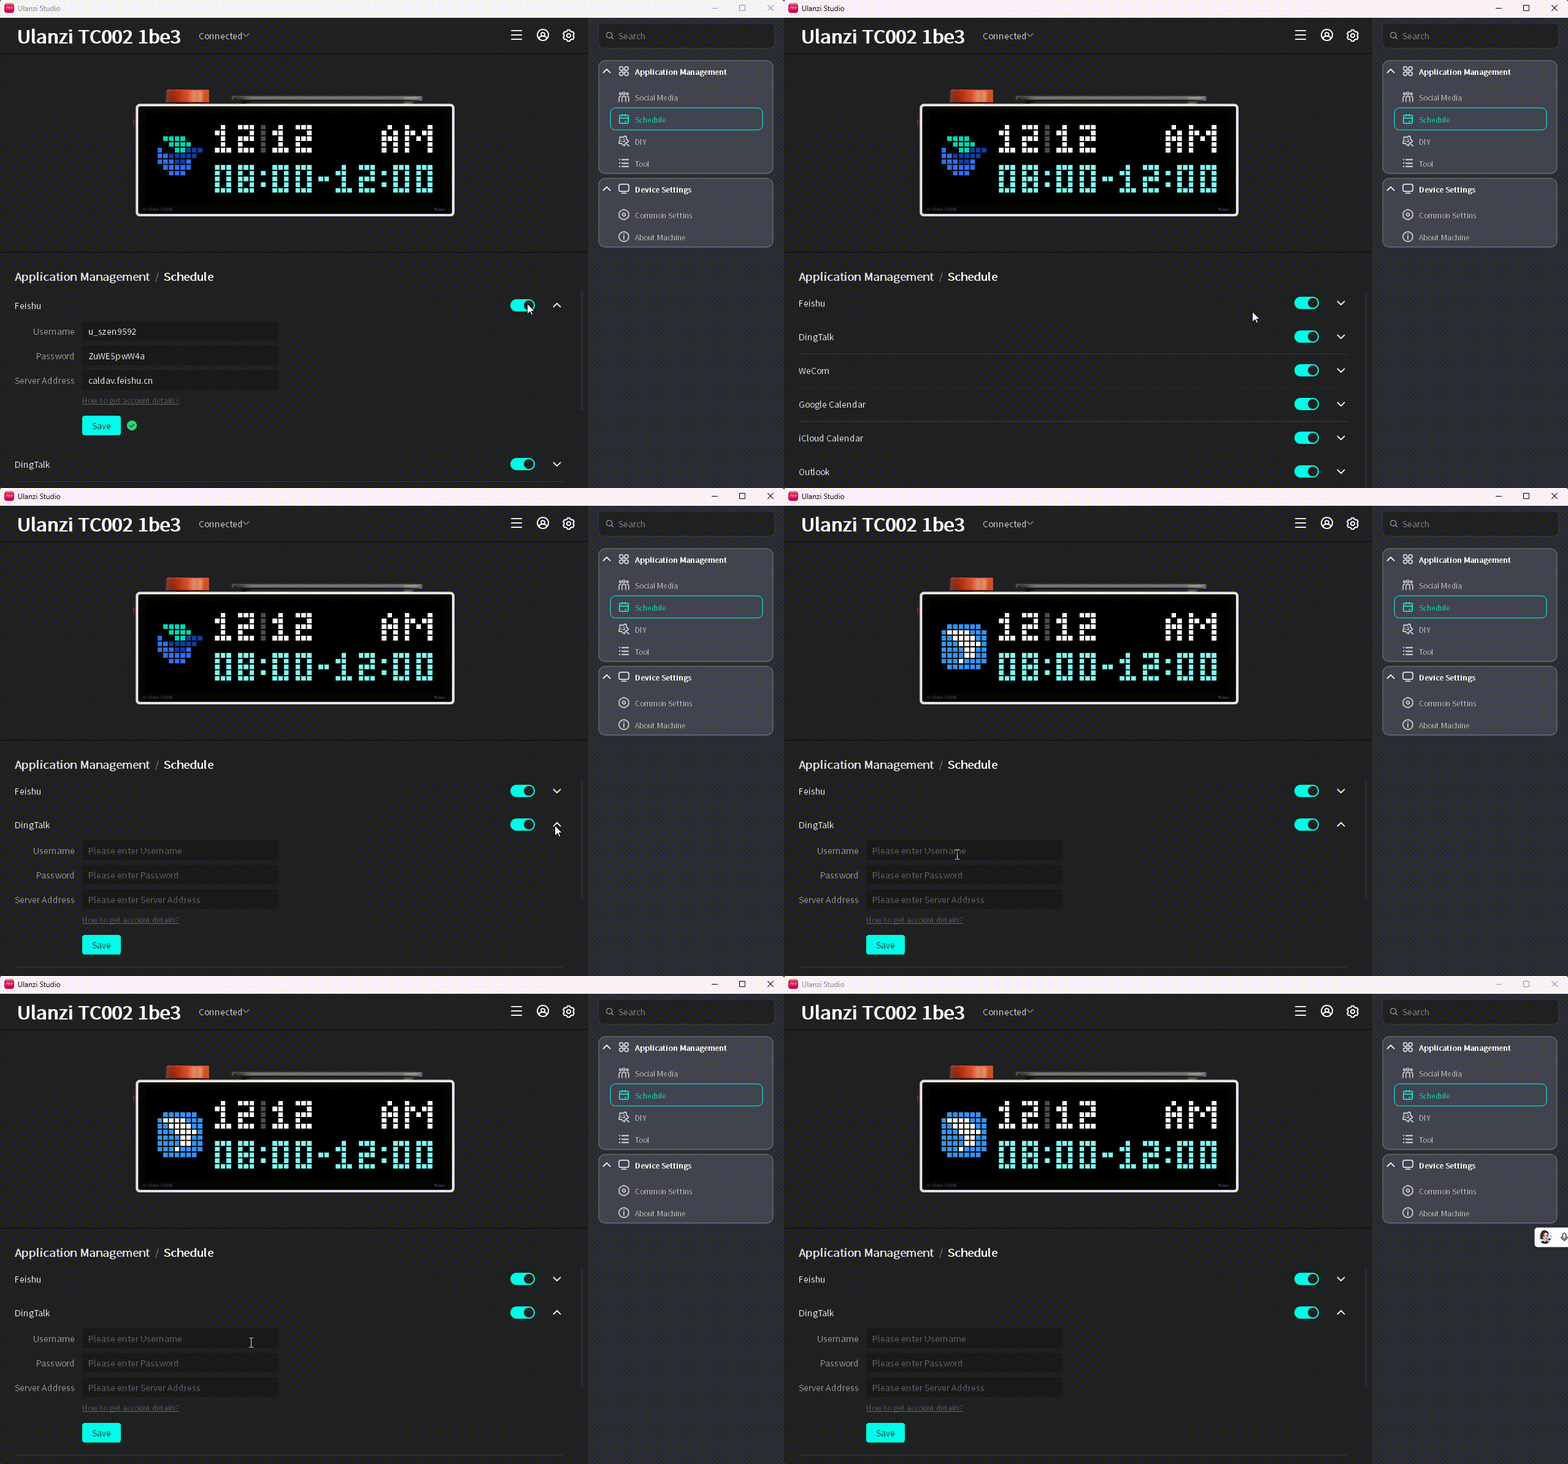
- Click How to Get Account Information? and select the DingTalk CalDAV guide.
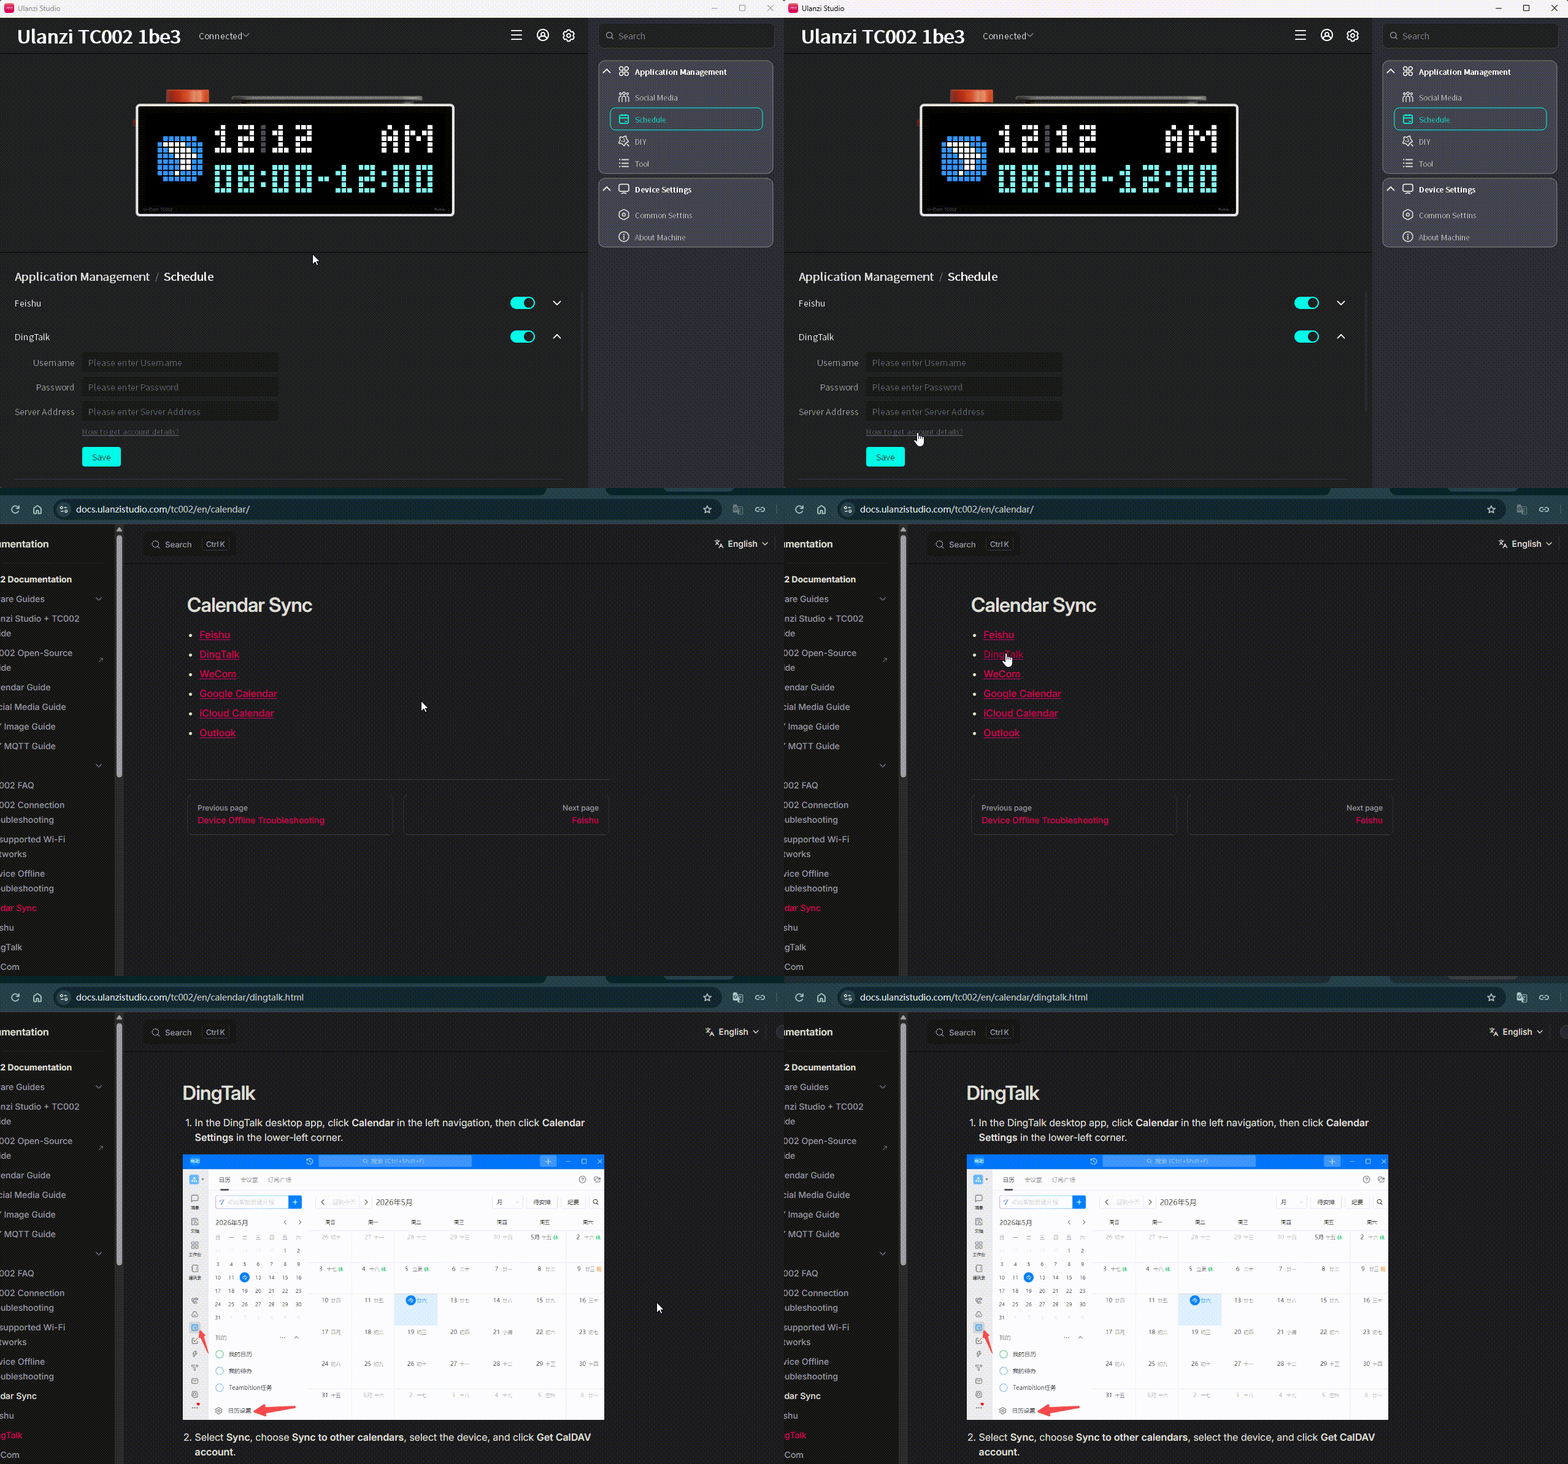
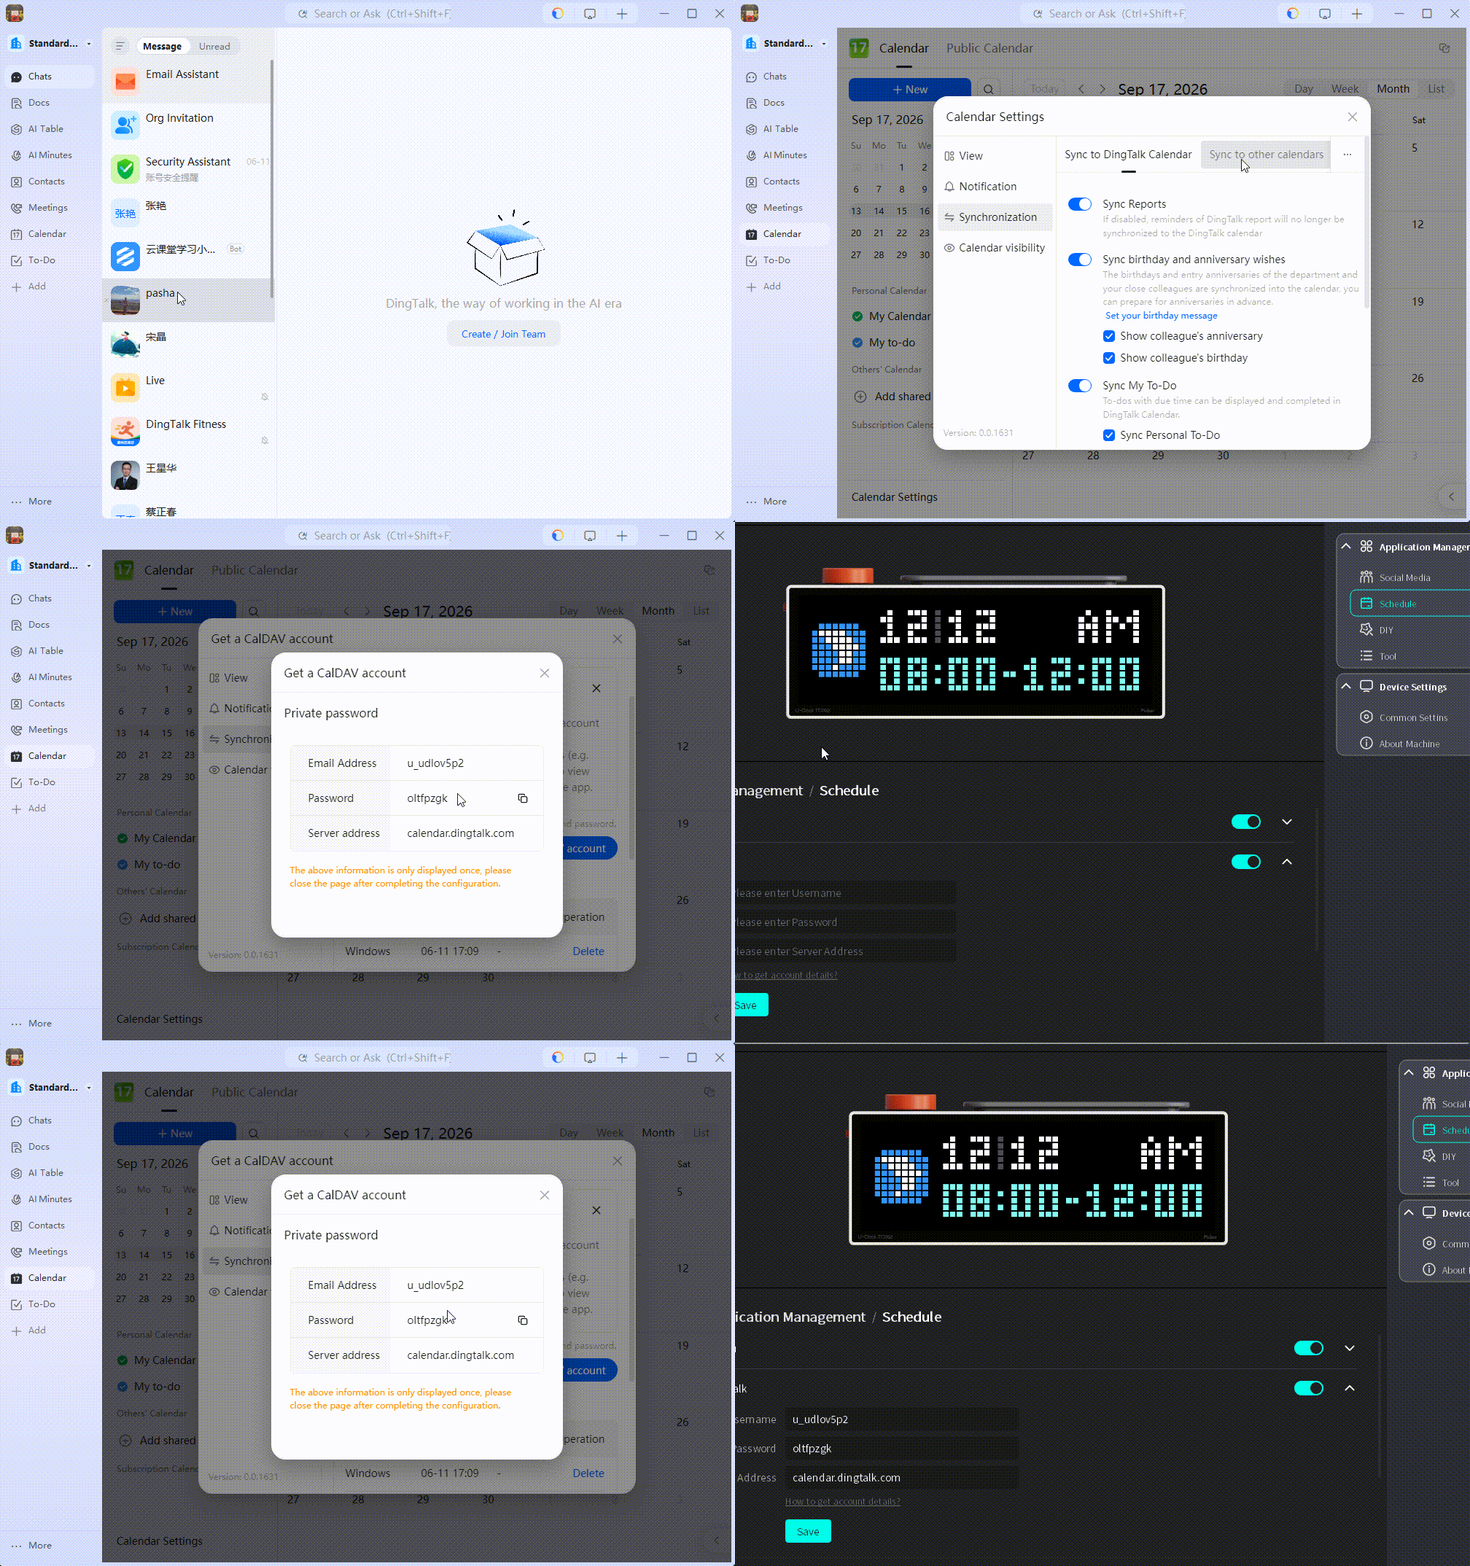
- Follow the guide and enter the generated credentials.
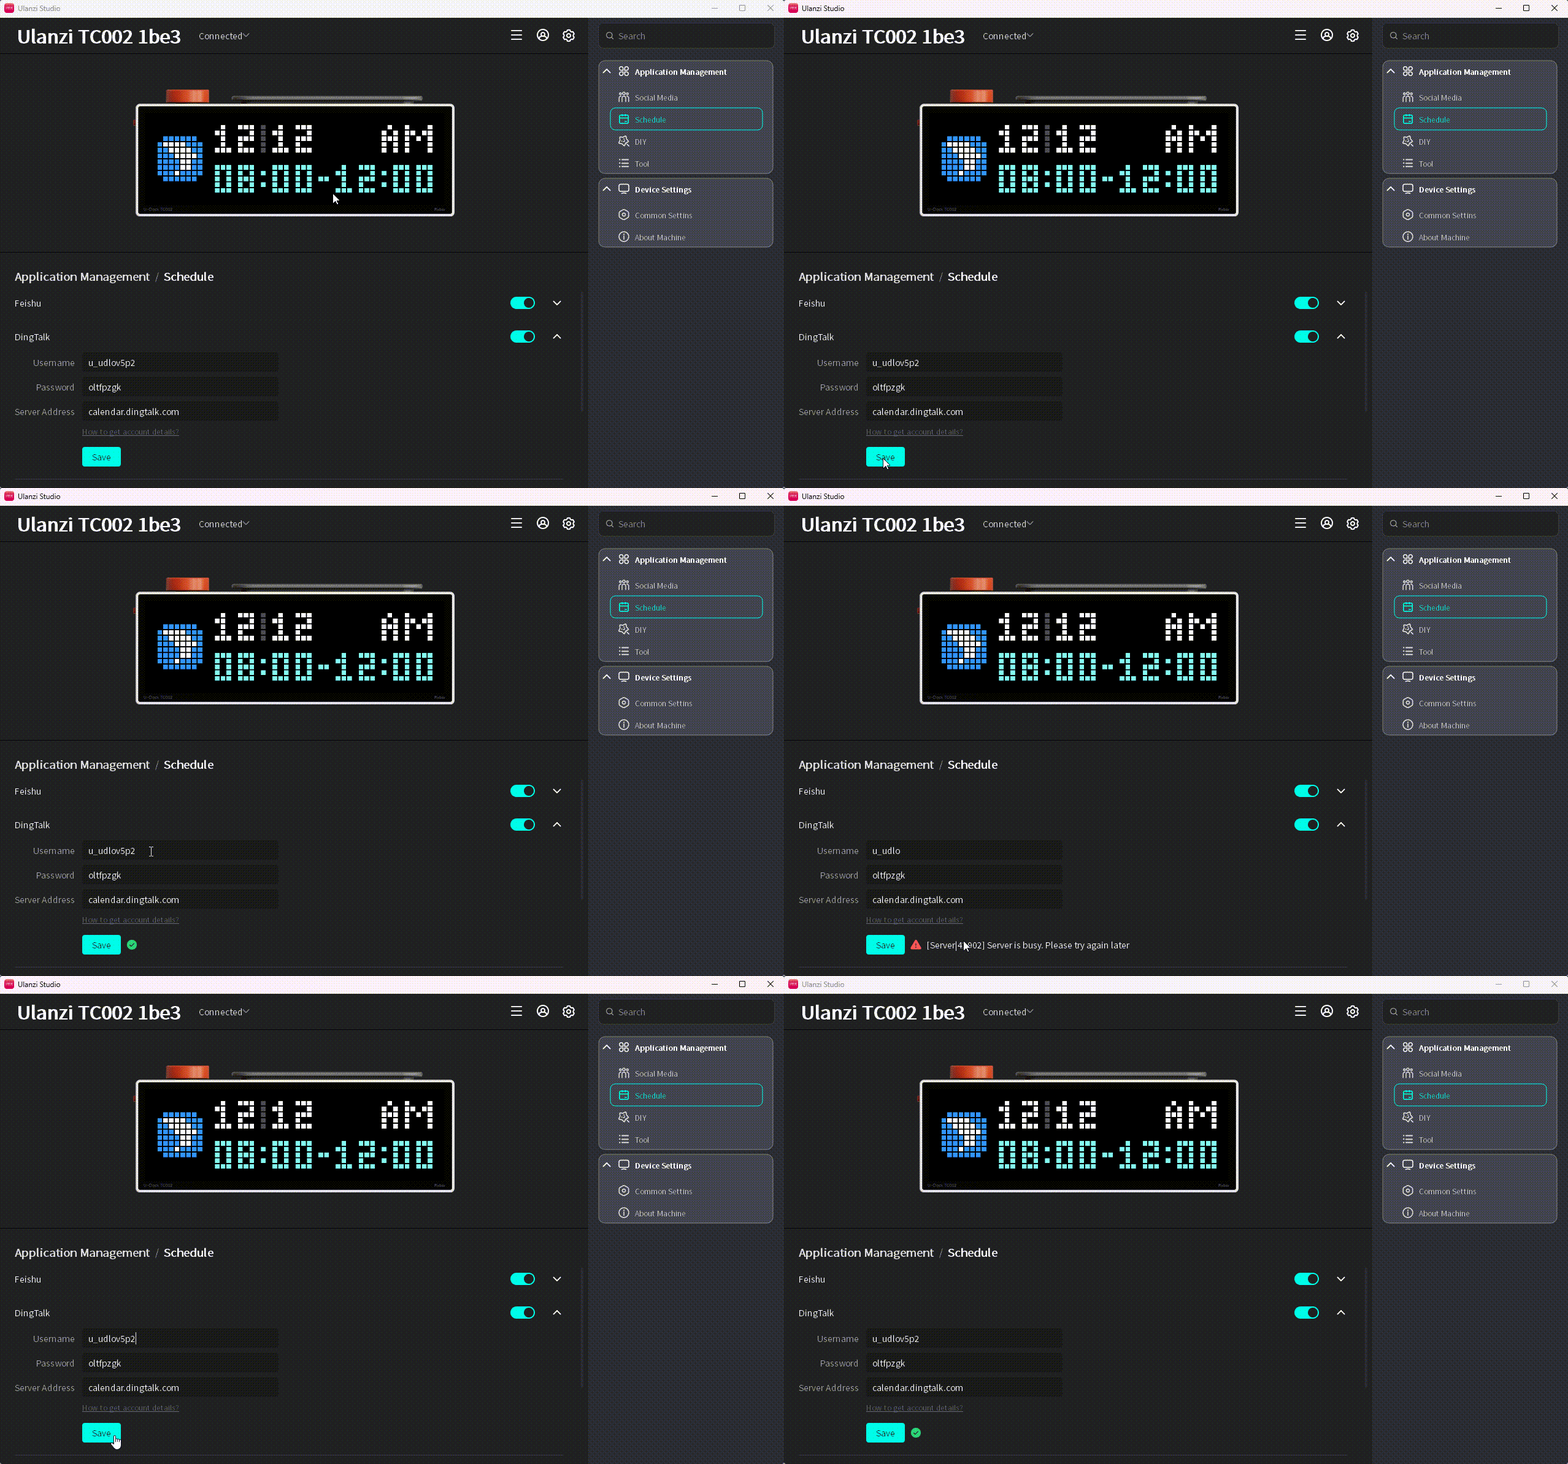
- Click Save and check the validation result.
- Switch TC002 to Calendar > DingTalk.

WeCom
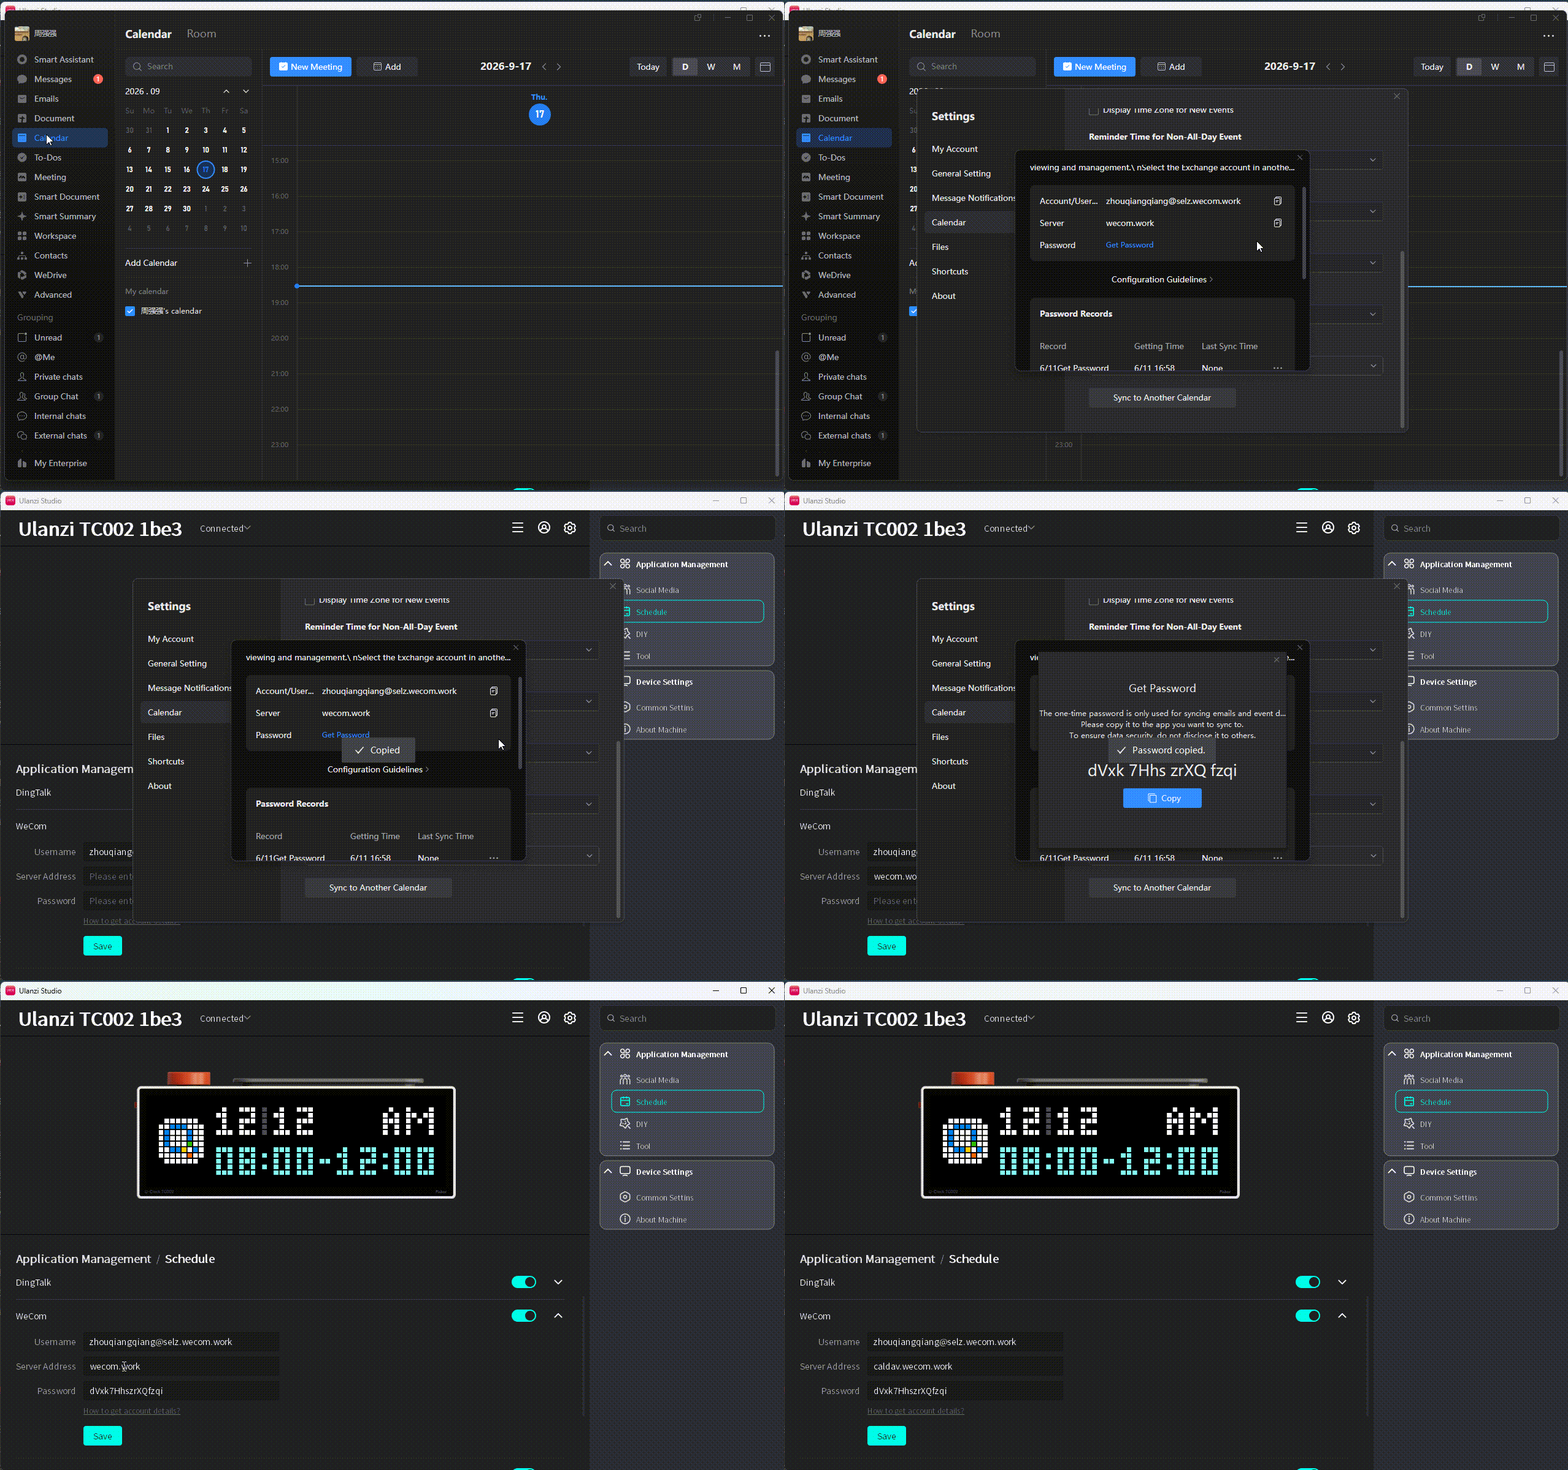
The required username, password, and server are CalDAV credentials generated by WeCom.
- Expand the settings.
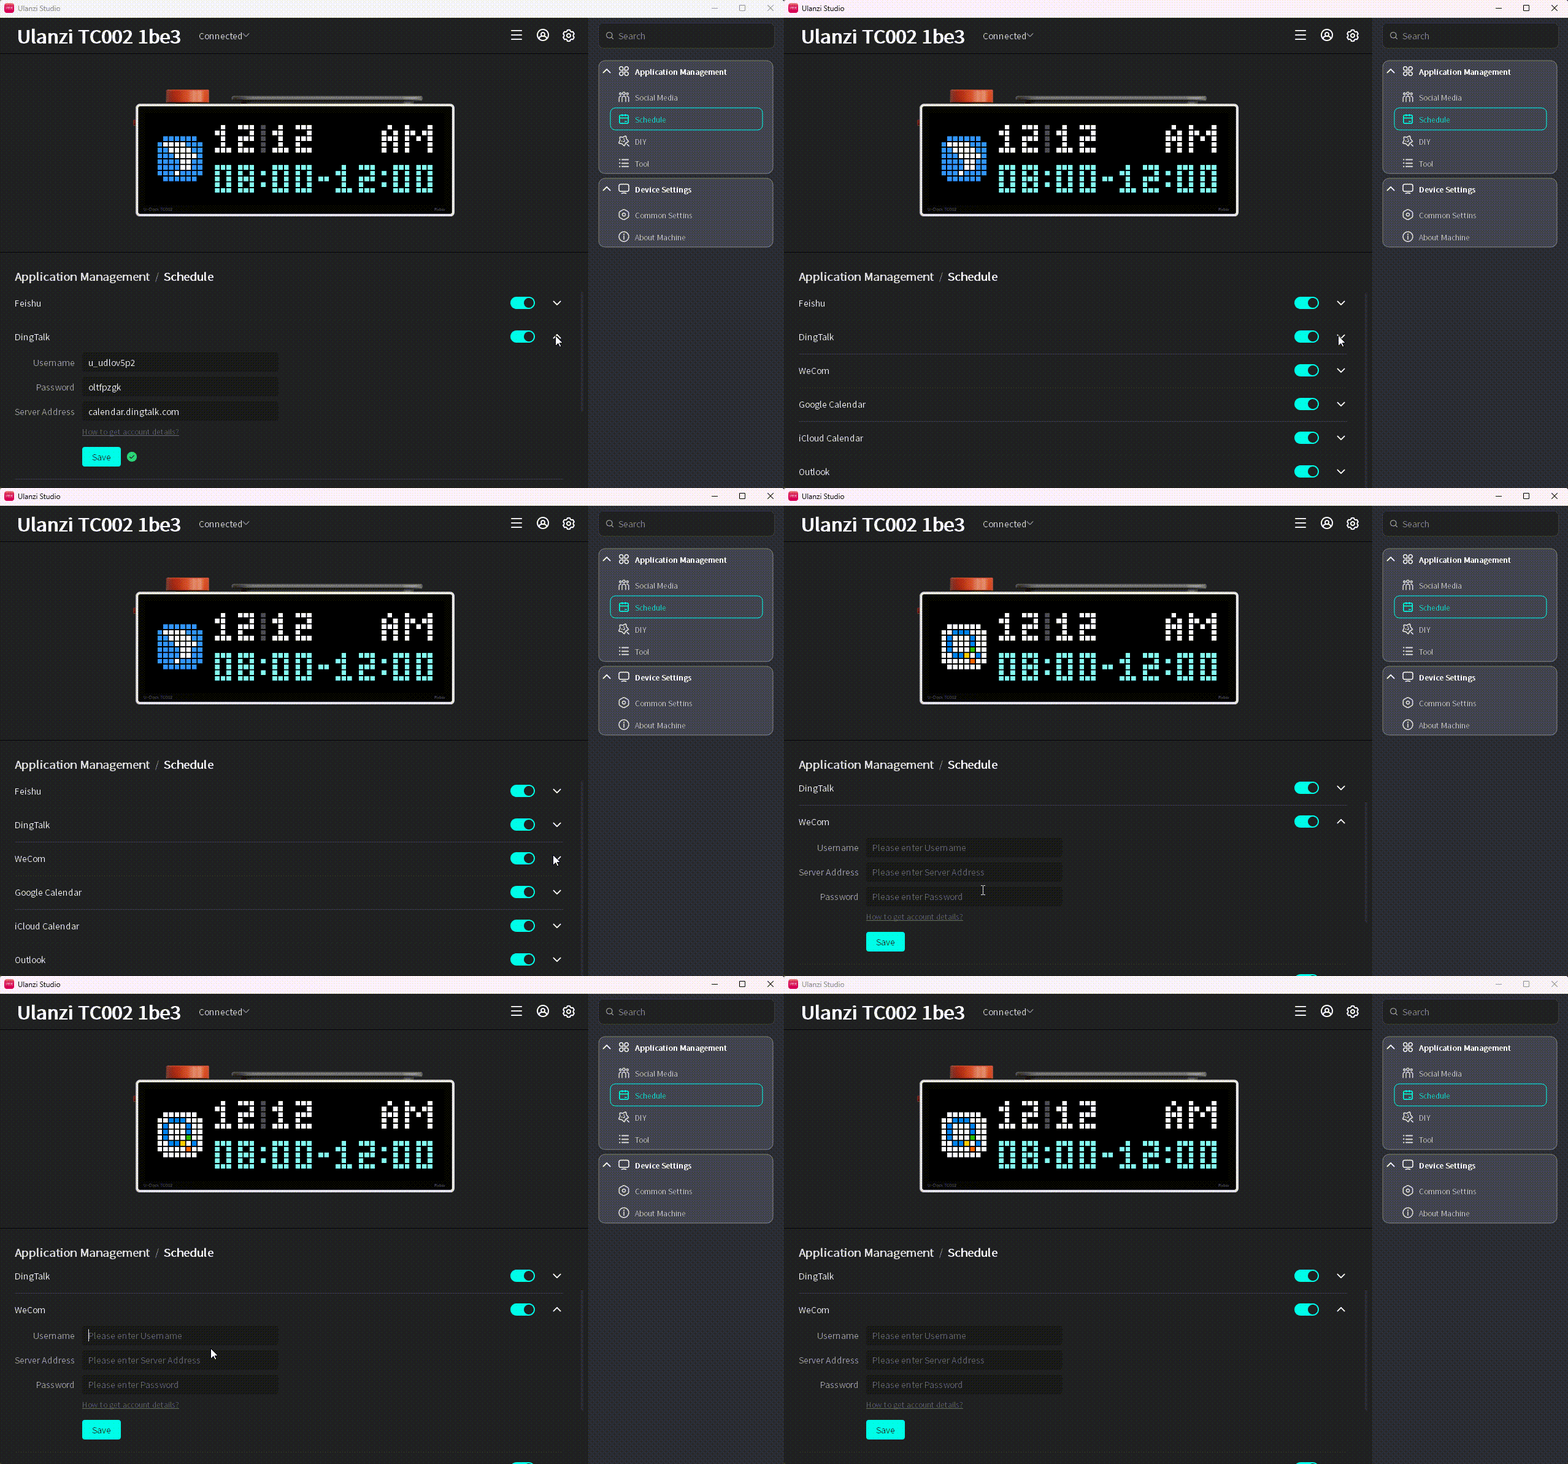
- Click How to Get Account Information? and select the WeCom CalDAV guide.
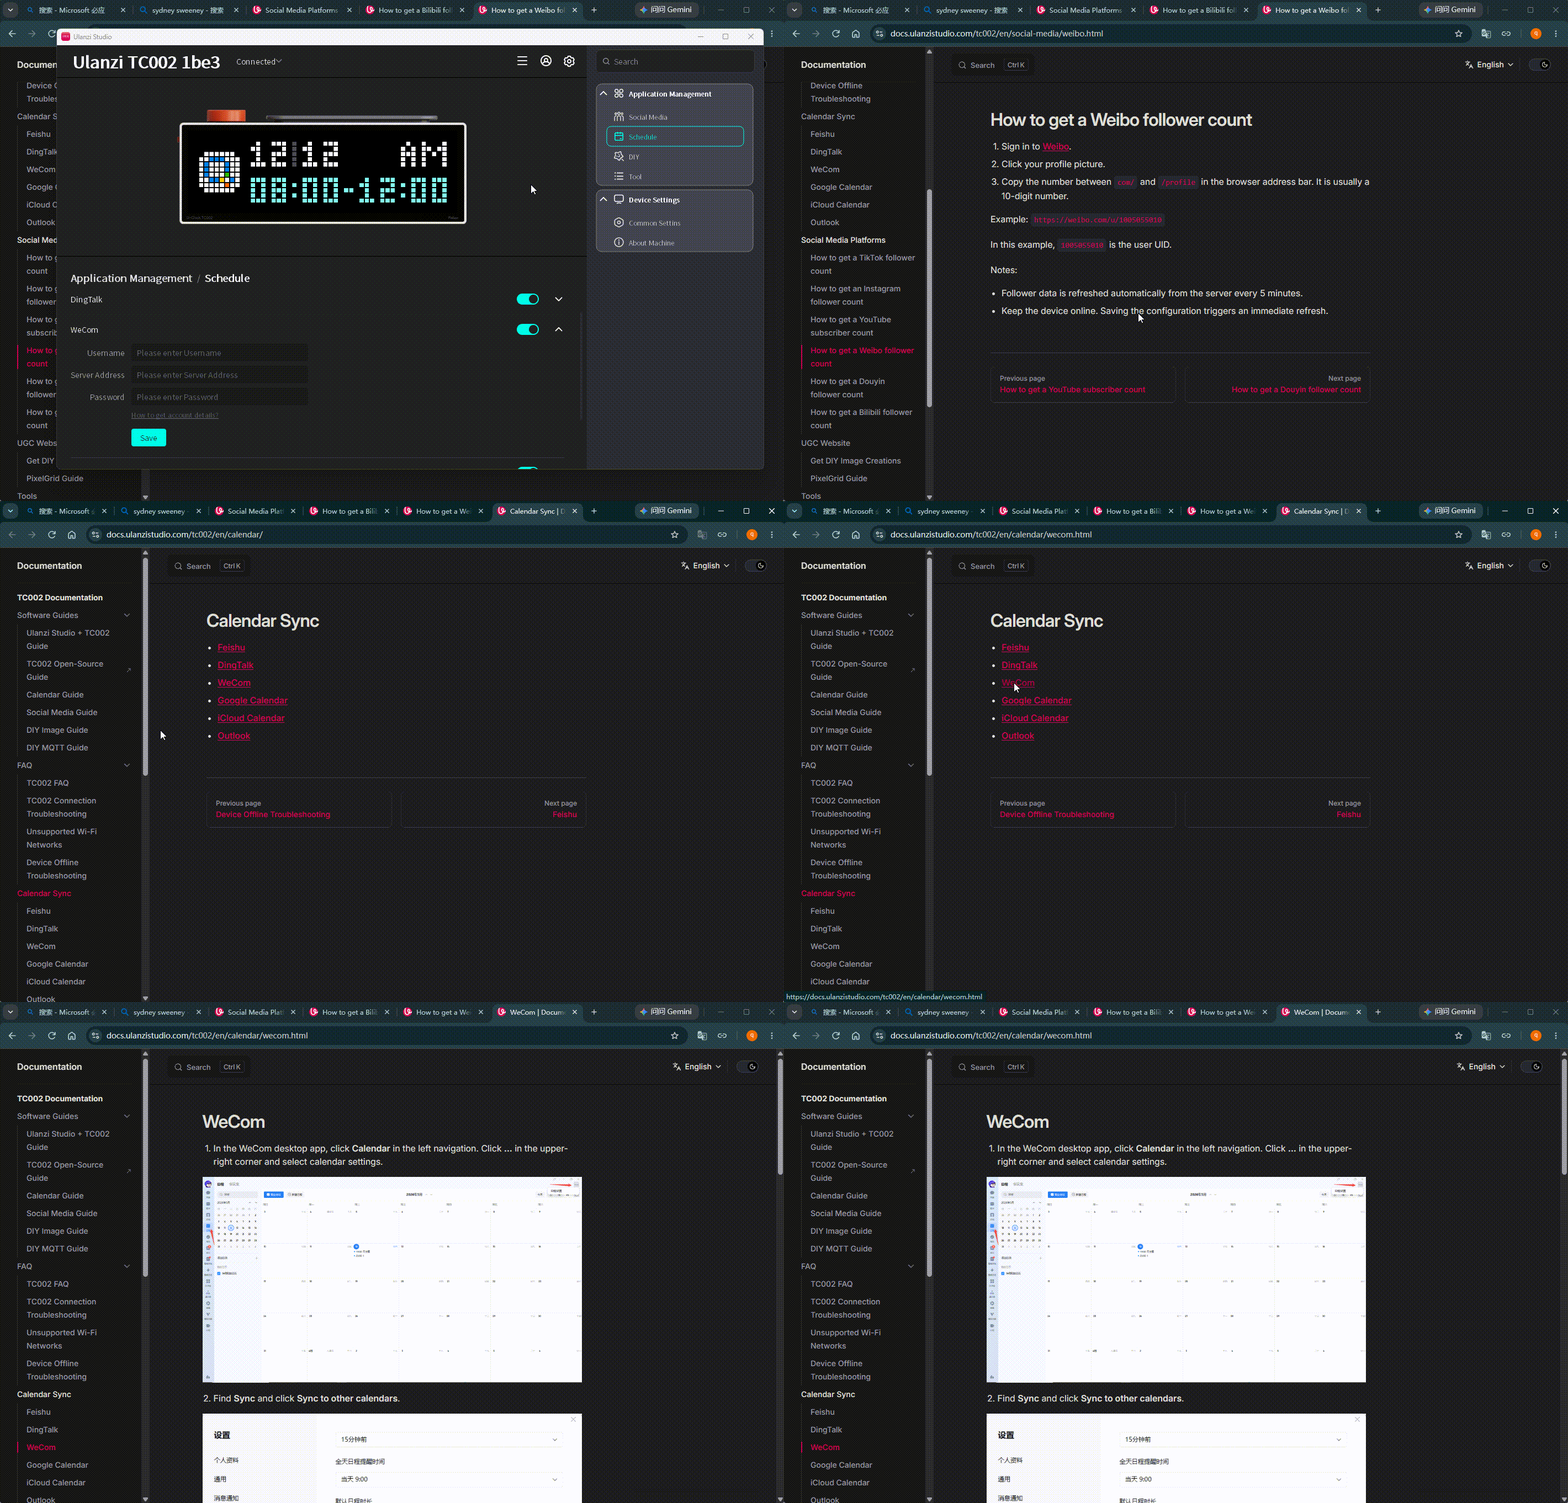
- Follow the guide and enter the generated credentials.
- Click Save and check the validation result.
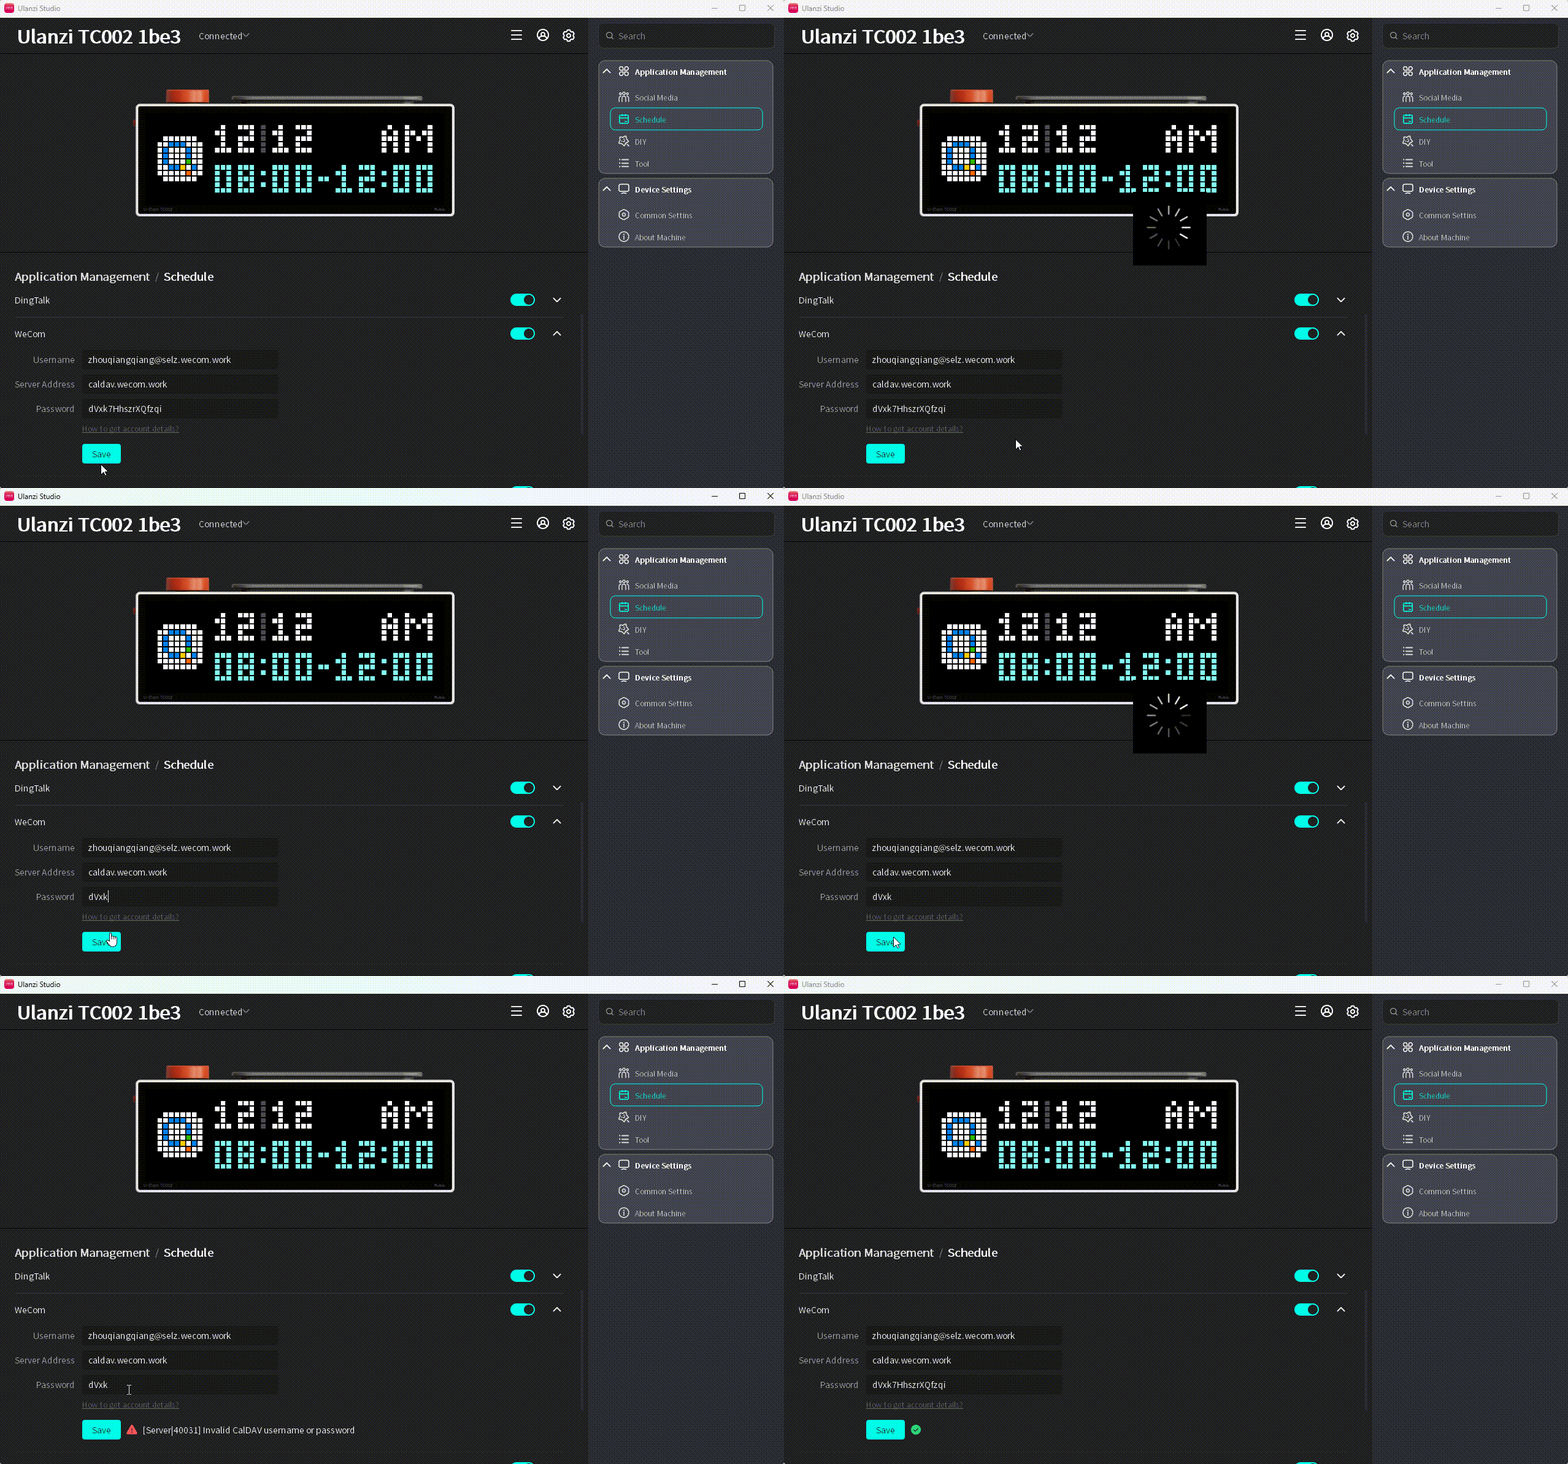
- Switch TC002 to Calendar > WeCom.

Google Calendar
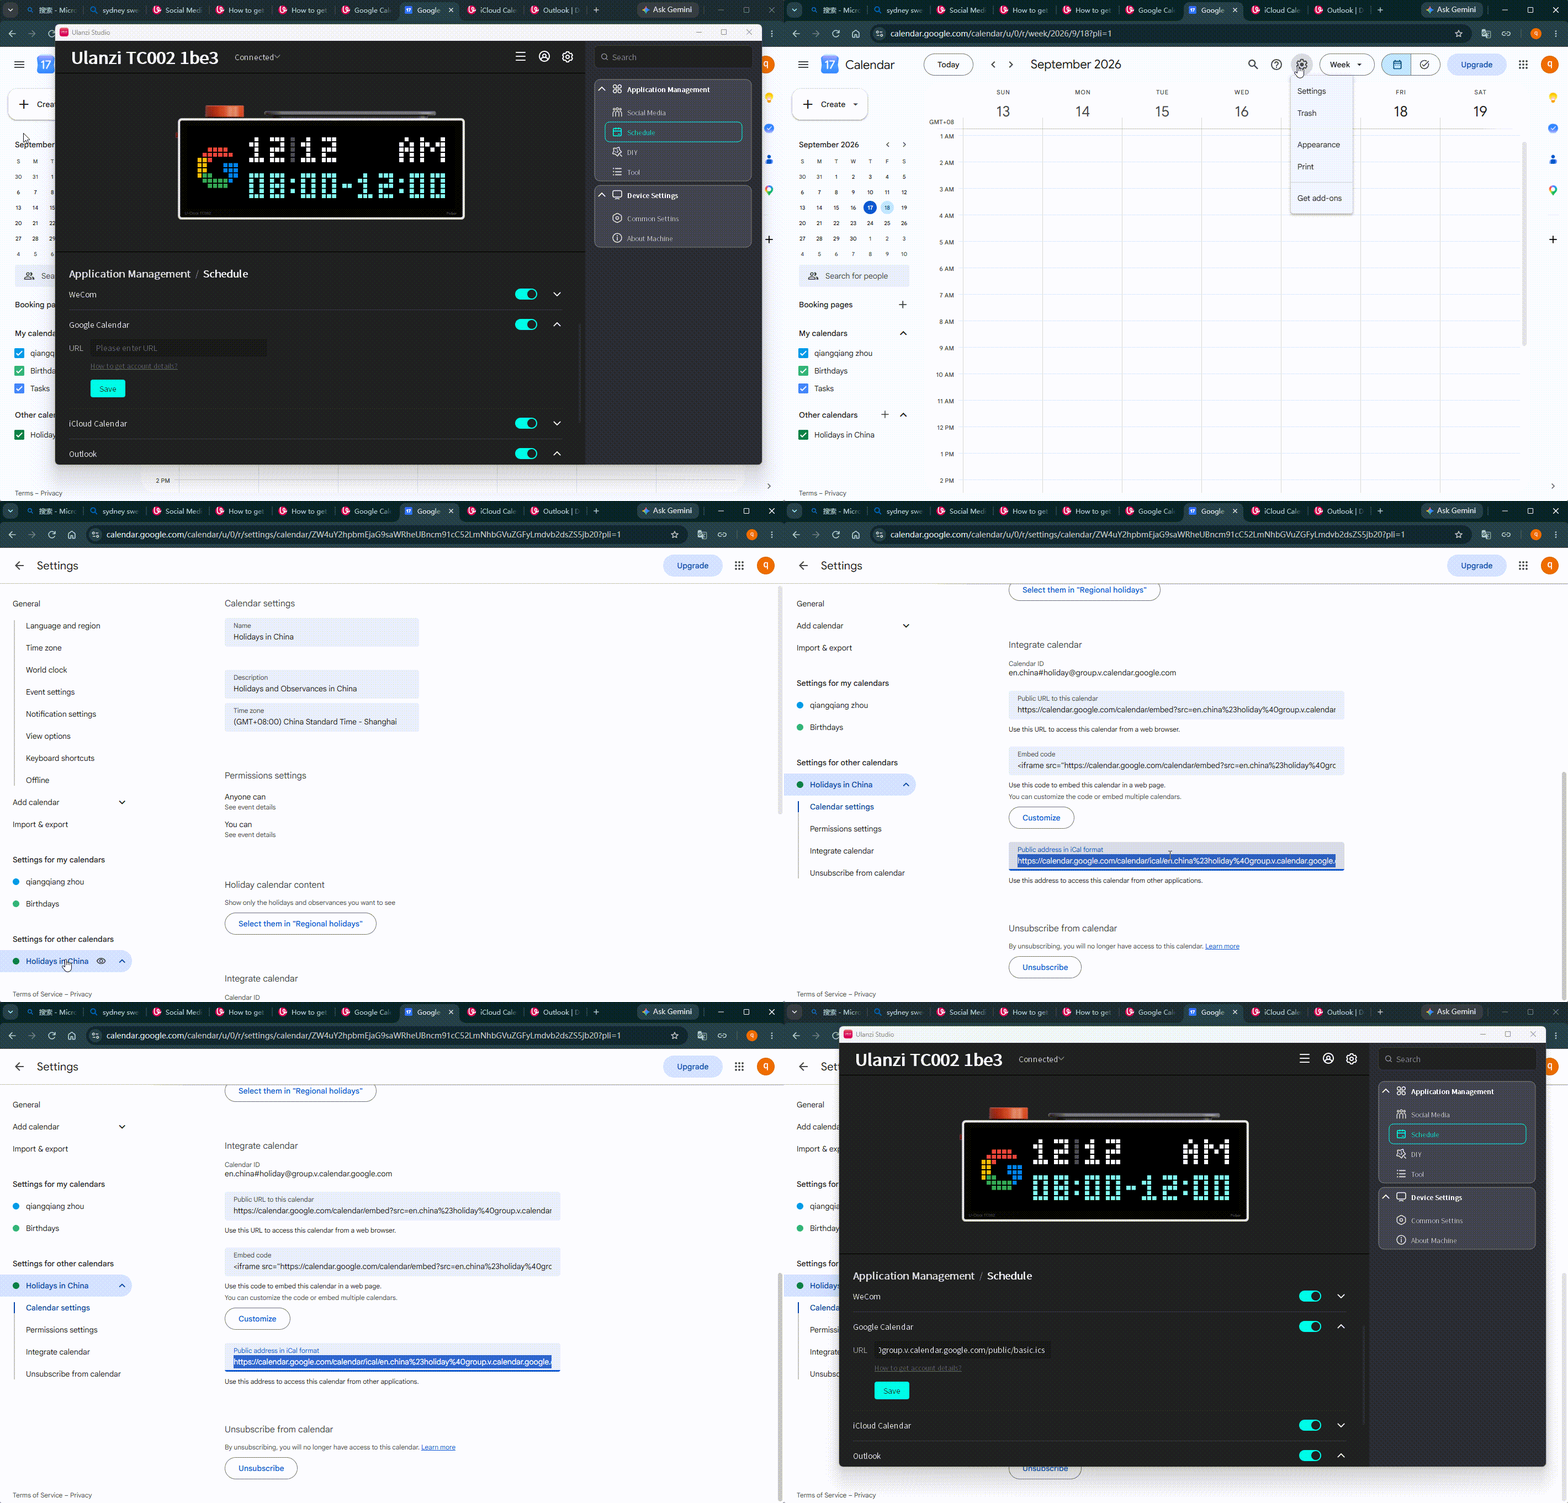
This service requires the public URL generated by Google Calendar.
- Expand the settings.
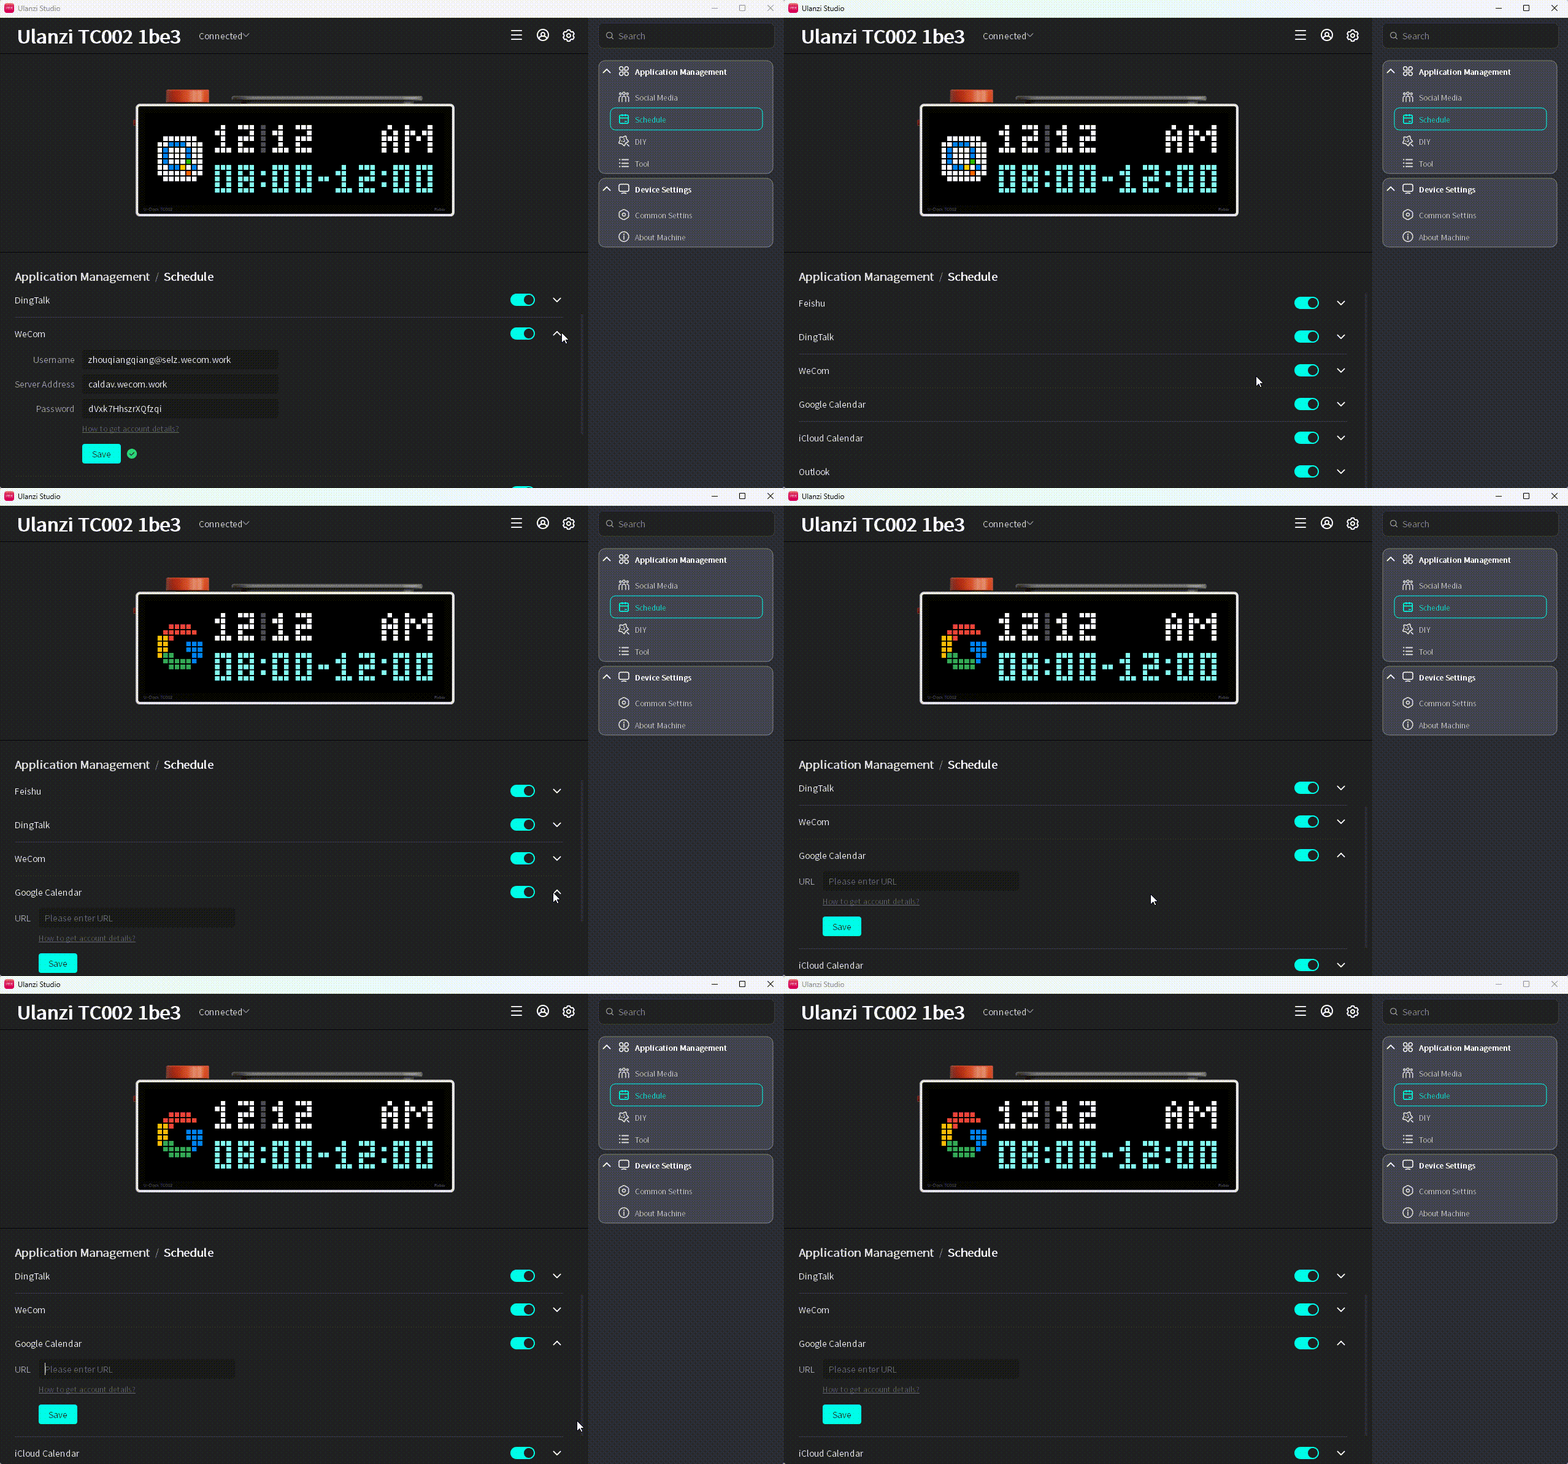
- Click How to Get Account Information? and select the Google Calendar sharing guide.
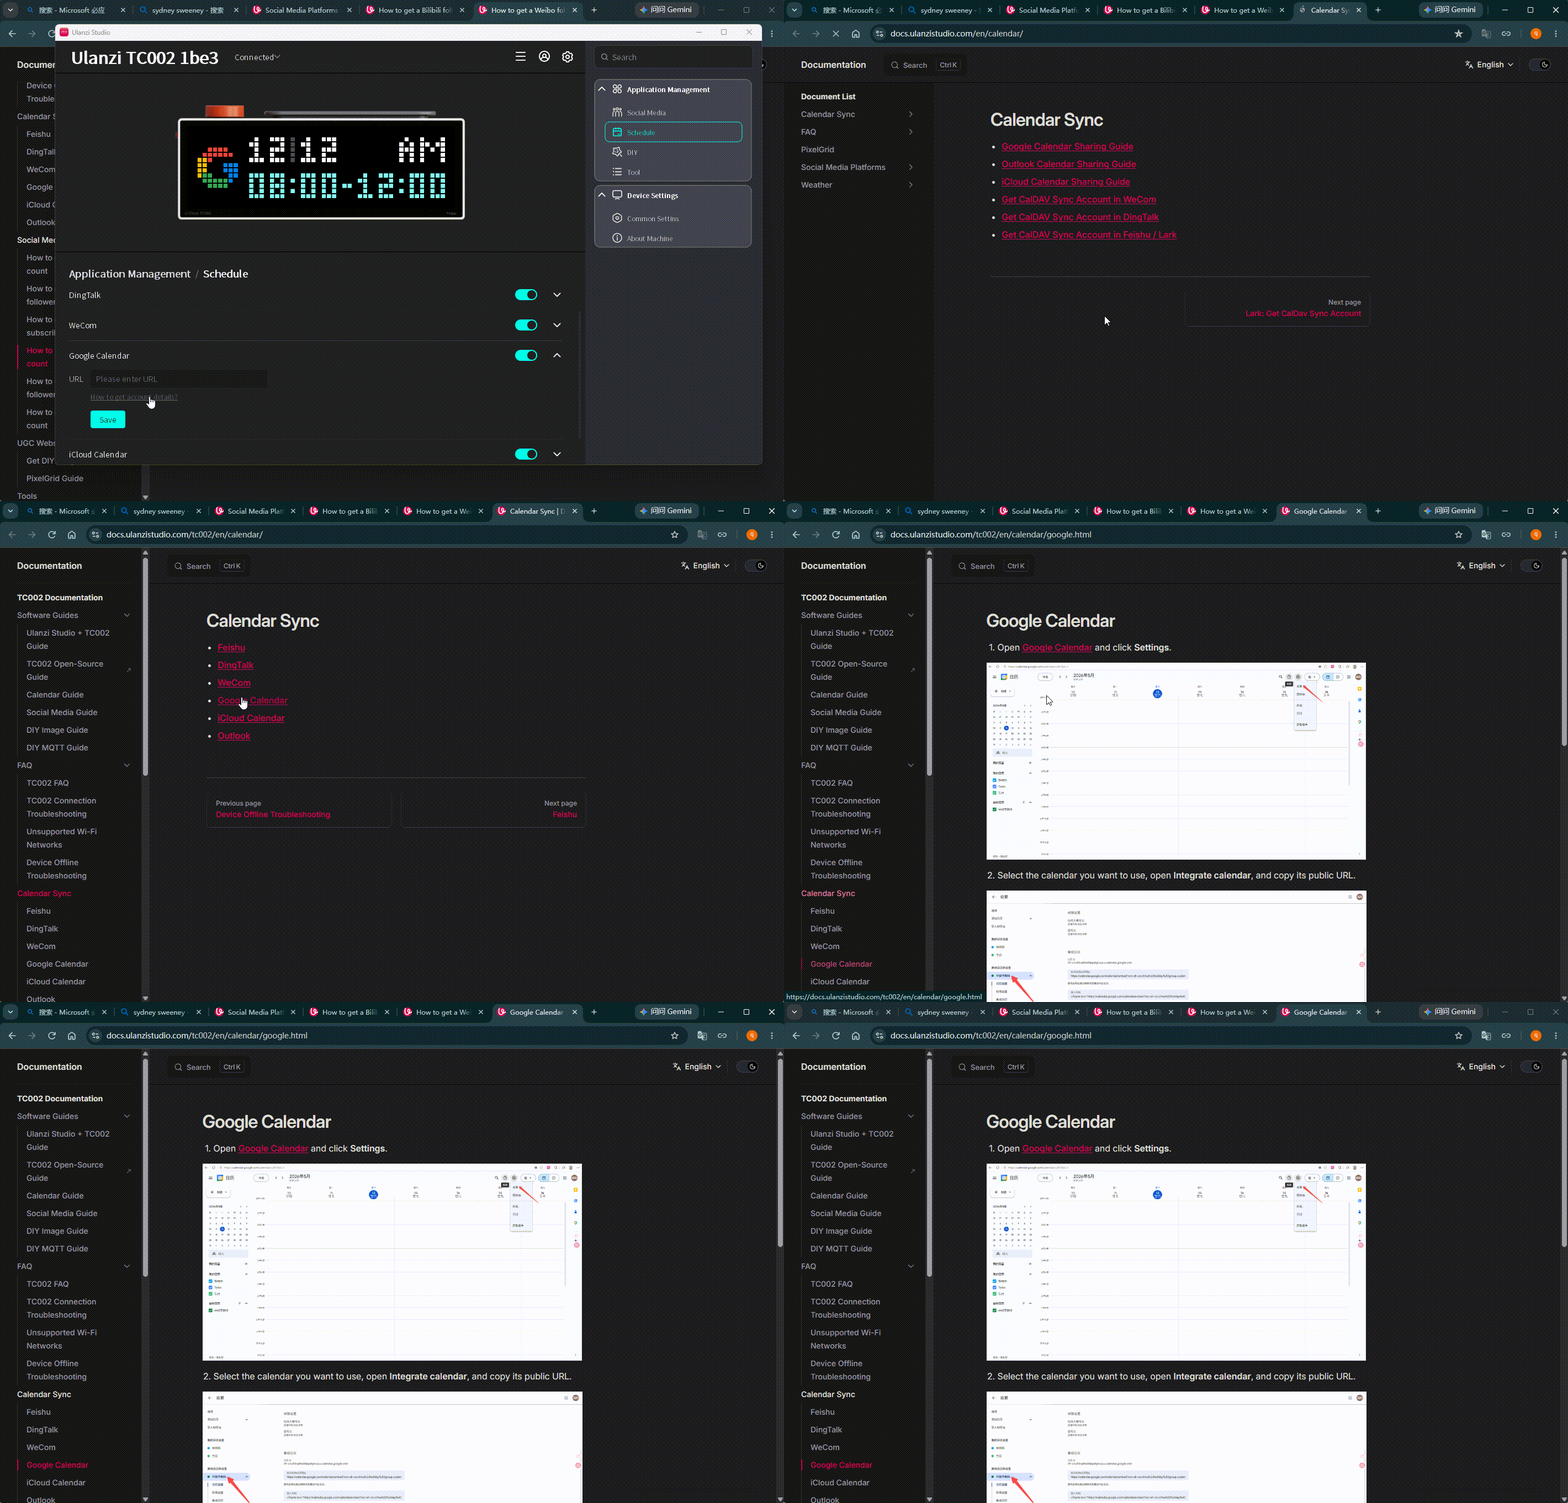
- Follow the guide and paste the public URL.
- Click Save and check the validation result.
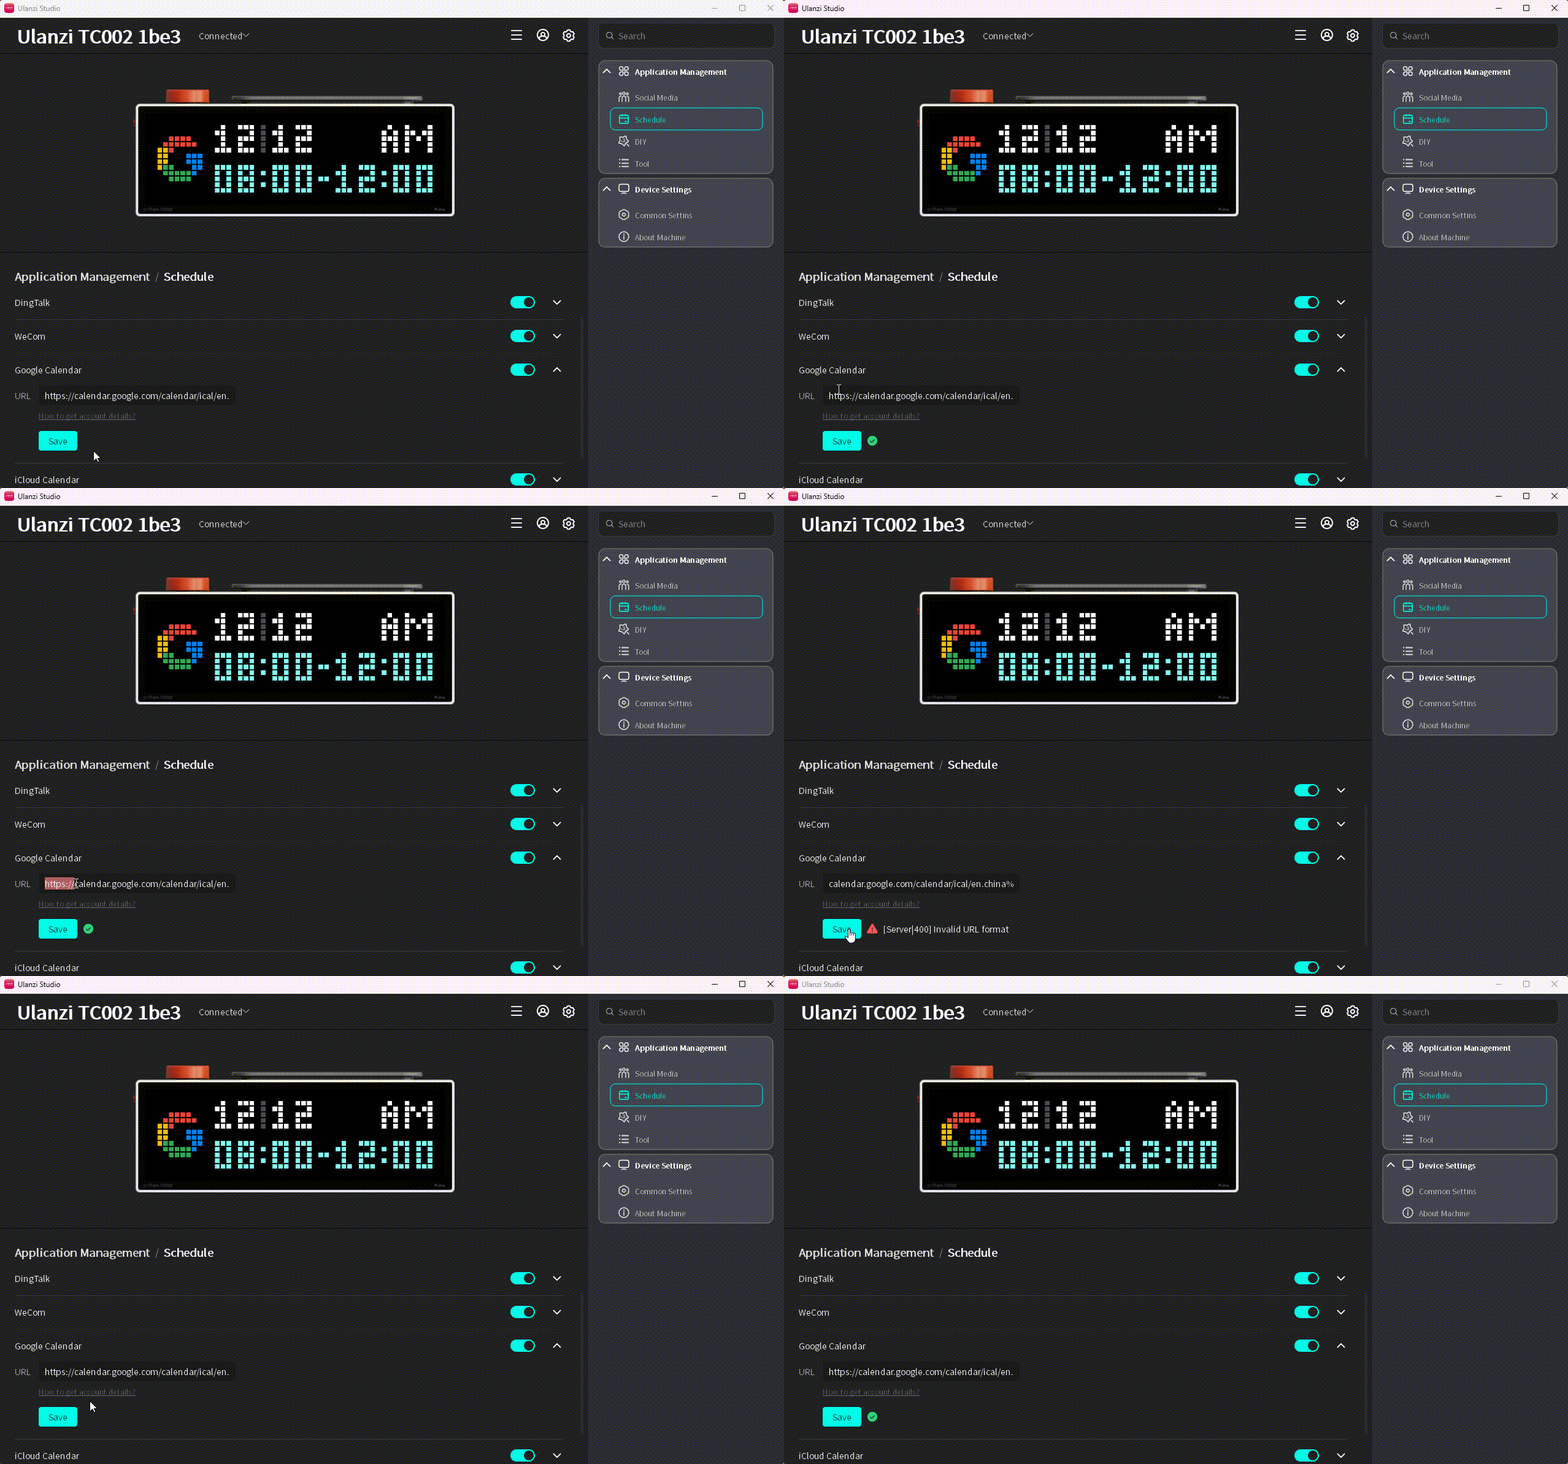
- Switch TC002 to Calendar > Google Calendar.

iCloud Calendar
Required fields:
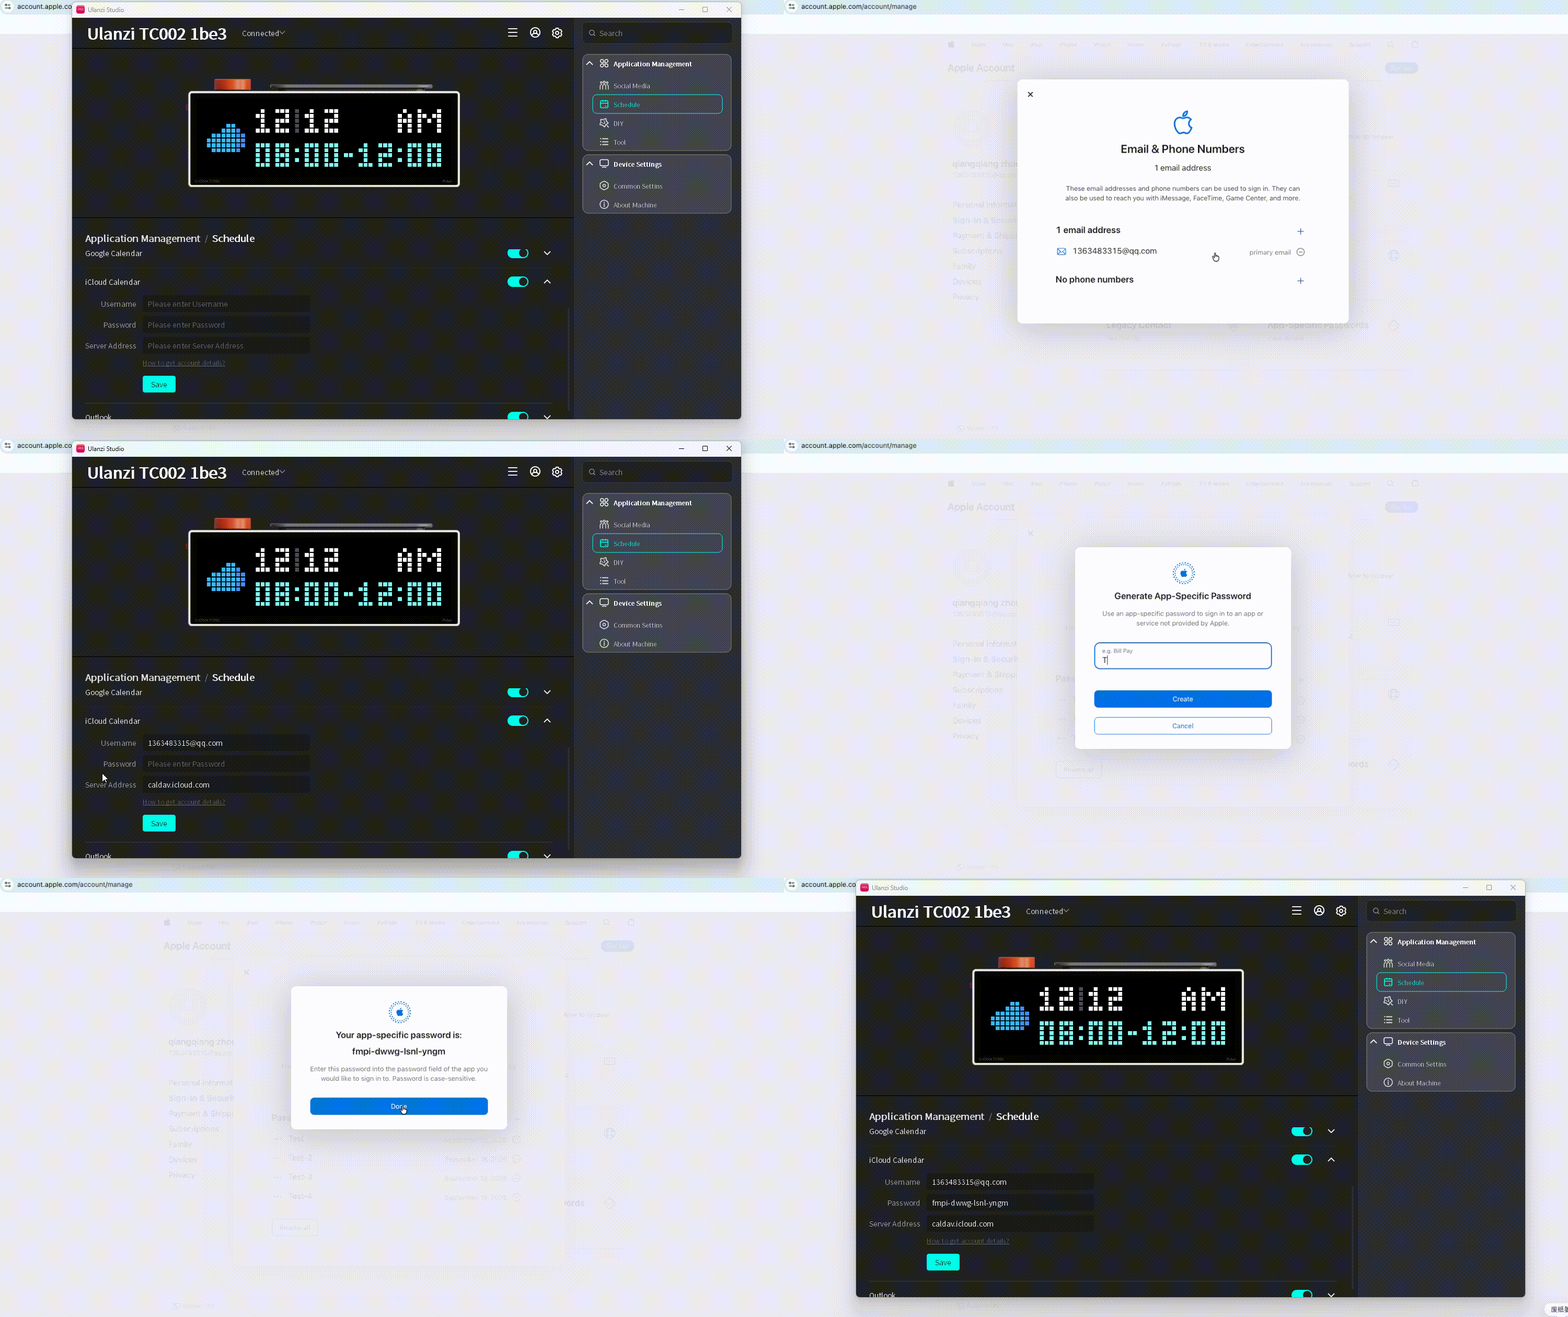
- Username: your Apple Account.
- Password: an app-specific password.
- Server: the Apple calendar server.
- Expand the settings.
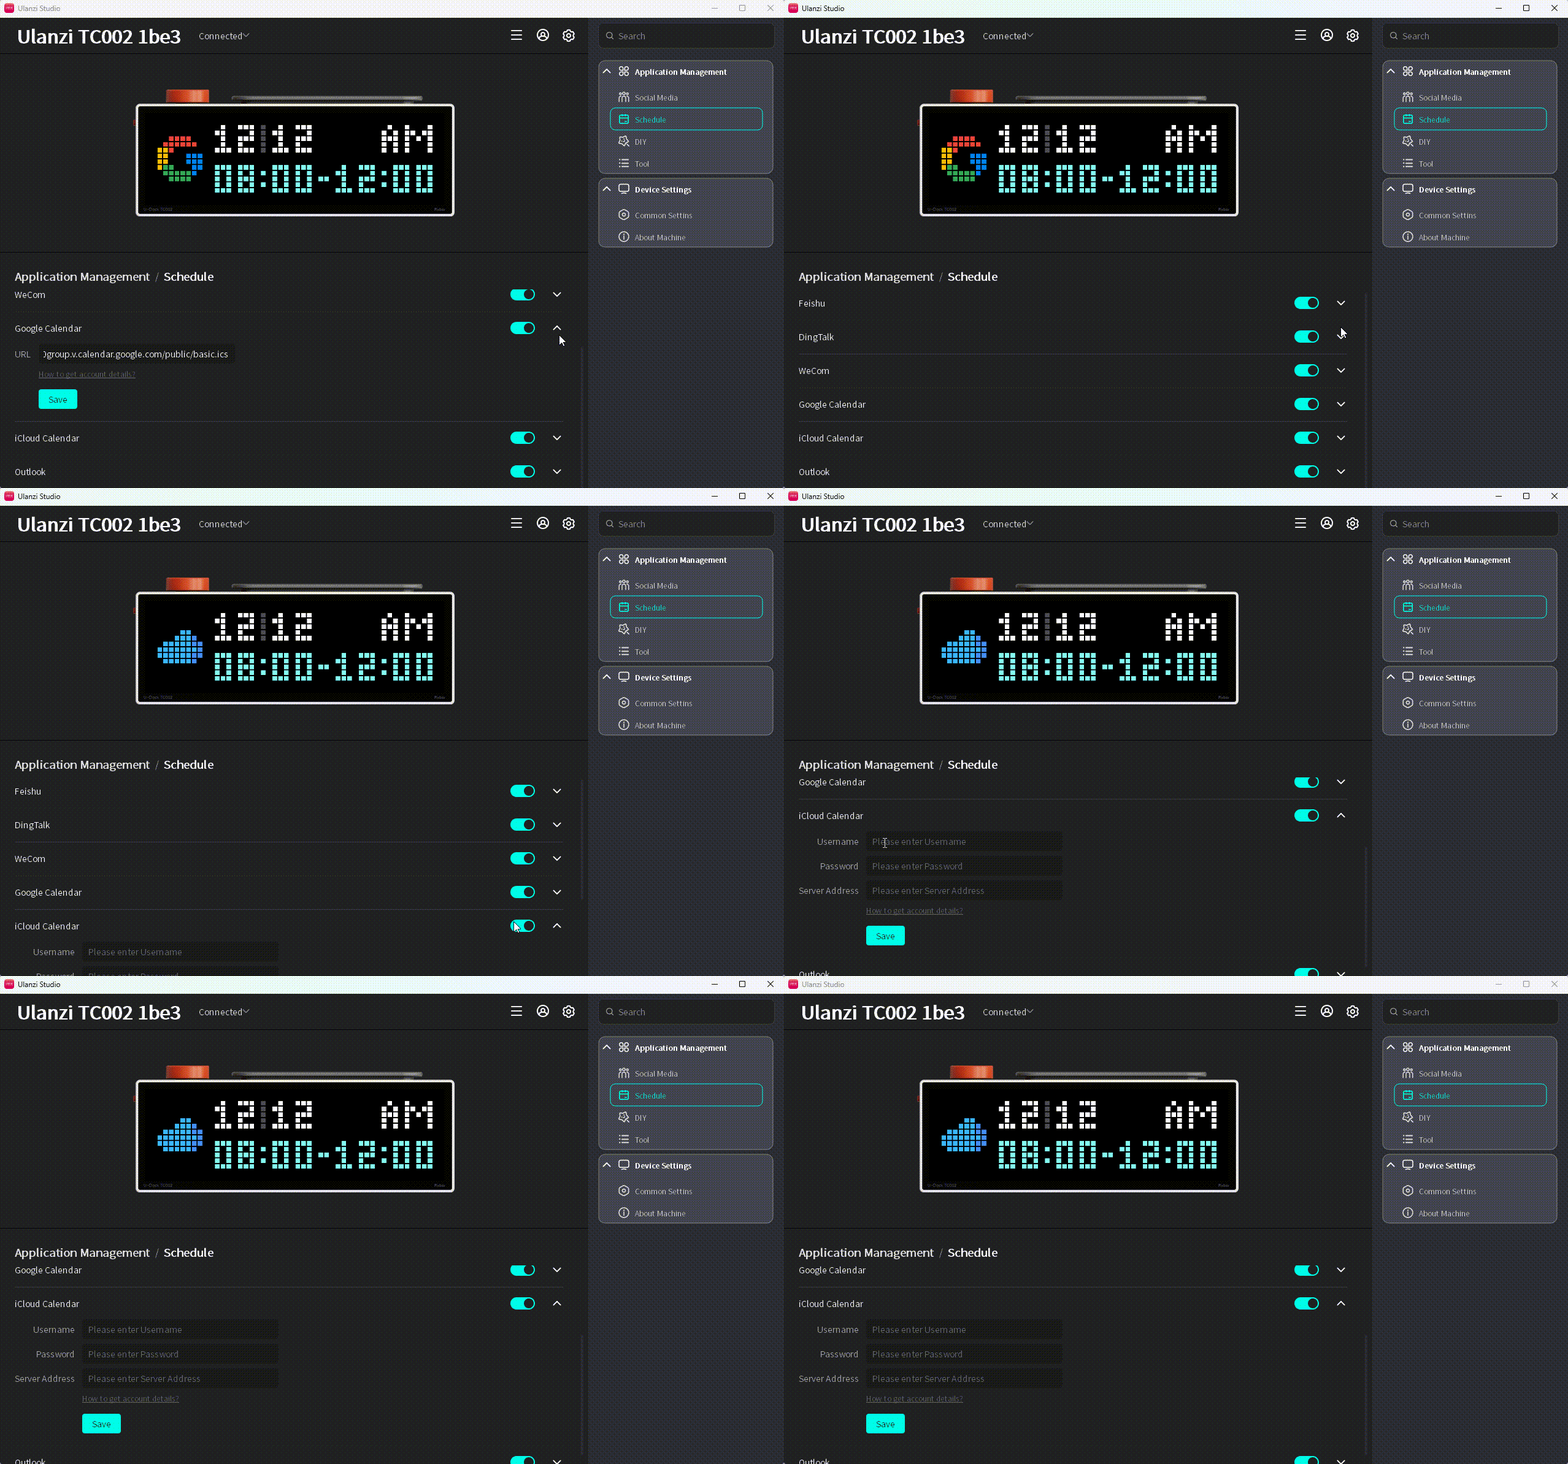
- Click How to Get Account Information? and select the iCloud Calendar sharing guide.
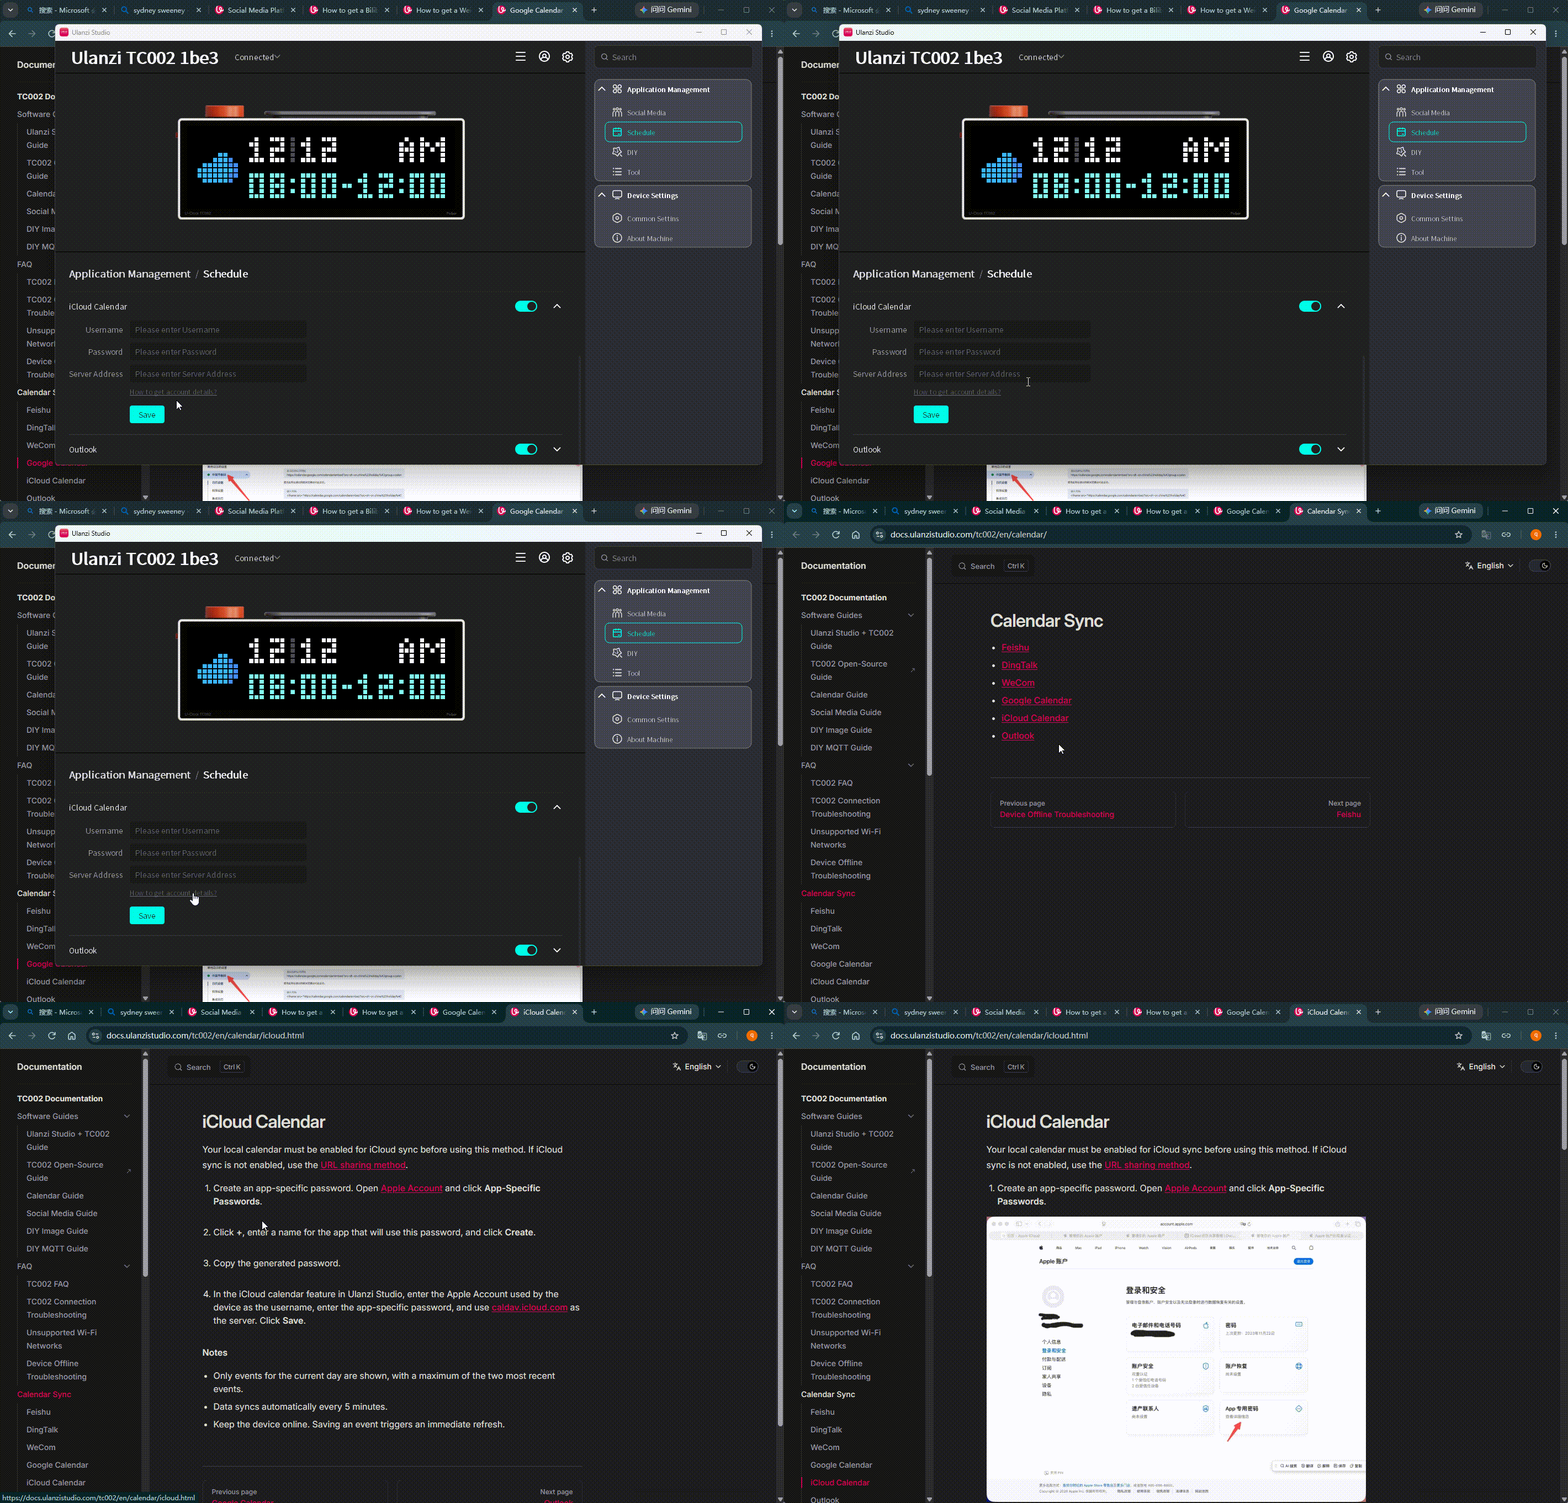
- Follow the guide and enter the account information.
- Click Save and check the validation result.
- Switch TC002 to Calendar > iCloud Calendar.

Outlook
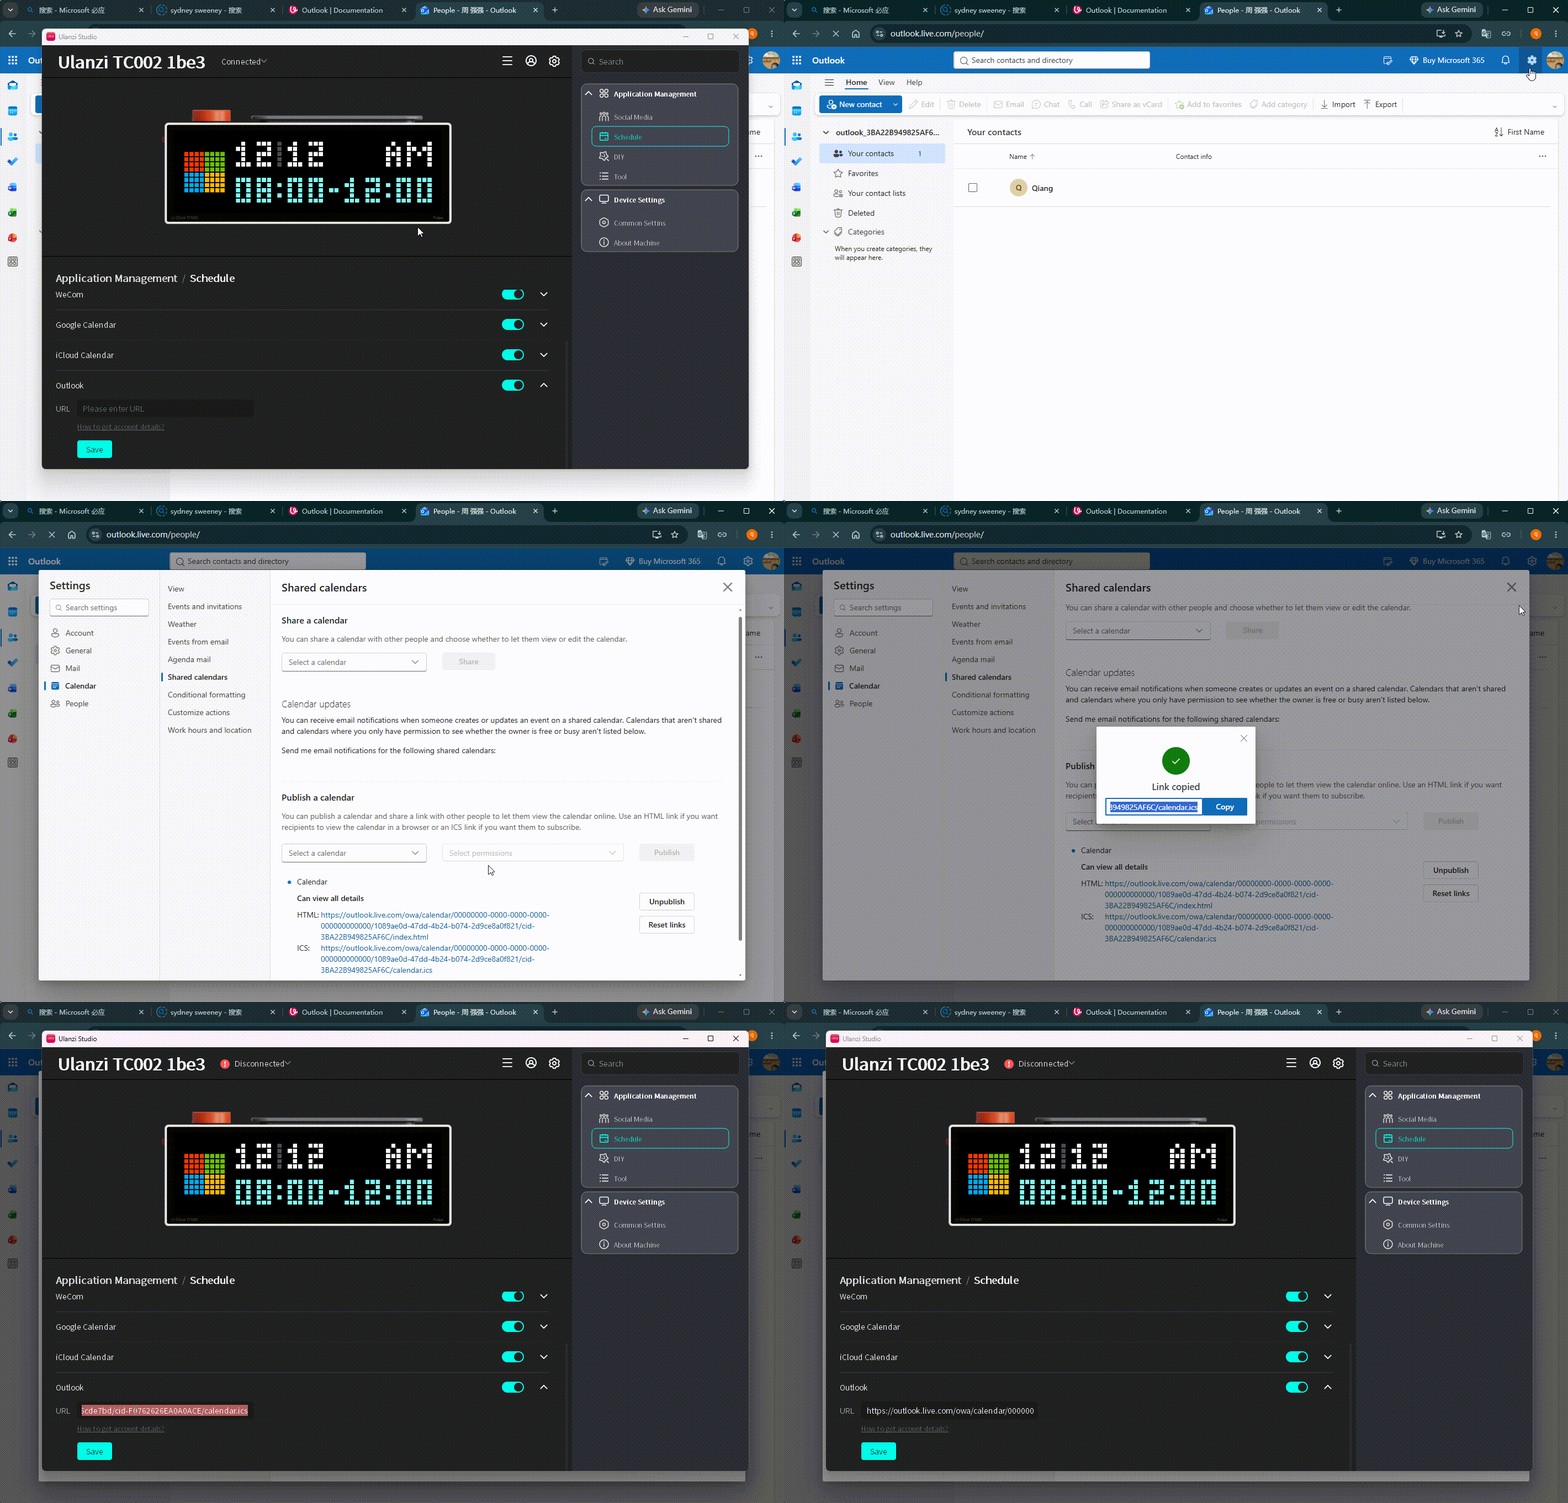
This service requires the public URL generated by Outlook Calendar.
- Expand the settings.
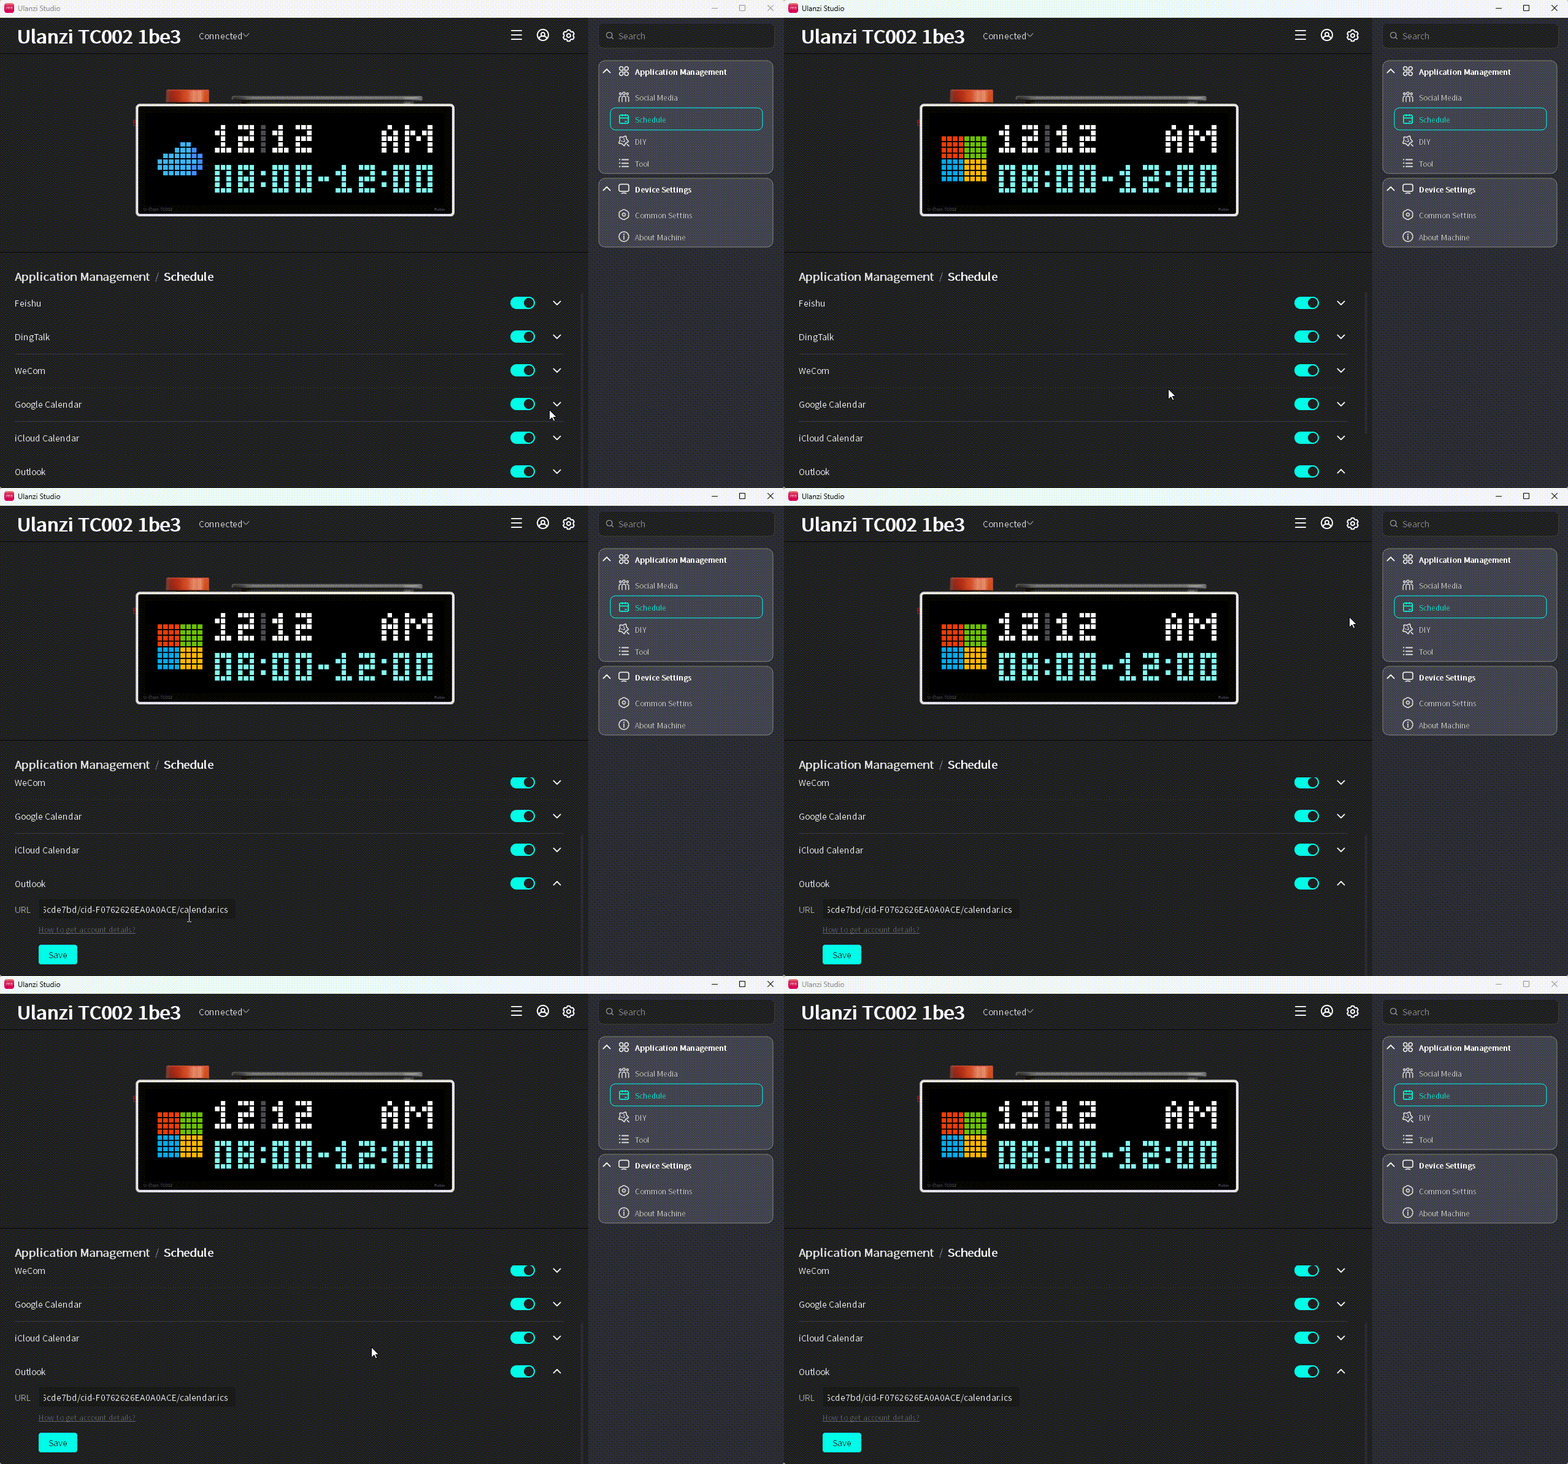
- Click How to Get Account Information? and select the Outlook Calendar sharing guide.
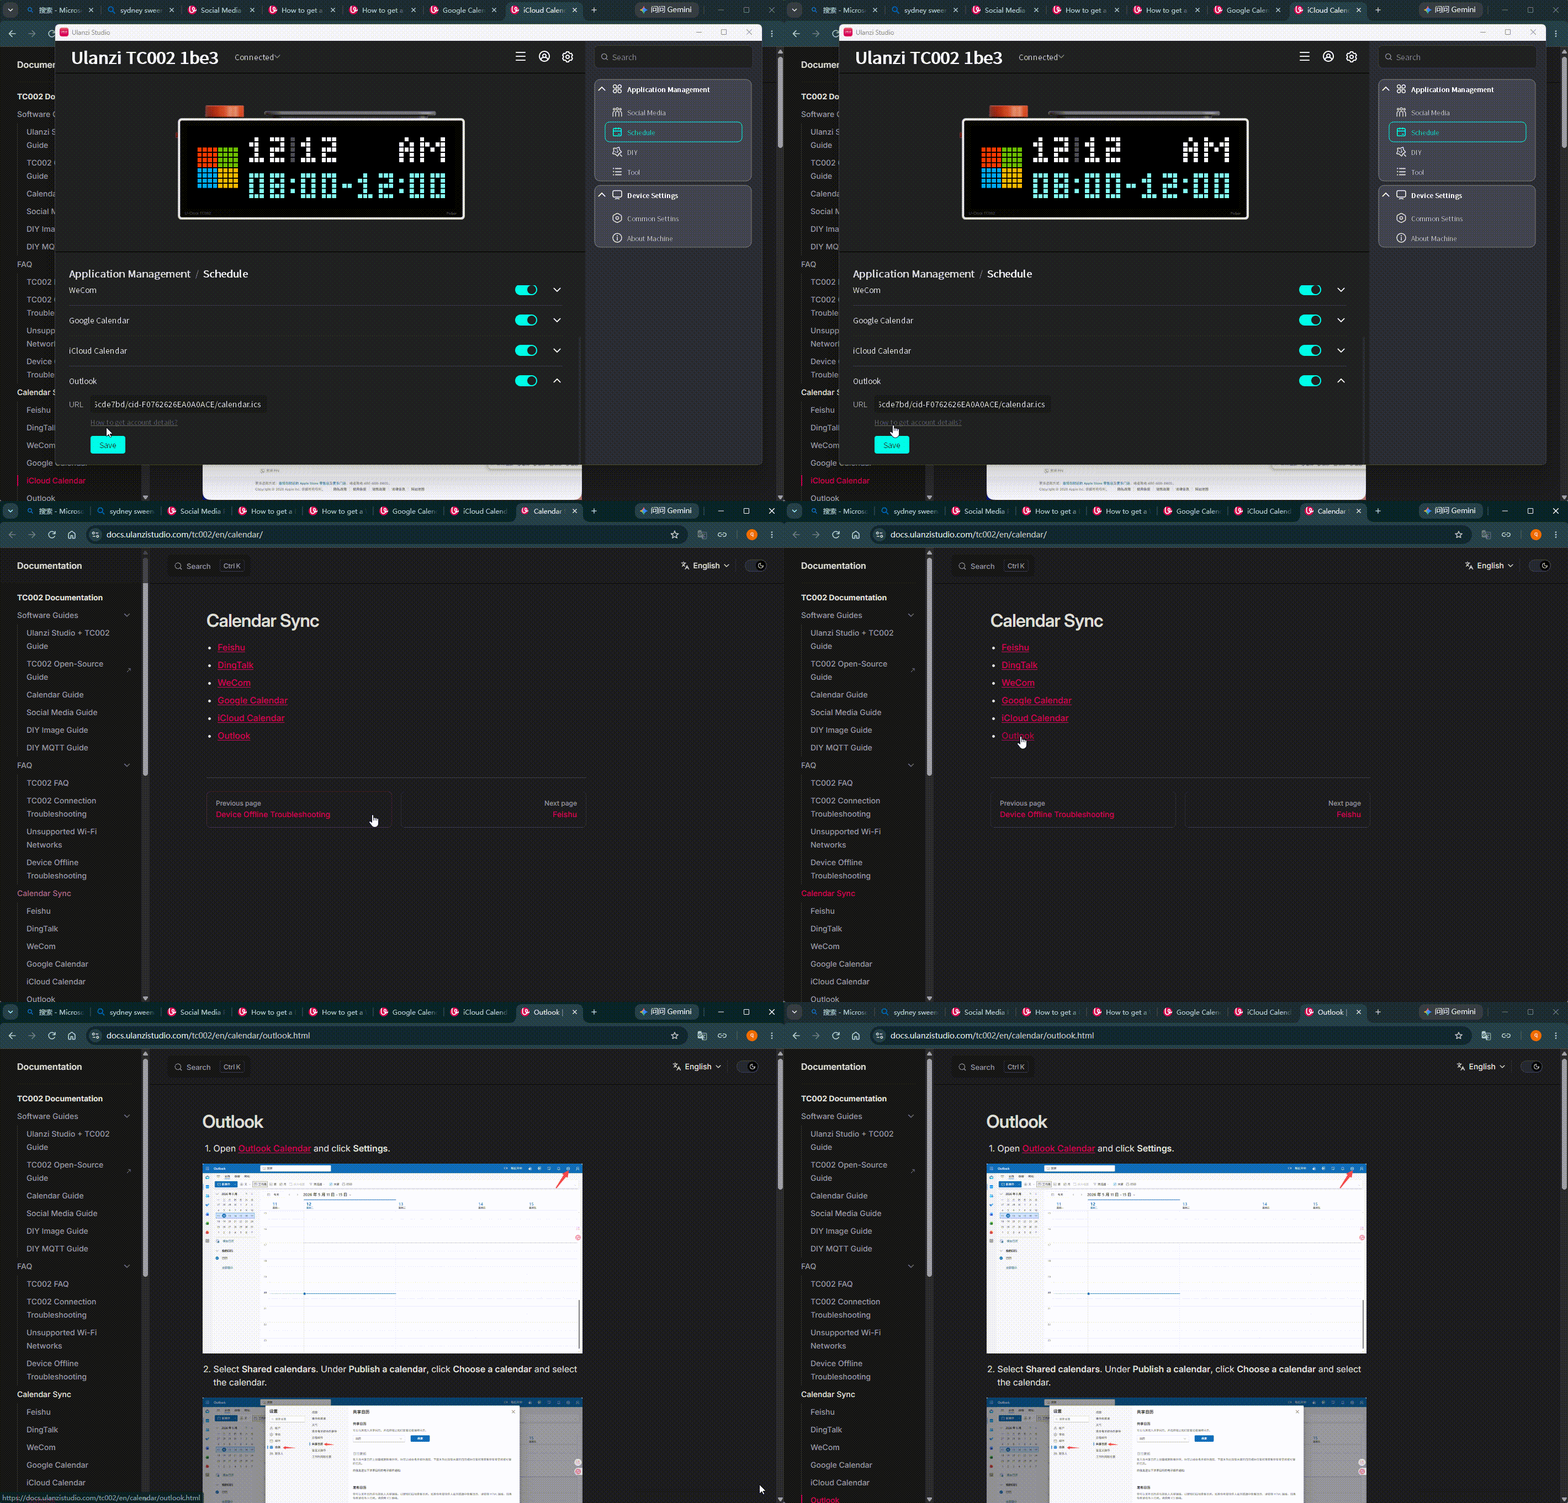
- Follow the guide and paste the public URL.
- Click Save and check the validation result.
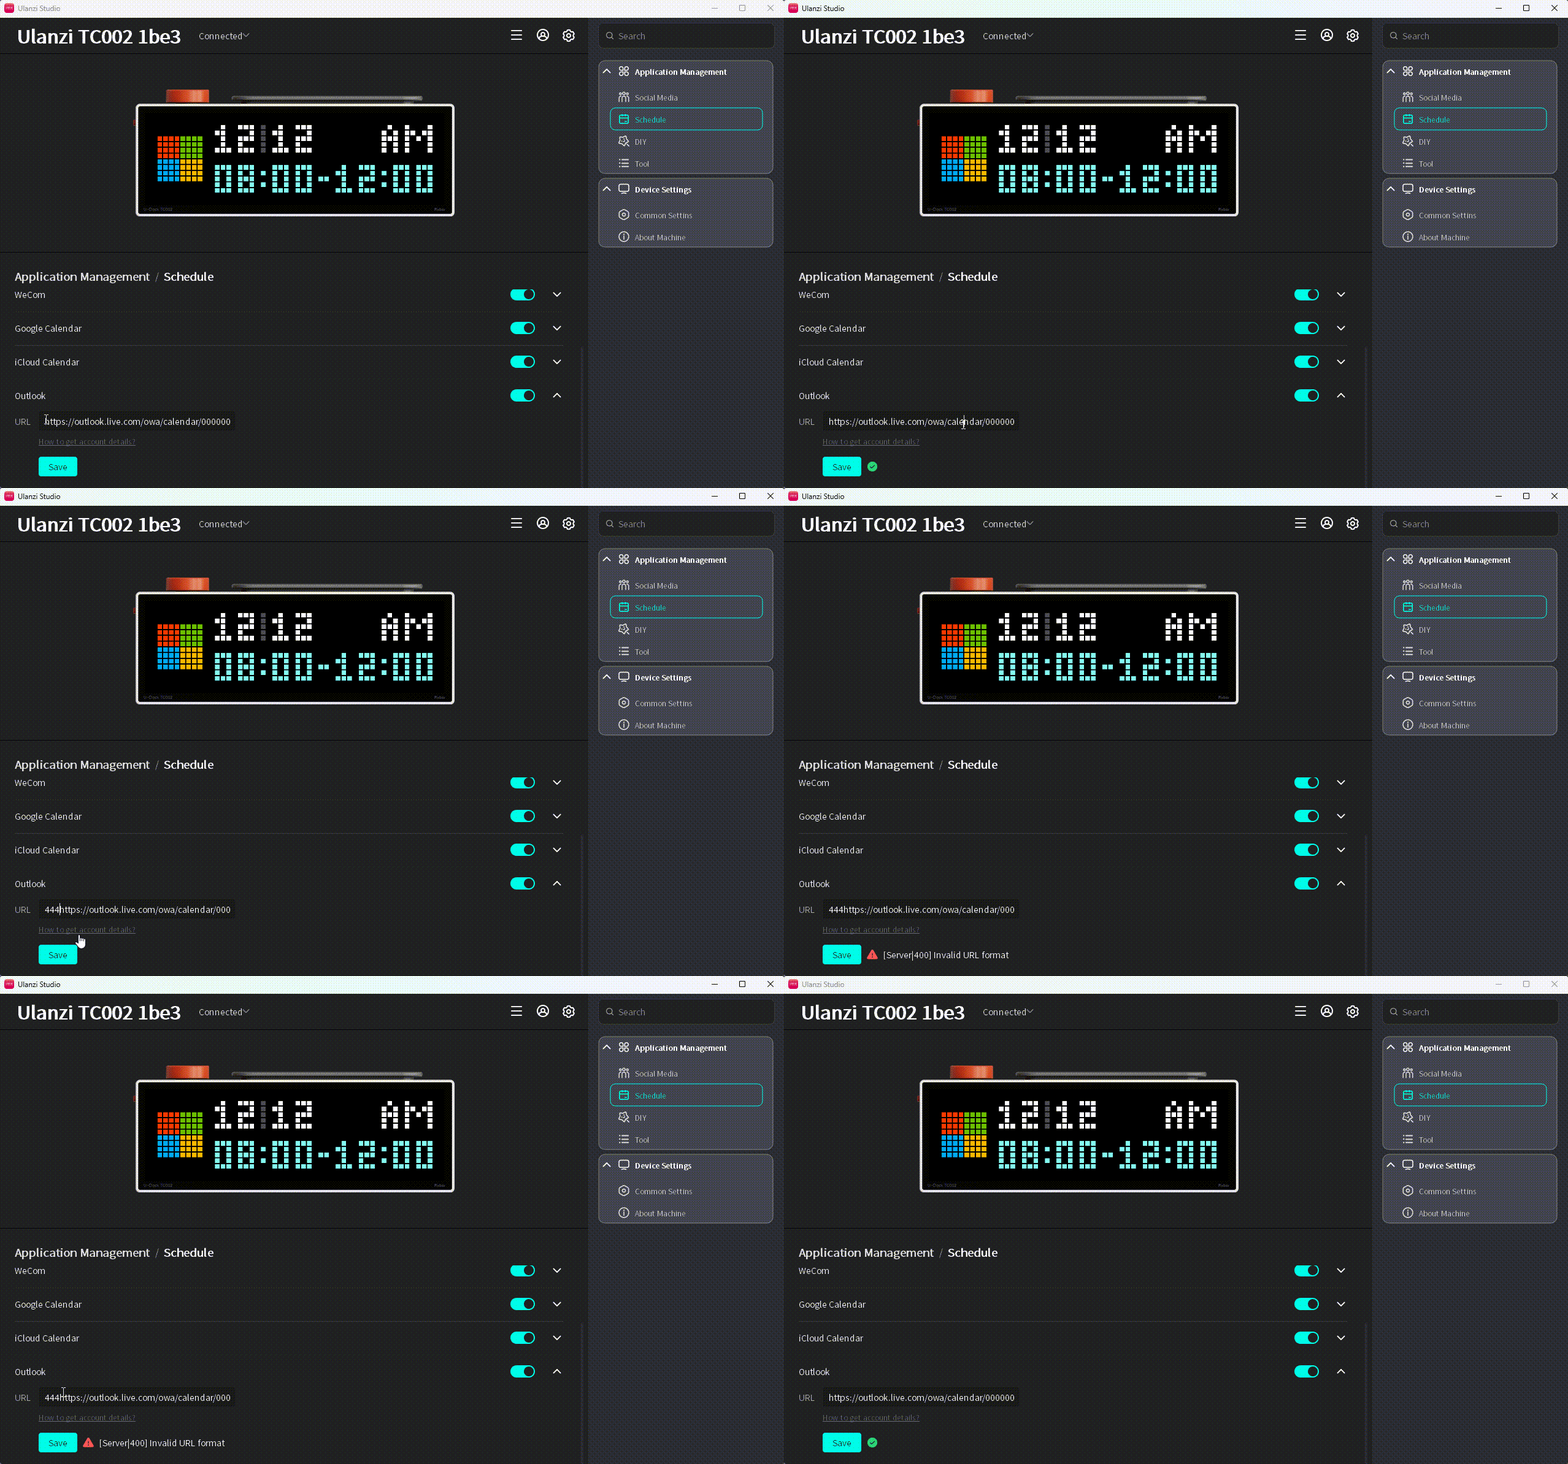
- Switch TC002 to Calendar > Outlook.
