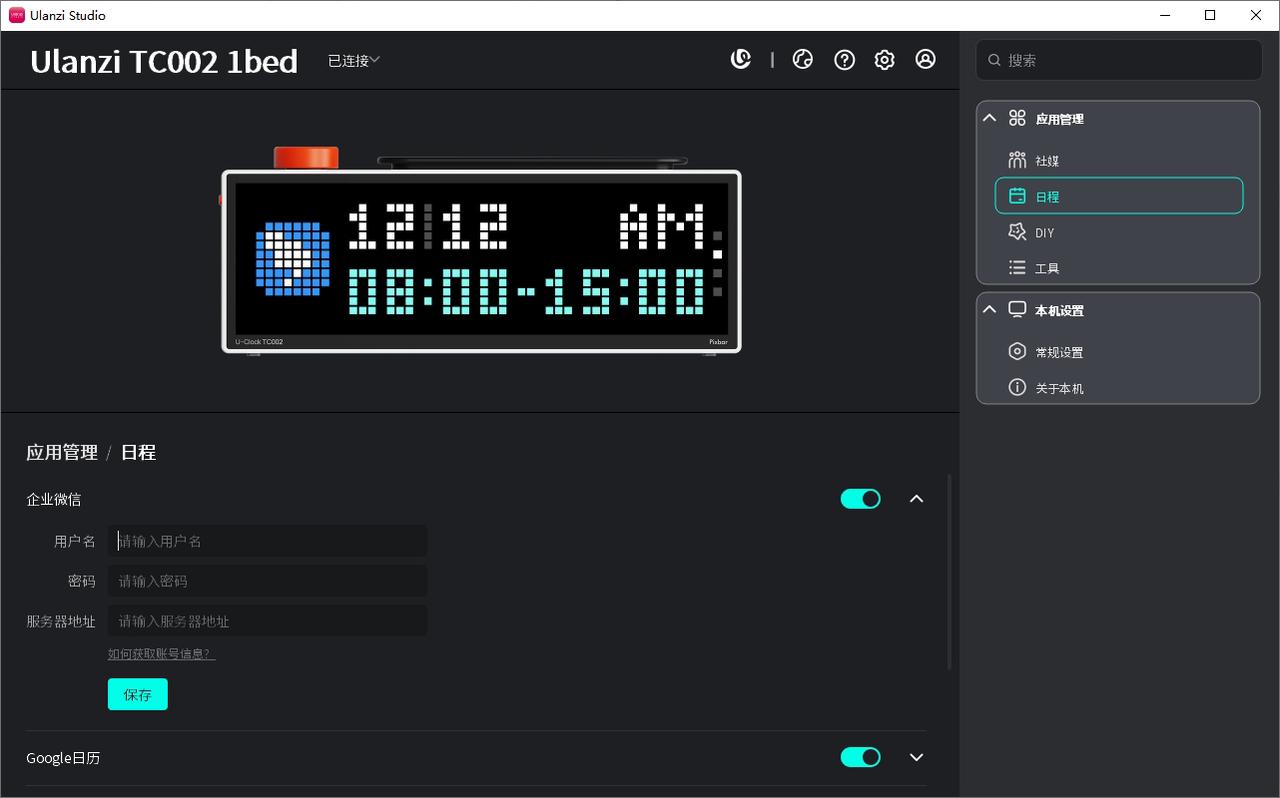
WeCom: Get CalDAV Sync Account
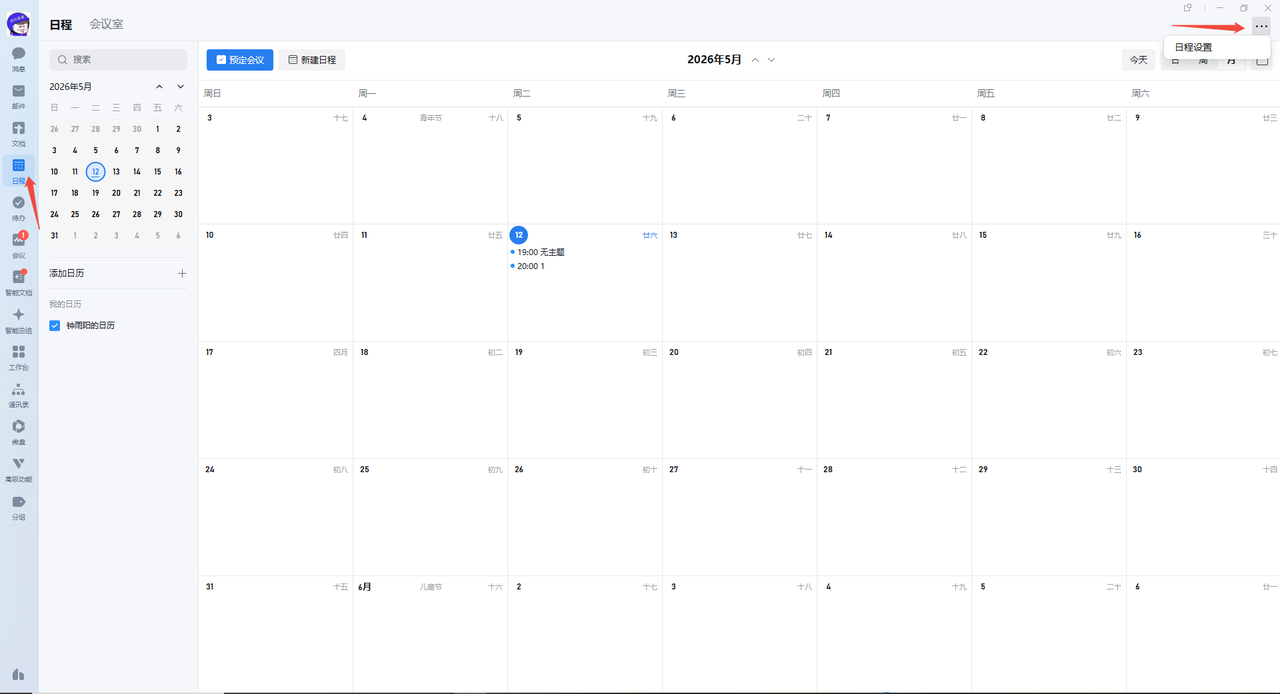
- In the WeCom desktop app, click “Schedule” in the left navigation, then click “...” in the top-right and choose Schedule settings.
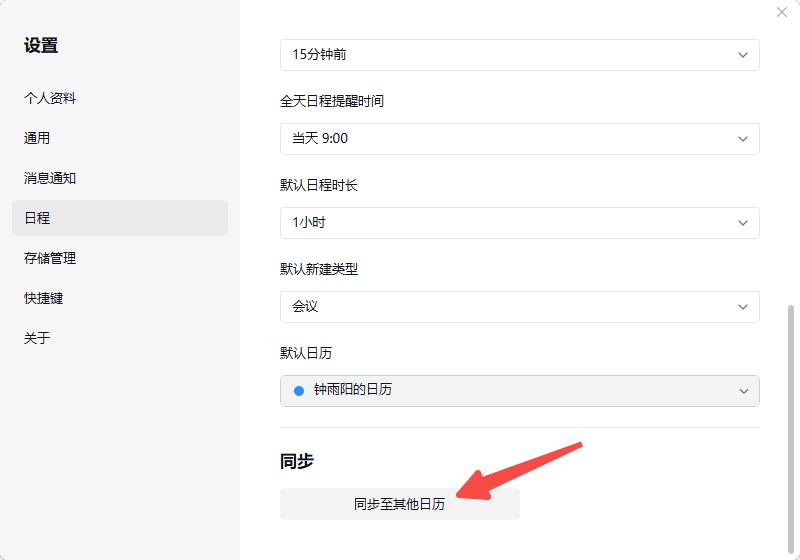
- In Schedule, find Sync and click Sync to other calendars.
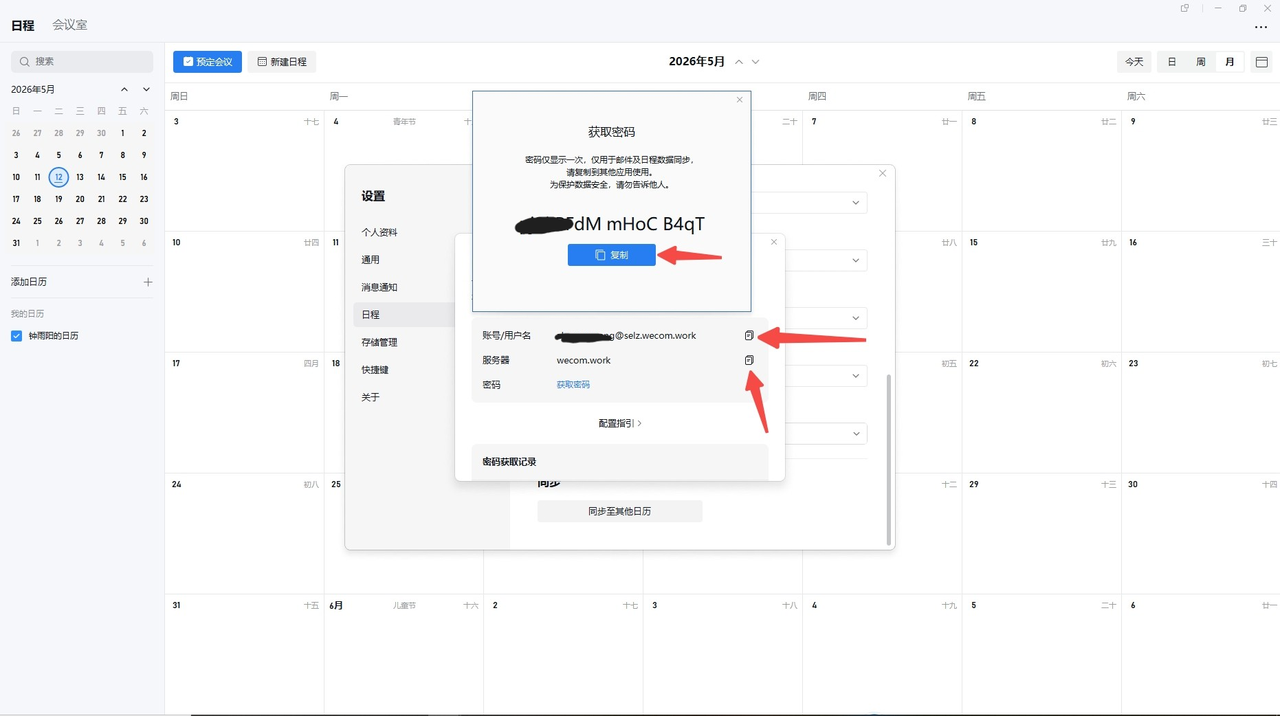
- Click Get password.
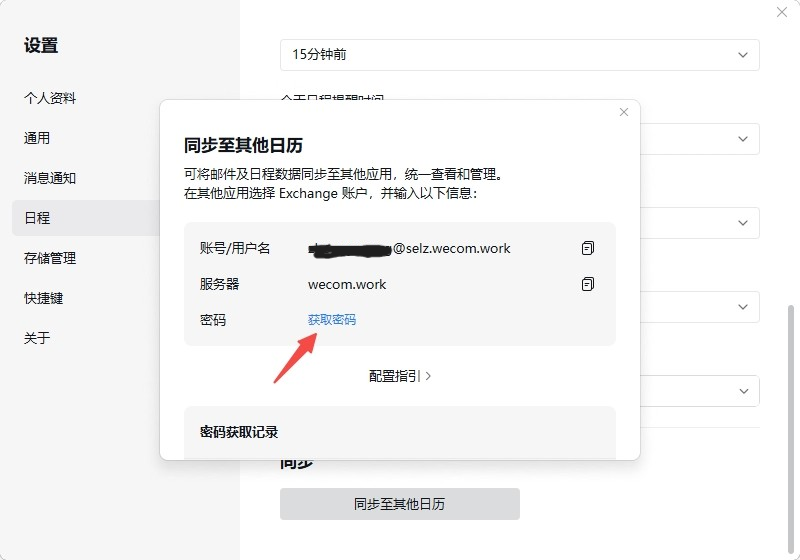
- Copy the account, password, and server in order.
- Paste them into the account/password/server input boxes of the WeCom Schedule feature (note: the server address wecom.work should be changed to caldav.wecom.work), then click Save.